One thing on every person’s bucket list is a chance to see the Aurora Borealis. It’s not easy, and it’s even less of a sure thing.
I figured with our 10 days in Iceland during its winter, we’d find them no problem. We would have one of those picturesque hallmark moments where we pull over to the side of the road and ponder the meaning of life while admiring nature’s beauty. After staying up late and attempting to find them every night, we didn’t have quite the picture perfect moment I had in mind. We did, however, see the lights. Twice near the end of our trip.
What are the Aurora Borealis / Northern Lights?
Auroras happen when charged particles from the sun interact with the magnetic shield in our atmosphere. They concentrate at both the northern and southern points of earth where the magnetic field is strongest, which is why there are both northern and southern lights. Iceland is strategically located along the aurora belt where the solar winds blow, and hence occurrences are fairly common.
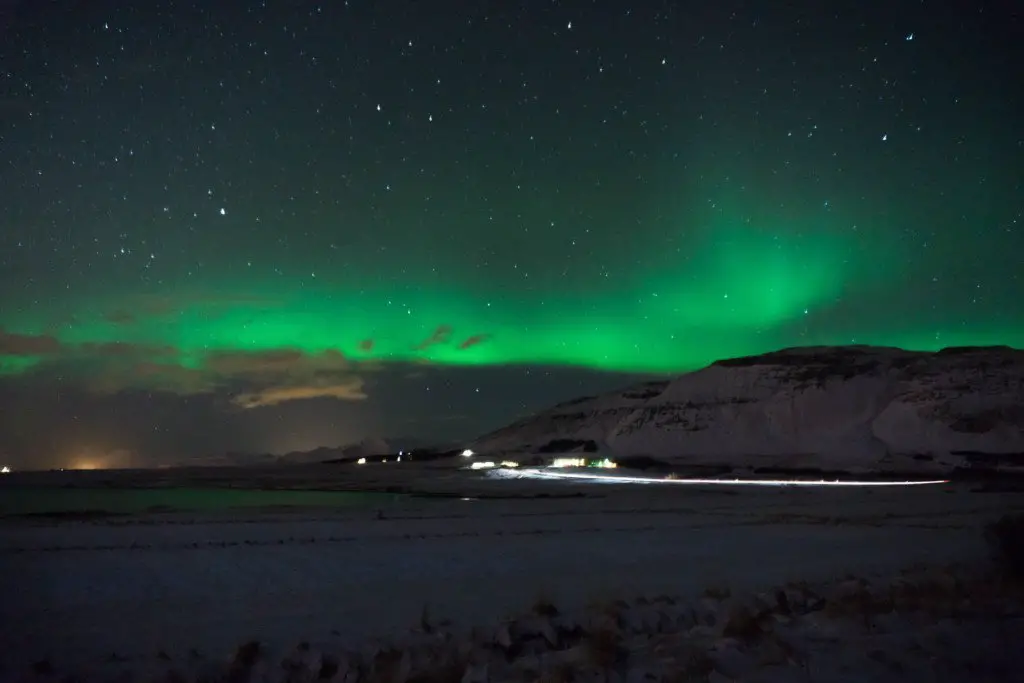
While most pictures of the Aurora depict shades of green, there are in fact multiple colors that can be seen depending on conditions. The color of the aurora depends on which gas is being excited by the electrons and on how much energy is being exchanged. Oxygen emits either a greenish-yellow light (the most familiar color of the aurora) or a red light; nitrogen generally gives off a blue light. The lights are located 90-150km above ground level and different colors are associated with different heights. Don’t worry, planes will not crash into the lights any time soon.
Conditions have to be perfect
To see the Northern Lights, a lot of things have to fall in place. Conditions have to be perfect and all of the following must happen simultaneously:
- The solar winds must be blowing near you (High KP Index)
- Little to no clouds (if you can see the stars, you can see the lights)
- Dark skies
The latter shouldn’t be a problem as winter in Iceland is characterized by long nights and sparse population. The lights can be seen at all hour of the night but typically peak between 8pm and 2am. Our worst nights were when the KP index was high, but the sky was completely covered in clouds. I just knew the lights were above the clouds taunting us.
Planning is everything
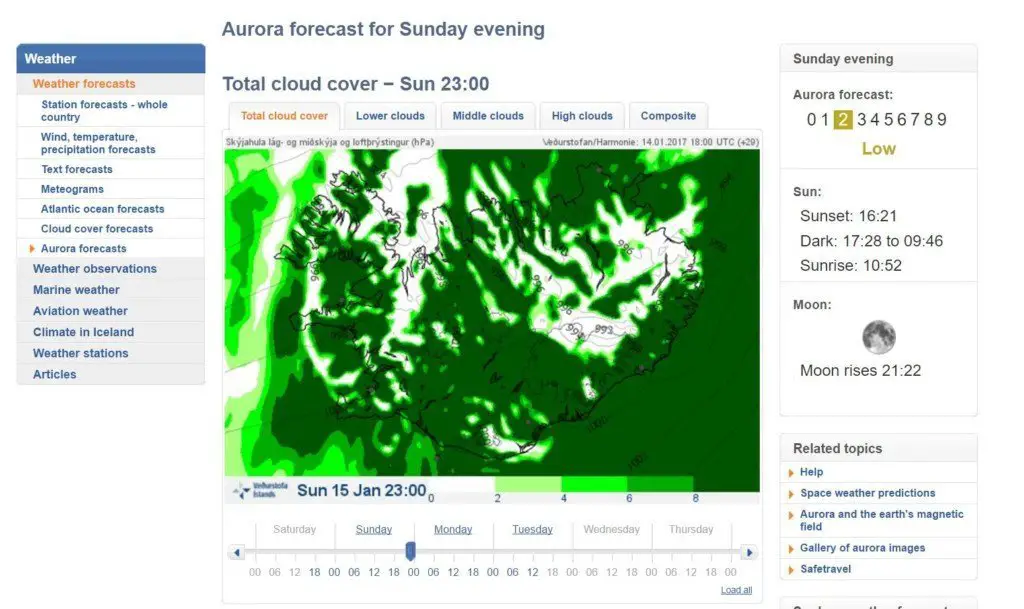
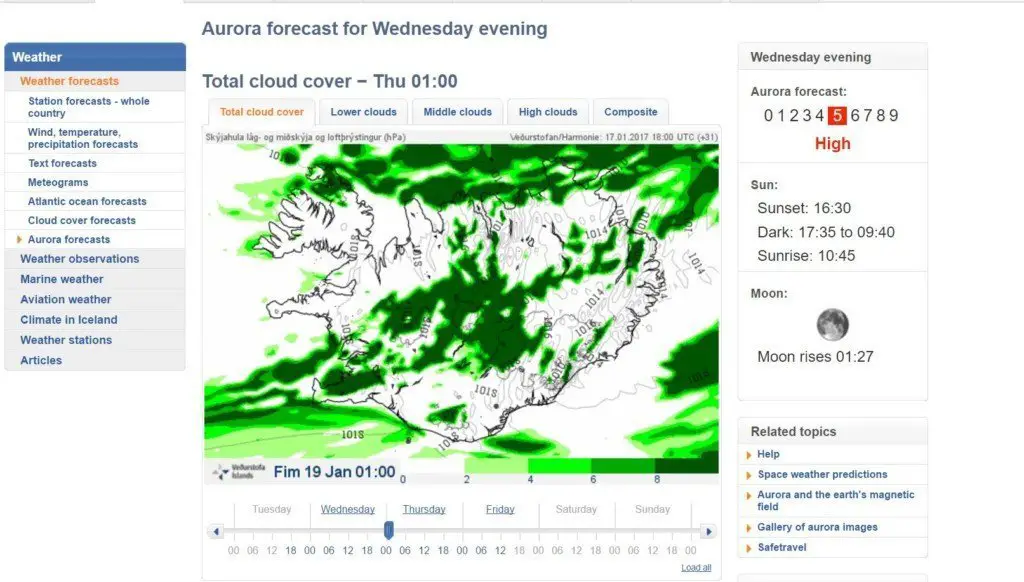
Thankfully, there are some very helpful tools for Aurora enthusiasts. While in Iceland, my most visited site was Iceland’s official Aurora Forecaster. Created by Iceland’s Meteorological office, this site gives hour by hour cloud coverage information for all of Iceland. It’s absolutely essential for anyone looking for the aurora. It even breaks down cloud coverage by low, medium, and high clouds, of which the latter two are your worst enemies.
The website also gives an “Aurora forecast” on a scale of 0-9 depending on the strength of the solar winds. After talking to tour guides, it’s possible to see the lights with even a 1 rating, and anything 4 and over is almost guaranteed assuming conditions are right.
The Aurora App
To enhance the Aurora hunting experience, there are numerous apps out there that track the solar wind movement. My favorite is the Aurora app. It tells me what the KP index is at the moment and at various points in the future. It also gives a world map and where the solar winds are at the moment. It even has a % probability of seeing the lights at your current location, although I’m not sure how accurate that is.

Using the Aurora app, in conjunction with the official cloud coverage map was our go to combination for finding the lights.
Luck is Key
I’ll keep this short and sweet. You need luck. To have all these things happen at once is not easy, and certainly never guaranteed. You could see the lights on your first night, or you may never see them over two weeks. At the end of the day, this is nature!
Darkness is Essential to see the Northern Lights
Darkness is key. This means get out of the city, and drive a half hour to the outskirts! It isn’t difficult in Iceland since 2/3 of the population live in Reykjavik and the rest of the country is sparsely populated. Light pollution diminishes the viewing experience. The lights come at in different strengths so a weaker showing might be repressed with too much light pollution. And plus, who doesn’t want the experience of being in total darkness, looking up at the impossible colors of the lights against milky way?
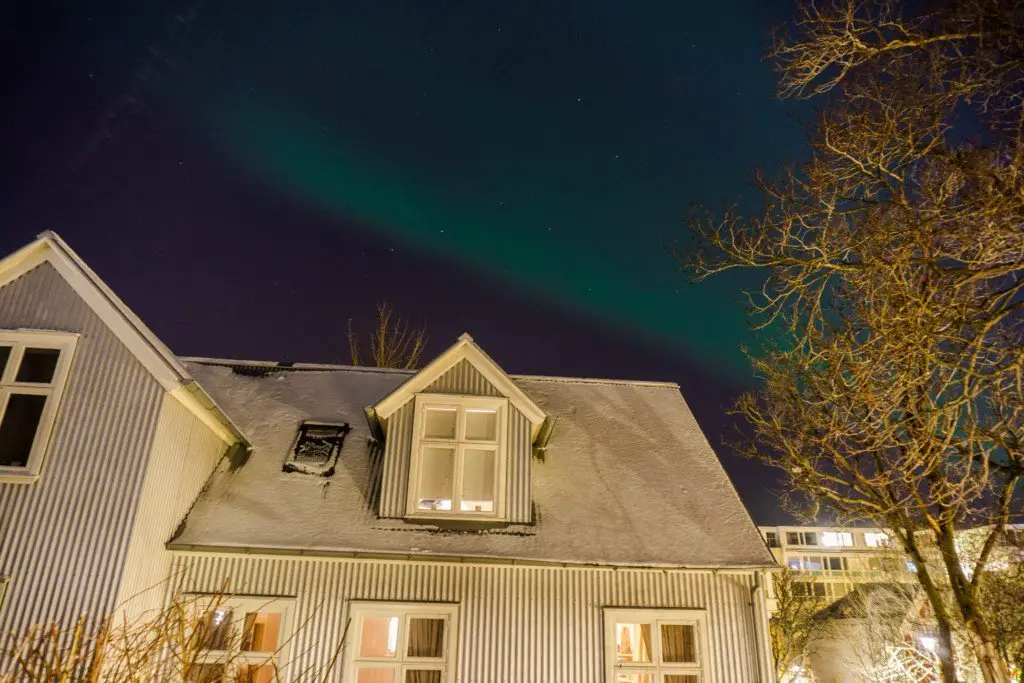
Nevertheless, it is still very much possible to see the lights without complete darkness. We saw the lights on New Years Eve in Reykjavik next to houses and a bonfire! Granted those lights were very bright, we could see them clearly.
Drive and actively hunt the lights
We would spend all day glued to our phones on Vedur’s website looking at cloud cover for the night. Our moods and happiness were somehow directly correlated to how much white we saw on the map between the hours of 1800 to 0200. Every night, we would decide if it was worth it to drive around after looking at the forecast tools. If we thought we had even an ounce of hope, we would choose which direction to go, and drive. Once we found a dark area, we would turn the lights off and wait. We repeated this a few times over, but we never ended up finding the lights.
Worse comes to worse, book a tour
So I have to admit, we did not see the lights while driving on our own. We spent almost every night looking and praying, but at the end of the day, the conditions never worked in our favor. The day before we were to arrive in Reykjavik and return the rental car, I saw that conditions looked optimal for our stay in Reykjavik and we ended up booking a tour with trex.is.
There are countless companies that do Northern lights tours from Reykjavik. There are tours scheduled every night in the winter. Depending on the conditions, they will cancel the tours as well. If tours are canceled, you will be able to reschedule to another night free of charge and some companies offer full refunds altogether.
Tour Operators
Tours range in price between 6,000 ISK and 10,000 ISK. The cheaper tours will cram everyone into a charter bus while the more expensive tours will take you in an off-road truck. We chose the cheaper option and I don’t regret it because most of them end up in the same place anyhow.
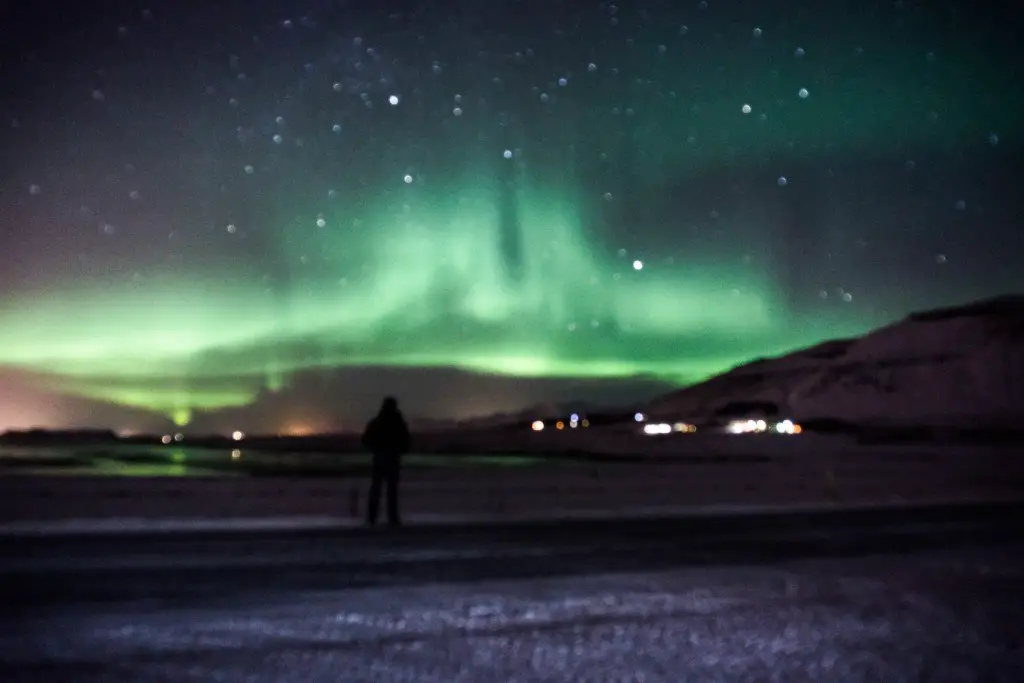
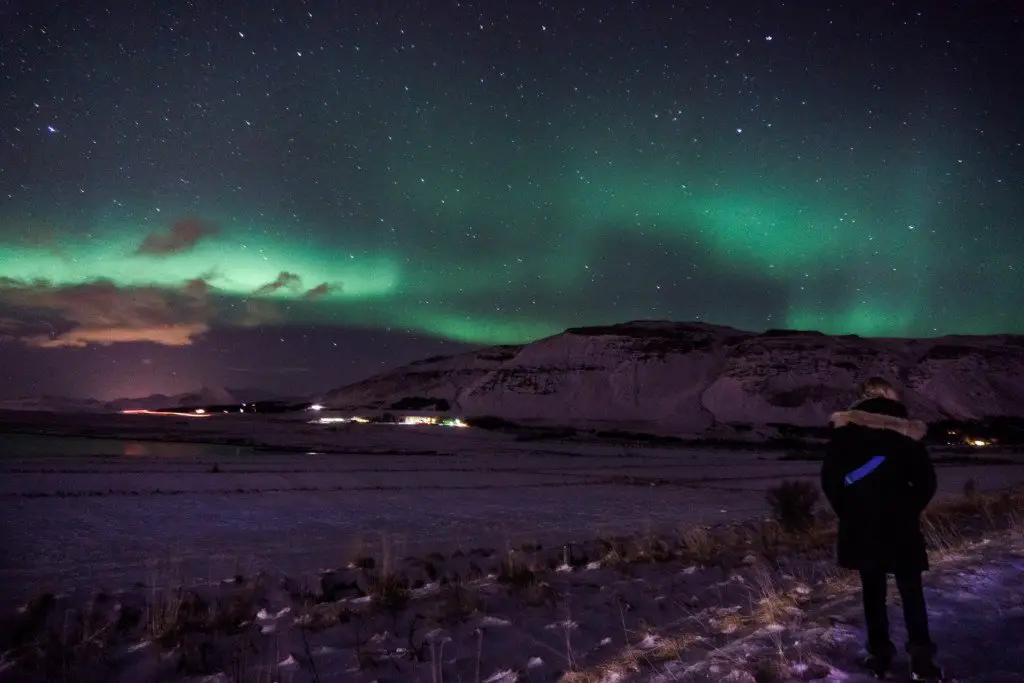
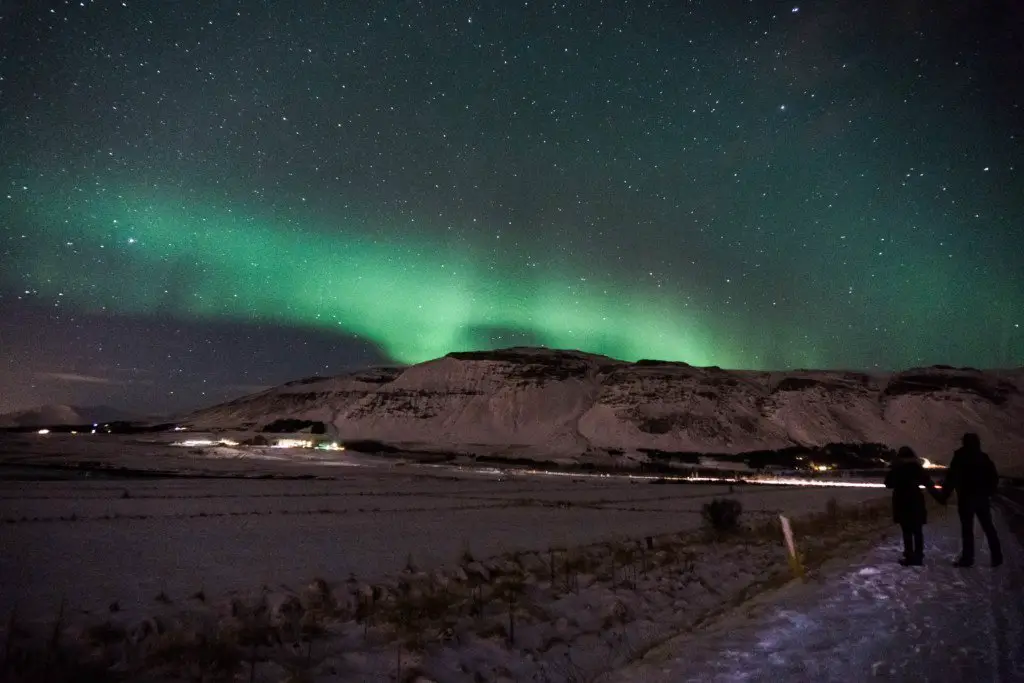
Like going on Safari in Africa, the different companies work together to find the most ideal spot outside of Reykjavik for viewing the lights. This leads to huge crowds of people from different tours congregating in the same place. I think we must have had at least 200 people at the same place, all trying to take photos of the Aurora. While we were in the middle of nowhere, there were so many tour buses pulling in and out that it was distracting.
It wasn’t the peace and quiet I thought it’d be. Ideally, I wish I still had my rental car as I would have just followed the tour groups, and parked away from the crowds. Regardless, we still saw the lights, I captured my photos, and our tour guide was very funny and informative about Icelandic culture.
Taking amazing photos of the Aurora
When the stars align, and the lights can finally be seen, they can last for 5 minutes or be around for an hour. Be sure to capture the moment! You’ll need the following:
- A good DSLR camera
- A tripod, preferably heavy grade and sturdy
What you need to do is make sure your camera is set to take with a long exposure (or slow shutter speed). This allows the camera to absorb light over a longer period of time, hence the “long exposure”. I’d recommend starting with 15 seconds which the camera will spend 15 seconds to absorb the light it sees in taking the photo.
A strong tripod is key
I bought a tripod specifically for this trip. I paid $7 on Amazon.com for the AmazonBasics brand 50″ tripod. The reviews were great, and the price was perfect for an amateur photographer like me. Looking back, I wish I had paid up for a higher end tripod. The Amazon branded tripod works in most occasions, but I had troubles with blurry photos while photographing the Northern Lights due to how light and flimsy the tripod was. Iceland is known for its strong winds, and even though they were quite mild that night, even the slightest of vibrations cause by the wind can ruin a photo.
Camera Settings
Because the sky is so dark, the camera will absorb so much of the light coming from the Aurora, it will amplify what the lights really look like and your pictures will often look “better” than in reality. A tripod is absolutely essential as the camera needs to be stabilized for so long. If you tried to take a 15 second exposure night time photo by hand, you’ll notice that the picture will completely blurred out due to your hands shaking. For the most part, these were the settings I shot in:
- F2.8
- 15 second exposure
- ISO 1000
- Manual Focus (very important)
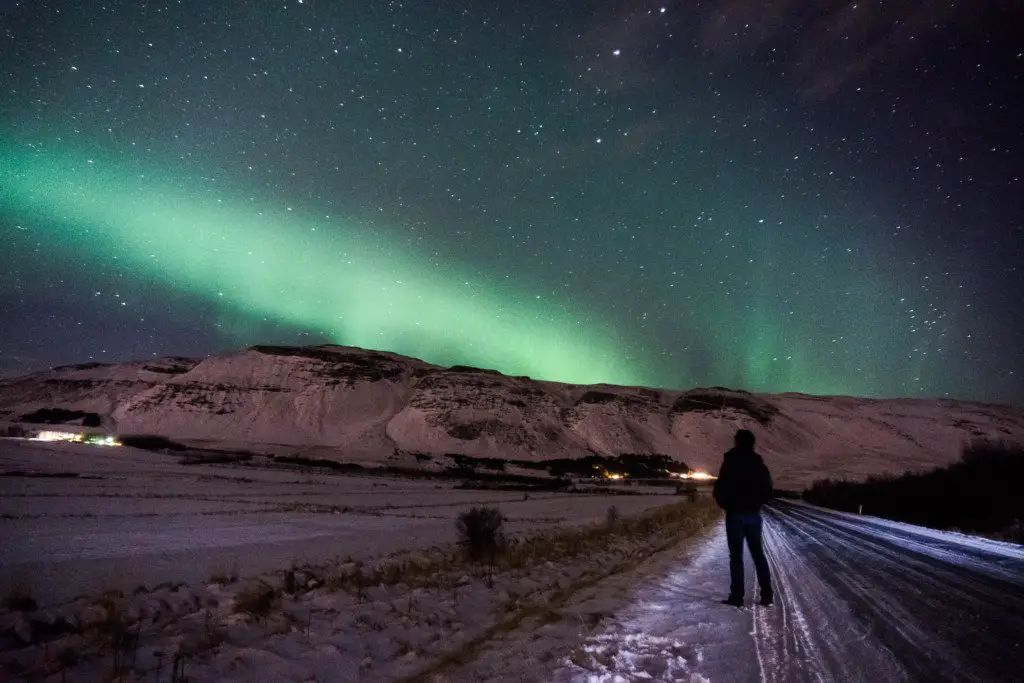
When your settings are ready, angle the camera towards the sky, and use a 2-3 second countdown timer so to eliminate any possible shaking movement. Once you get your first decent photo, play around with the settings (longer or shorter exposure) and camera angles to get the desired effect. I like to take pictures of the sky with a horizon as well. We were next to some beautiful mountains when we saw them allowing me to get that in the background as well.
It’s also possible to take photos of the Aurora and be in the picture too. Set the timer to 10 seconds, run into place, and do not move a muscle for as long as your exposure time lasts.
Turn OFF your Flash
Will keep this short. Camera flash is useless. Do not turn it on, it will do nothing but take a black photo. Countless people on my Northern lights tour kept doing this which was very annoying as it actually interferes with people attempting to take actual photos!
Do not plan a trip solely because of the lights
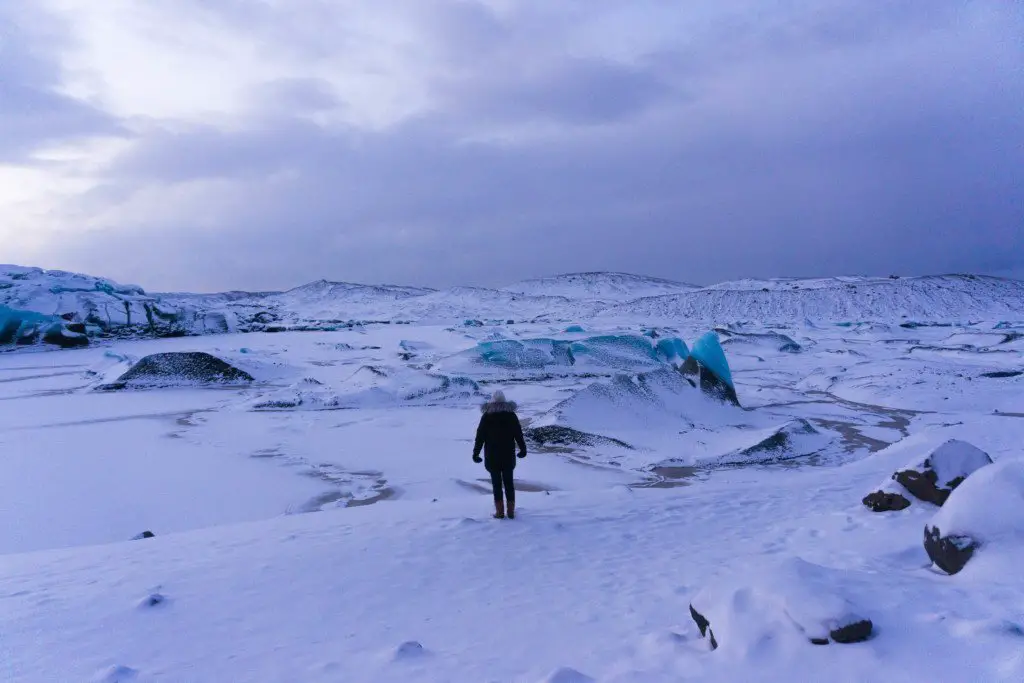
Unless you plan on being in Iceland for a month, do not plan a trip solely because of the Northern lights. It’s an easy way to set yourself up for disappointment. Instead, explore Iceland’s countless other incredible attractions. It’s a special place in the winter time when the landscape is painted white.
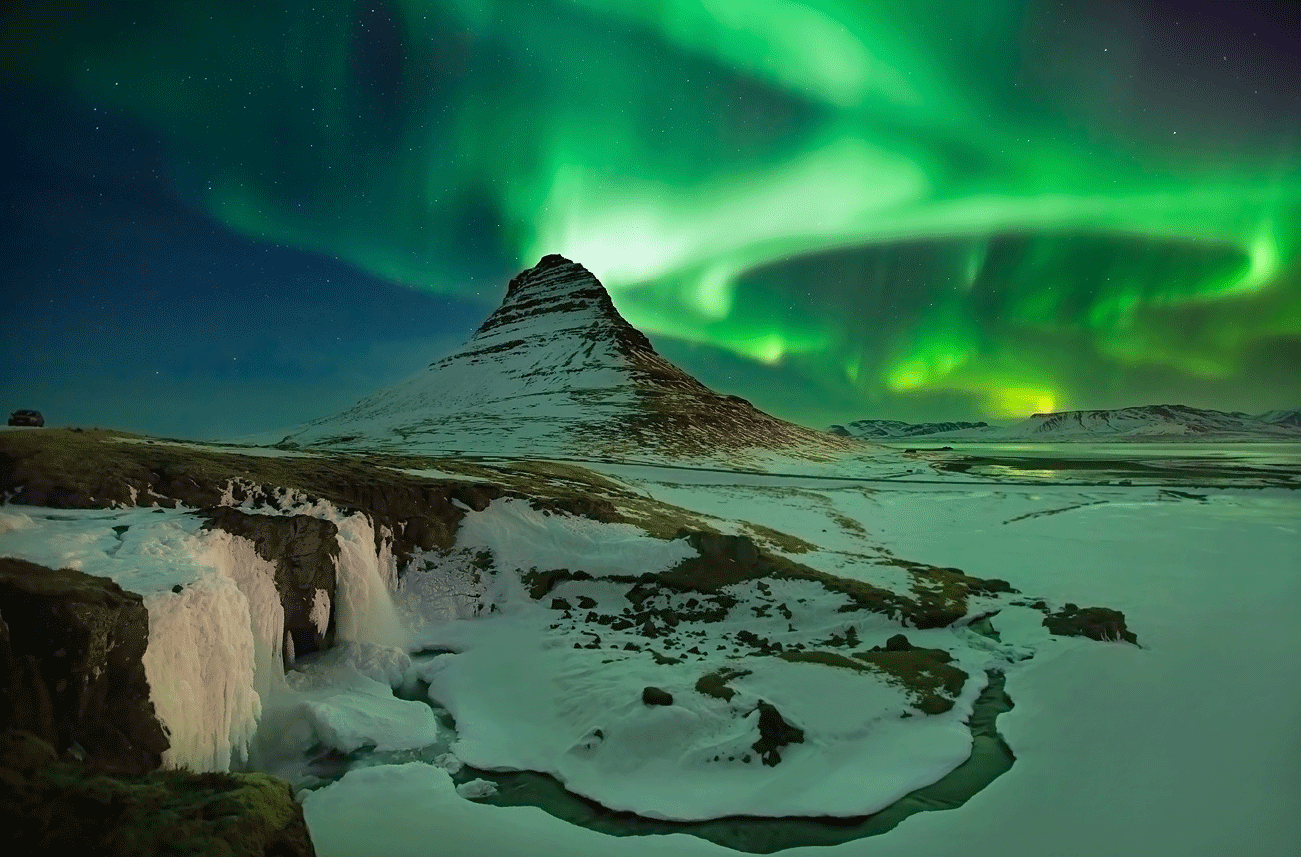
Also, the Aurora looks better in pictures. There’s no way the lights are actually as bright as the photos make them out to be. Not only does the camera absorb so much light because of the long exposure, but most “amazing” photos have plenty of Photoshopping done after the fact. This is not to downplay how special the lights are in person, but do not expect to see something like this:
Enjoy all of what Iceland has to offer, and let the lights be a very special bonus treat if you do get to see them!