

The American Southwest is in my opinion the most unique and stunning part of America. Sure New York, Los Angeles, and Miami get all the recognition from tourists but I always tell my foreign friends that the southwest is my favorite part of the country. In particular, I’m talking about the national parks of Nevada, Utah, Arizona, New Mexico, and California.
I’ve spent some time traveling the area and this is how I would spend an amazing two weeks visiting some of the most beautiful national parks in the world. So if you’re ready to cruise down open roads with breathtaking scenery taking in the ultimate American road trip, this is the itinerary for you!
Update 2021 for US National Parks
If you’re traveling in 2021, then you will be braving the parks with the swarms of other American tourists. Be prepared for heightened numbers of visitors to the parks and be prepared for much higher costs. Rental cars are crazy expensive at the moment and the imbalance in demand probably won’t subside until the end of the year. The parks will also be much more packed so you’ll want to consider visiting at the opening hours before everyone else gets there.
Most Americans are not venturing out of the country in 2021 even though Europe and other amazing places are now open like Greece or the Amalfi Coast. Last minute trips are hard to book but I think visiting places in Europe this year will be optimal as the tourism numbers remain very low.
Two Week American Southwest Itinerary
This itinerary can be done as quickly and slowly as you want. All in all, I recommend around 2 weeks so you have enough time to hike and really take in all the sights but this itinerary can probably be done in less if time doesn’t permit.
This itinerary is a combination of two separate trips I took in the past. One was a 5-6 day trip to Zion, Bryce, Grand Canyon, Antelope Canyon. The other was to Joshua Tree and Death Valley. So not to make this post 10,000 words+, I have abridged a lot of the itinerary. Make sure to read my other two posts to get the full details of what to expect in these beautiful parks (with many more pictures)!
Where this itinerary visits
Let’s start by saying there is no perfect itinerary for this region. All the parks are unique and beautiful in their own way so you just need to spend as little or as much time as you want in a certain park. This is just how I did my trip and I absolutely loved it. No matter how you choose to implement my itinerary, you will without a doubt have a special time.
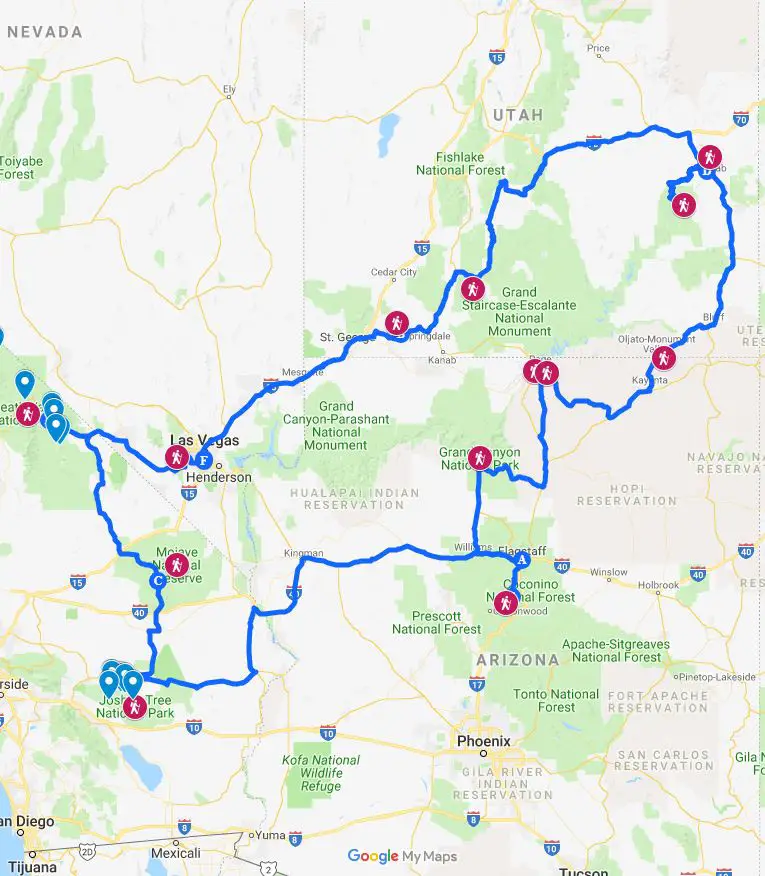
For this itinerary, I started in Las Vegas, and ended in Las Vegas. I drove east to Zion National Park, Bryce National Park, Arches National Park, Canyonlands National Park, Monument Valley, Horseshoe Bend, Antelope Canyon, Grand Canyon, Sedona, Joshua Tree, Death Valley, and Red Rock Canyon. The itinerary can be done in reverse too because it is essentially a big loop.
There is a lot of driving in this itinerary to the tune of 2500+ miles/ 4000+ km. Thankfully car rentals are cheap from Las Vegas and gas prices are also quite cheap by world standards. For this itinerary, I would plan to fill up the car 7-10 times.
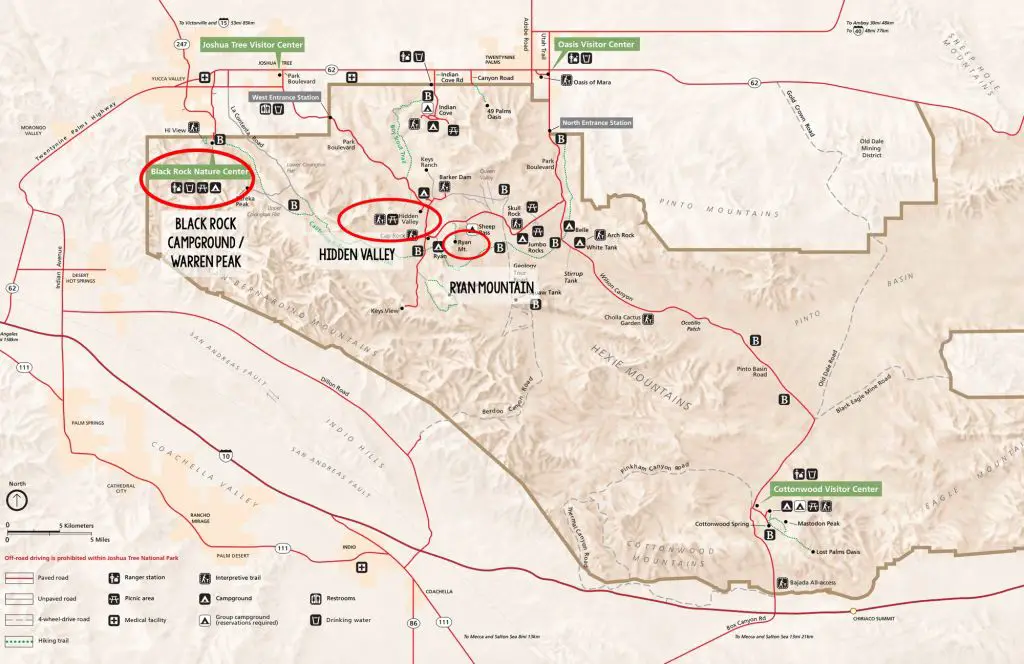
Itinerary Map
Here is a detailed map of everywhere I visited on this itinerary.
Full Itinerary
[mk_table title=”” style=”style1″]
| Start | End | Park visited | |
|---|---|---|---|
| Day 1 | Las Vegas | Zion National Park | Zion National Park |
| Day 2 | Zion National Park | Zion National Park | Zion National Park |
| Day 3 | Zion National Park | Bryce National Park | Bryce National Park |
| Day 4 | Bryce National Park | Bryce National Park | Bryce National Park |
| Day 5 | Bryce National Park | Moab, UT | Canyonlands – Island in the sky |
| Day 6 | Moab, UT | Moab, UT | Arches National Park |
| Day 7 | Moab, UT | Page, AZ | Monument Valley, Horseshoe Bend |
| Day 8 | Page, AZ | Grand Canyon, AZ | Antelope Canyon, Grand Canyon |
| Day 9 | Grand Canyon, AZ | Grand Canyon, AZ | Grand Canyon |
| Day 10 | Grand Canyon, AZ | Sedona, AZ | Grand Canyon, Sedona |
| Day 11 | Sedona, AZ | Sedona, AZ | Sedona |
| Day 12 | Sedona, AZ | Joshua Tree, CA | Joshua Tree National Park |
| Day 13 | Joshua Tree, CA | Joshua Tree, CA | Joshua Tree National Park |
| Day 14 | Joshua Tree, CA | Death Valley, CA | Mojave National Preserve, Death Valley National Park |
| Day 15 | Death Valley, CA | Death Valley, CA | Death Valley National Park |
| Day 16 | Death Valley, CA | Las Vegas, NV | Death Valley National Park, Red Rock Canyon National Park |
[/mk_table]
Day by Day Breakdown
Day 1:
- Start in Vegas
- Drive 3 hours to Zion National Park
Day 2:
- Hike Zion National Park
- Overnight in Zion
Day 3:
- Early morning in Zion
- Drive 2-3 hours to Bryce Canyon
- Enjoy sunset in Bryce
Day 4:
- Hike Bryce Canyon all day
- Overnight in Bryce
Day 5:
- Drive to Moab, UT
- Sunset at Canyonlands National Park
Day 6:
- Full day in Arches National Park
- Canyonlands if bored of Arches
Day 7:
- Drive to Monument Valley in the morning
- Horseshoe Bend for sunset
Day 8:
- Antelope Canyon tour in the morning
- Drive towards Grand Canyon
- Explore Grand Canyon for sunset
Day 9:
- Full day in Grand Canyon
Day 10-11:
- Drive to Sedona
- Hike Red Rock National Park
- Relax in Sedona
Day 12:
- Drive to Joshua Tree National Park
- Sunset in Joshua Tree National Park
Day 13:
- Start early in the morning
- Hike Hidden Valley
- Hike Jumbo Rocks/Skull Rock
- Hike Arch Rock, have lunch here
- Visit Cholla Cactus Gardens
- Drive to Cottonwood Springs
- Sunset at Keys View
Day 14:
- Drive to Mojave National Preserve
- Hike Kelso Dunes
- Visit Kelso Visitor Center, continue to Death Valley
- Sunset hike at the Mesquite Sand Dunes
- Dinner at Stovepipe Badwater Saloon
Day 15:
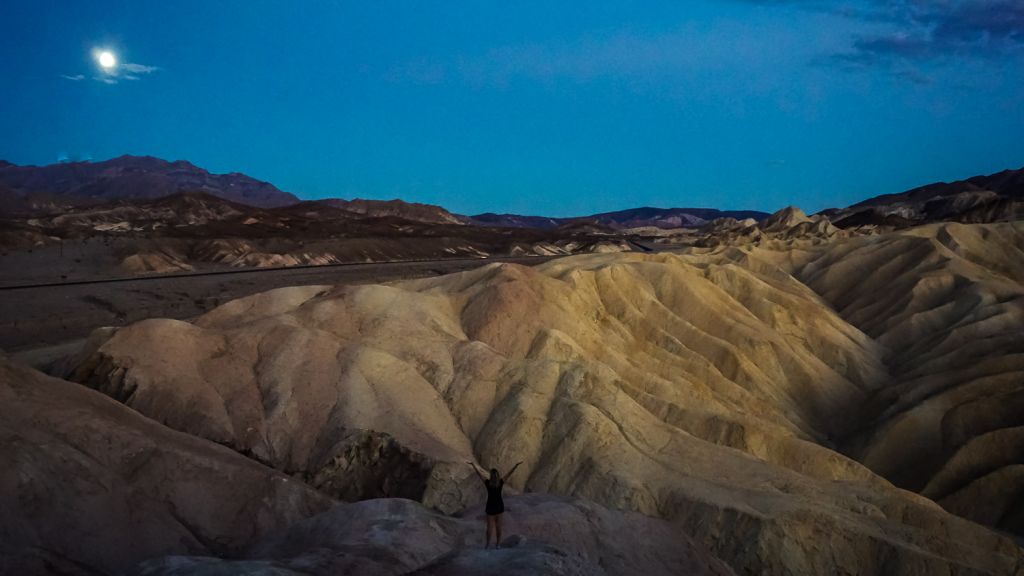
- Zabriskie Point for sunrise
- Hike Golden Canyon Trail at Zabriskie Point
- Natural Bridge walk
- Visit salt flats at Badwater Basin
- Artists Palette drive
- Zabriskie Point for sunset
- Dinner at the Oasis Inn
Day 16:
- Sunrise at the Badwater Basin Salt Flats
- Ubehebe Crater
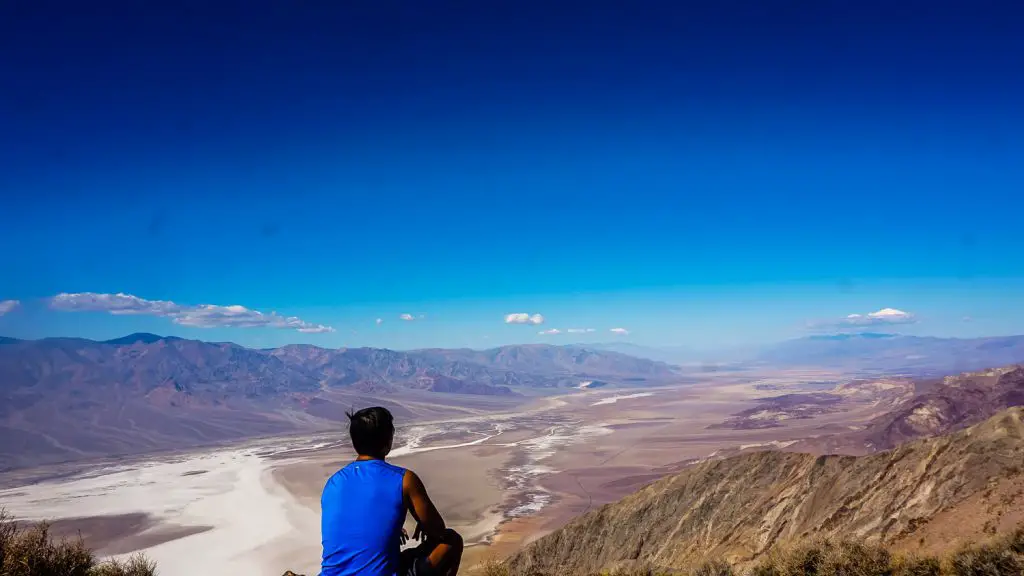
- Dante’s View
- Drive to Las Vegas and the Red Rock Canyon
- Flight home from Las Vegas
[mk_table title=”Parks Visited” style=”style1″]
| Park | Location | Admission Cost |
|---|---|---|
Springfield, Utah $15

Bryce, Utah $30
Moab, Utah $30
Moab, Utah $30
Monument Valley, UT & AZ $20
Page, Arizona Free
Page, Arizona $30
Arizona $30
Joshua Tree, CA $30
Mojave National Preserve, CA Free
Death Valley National Park, CA $30
Red Rock Canyon, NV $15
Planning the road trip
Before I move onto the itinerary, there are a few planning items to consider. For the most part, you don’t need any special gear or planning unless you are looking to do some serious multi-day hikes or plan to solely camp. There roads are all in great condition, there are ample hotels, guesthouses and Airbnb’s, and weather is generally pleasant throughout the year.
Best time to Visit the southwest
The southwest is a great place to visit year round. However, the summer months can get very hot, especially in places like Death Valley (where record temperatures are regularly set at 130F/58C and above). Summer also means bigger crowds as school is out for summer break. I think the best times to visit this area are the fall and spring time. It is still warm enough to hike in shorts, but the crowds have mostly dissipated. Nevertheless, there is no bad time to visit!
America the Beautiful Pass
Most entrance fees to the National Parks are somewhere in the $20-$30. As this itinerary visits 10+ parks, you can expect to pay almost $300 for entrance fees. Recently, the NPS (National Park Services) released a pass, aptly named America The Beautiful, for the avid traveler planning on doing an itinerary like the one written by yours truly. You pay $80 for a year of unlimited visits to all the national parks of America. For this itinerary, it is a no brainer to purchase one of these passes.
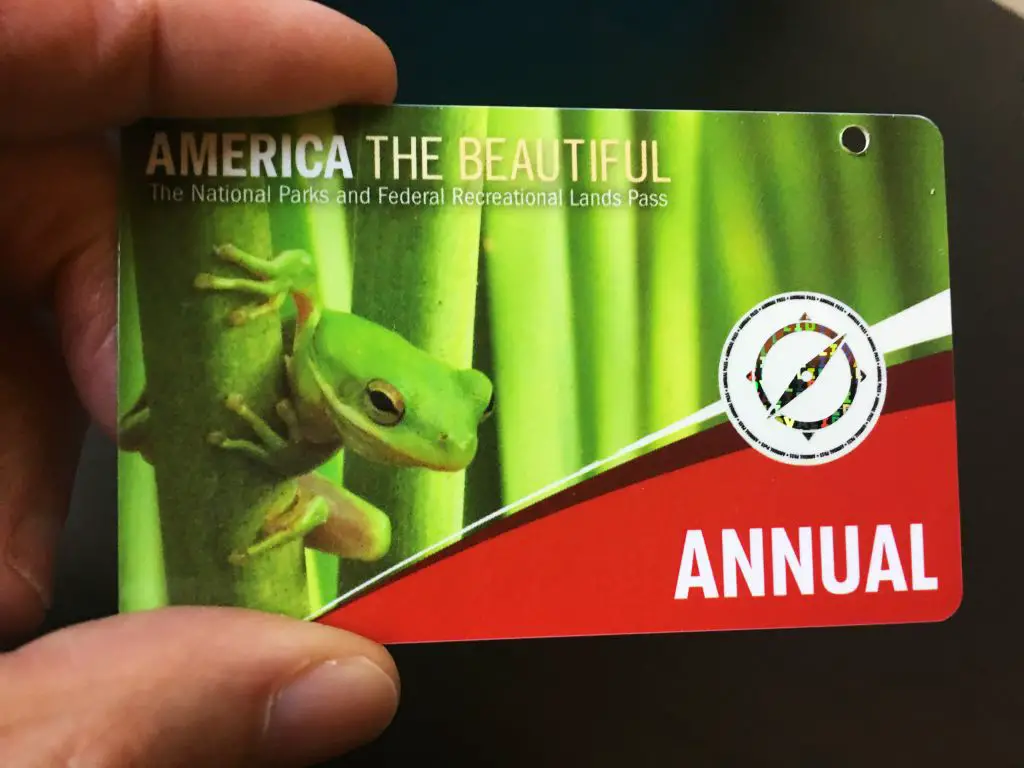
You can purchase this pass at most national park entrances. Wherever you decide to go for your first national park, just purchase one of these. For this itinerary, the famous Zion National Park is the first on the list so make sure to pay the $80 at the entrance, and you’ll never have to buy another entrance fee. They’ll give you a card that you simply hang on your car and that is it!
Renting a car
This is the ultimate road trip so renting a car is an obvious must. For the most part, the roads in the southwest and in the national parks are very good. Unless you plan to do off-roading like visiting Racetrack Playa in Death Valley, any car will suffice. However, I would recommend a small-mid size SUV just because you tend to accumulate a lot of stuff during these road trips and having the extra space is nice. If your budget allows, then go for a convertible or a Jeep Wrangler to really enhance the experience!

Las Vegas is one of the cheapest places to rent cars in the country. All the major car rental companies are here including Avis, Hertz, Enterprise, SixT, Budget, Thrifty etc. and assuming you are returning in the same place, $30/day should be easily doable.
Alternatively, a very popular method of road tripping the US is by RVs. RV rentals Utah is a great way to start looking for rentals of RVs.
Day 1-2: Zion National Park
Zion is one of the most famous national parks in the country. With over two million visitors a year, this was a great start for the trip.
Like all the parks in this area, Zion is very organized and developed as far as the tourist infrastructure goes. There is a shuttle that runs through Springdale to pick up people to drop off at the entrance of the park. We parked our car near the entrance since we arrived so early. Within the park, there is another free shuttle that regularly runs to/from the 8 stops in the park.
Since we only had a day here, we wanted to hit up the most famous and iconic areas: Angel’s Landing, and the Narrows. For the shuttle, this was the Grotto and the Temple of Sinawava stops.
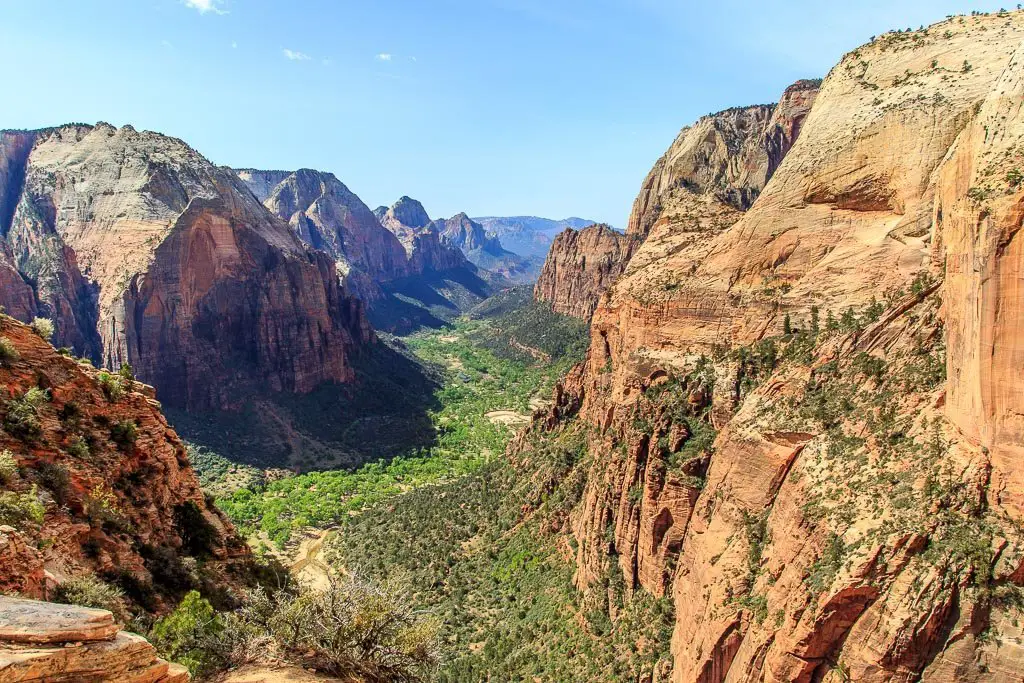
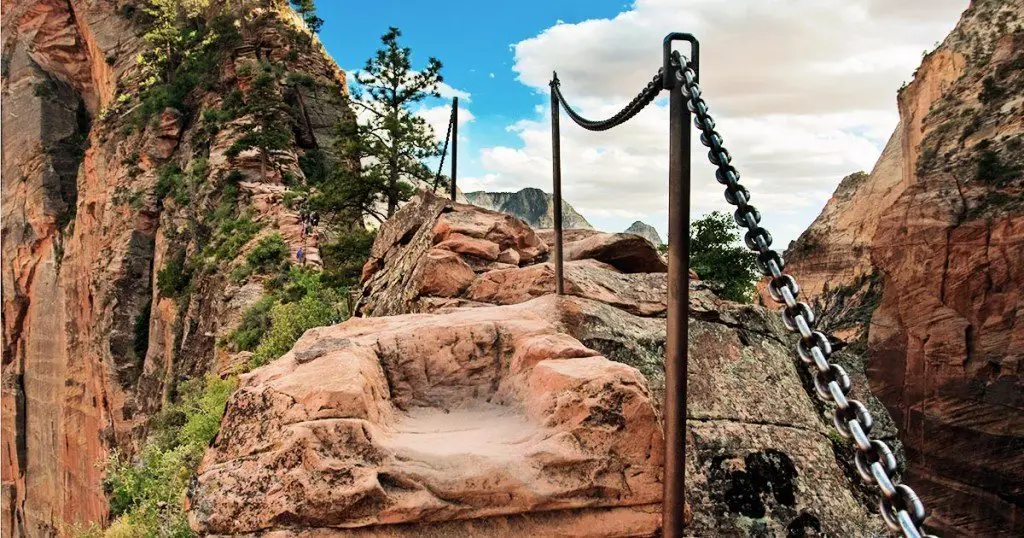
Angel’s Landing Hike
After getting off at the Grotto stop, we proceeded to hike straight up to the top of the mountain for the famous Angel’s Landing views. We read numerous blogs as well as heard from many people we met how difficult the hike was. We packed loads of water, and were expecting a strenuous hike. In reality? This hike was easy.
Perhaps, it’s because I had just hiked up Montana Picchu in Peru, which at 8000m was much more difficult. The hike up Angel’s landing offered some amazing views make no mistake, but we were up in less than 1 hour.
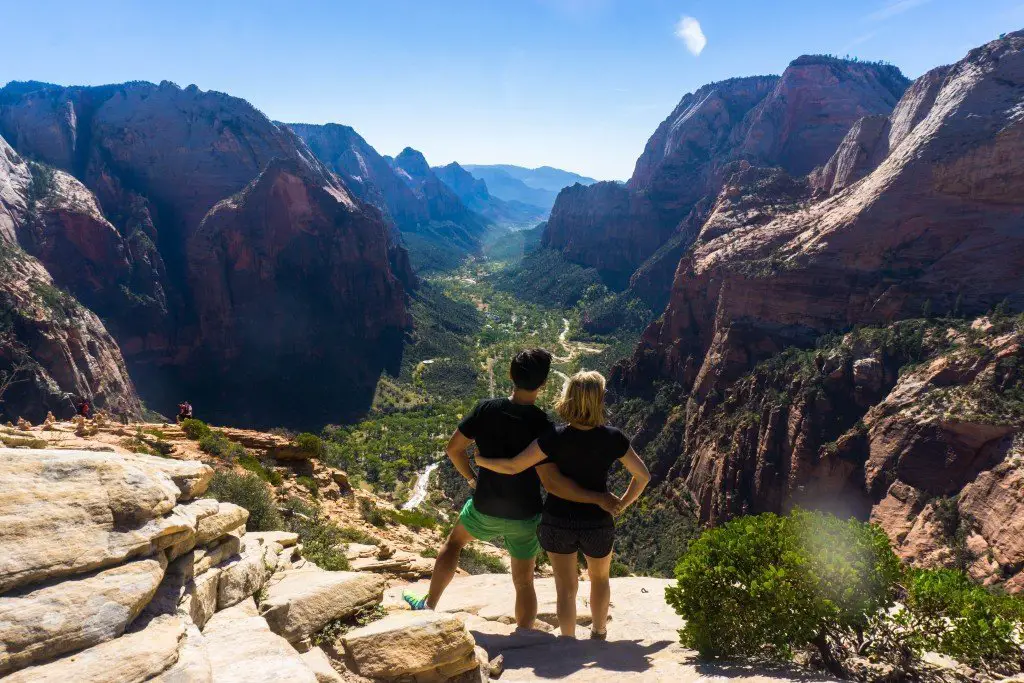
Near the top, there is a hike along a very narrow ridge with nothing but air on each side. This can be quite scary because you are literally semi-tight roping across the ledge of the mountain with only chains to hold on to. For those scared of heights, I would not recommend this! Walking along the ridge itself wasn’t that difficult, but there’s no reason to speed through this part of the hike as a misstep will almost surely result in falling towards where Angel’s don’t live.
Once we got to the top, the views were absolutely stunning! There’s a reason this is one of the most famous hikes in the country. The views of Zion Canyon are hard to beat. There were a ton of people at the top but we managed to find a somewhat isolated spot to eat lunch and just soak in the views. After 1 hour or so, we hiked back as we still had the Narrows hike afterwards. Most people thought we were crazy to hike both Angel’s landing and the Narrows in one day but I’ve done far worse in my travels.
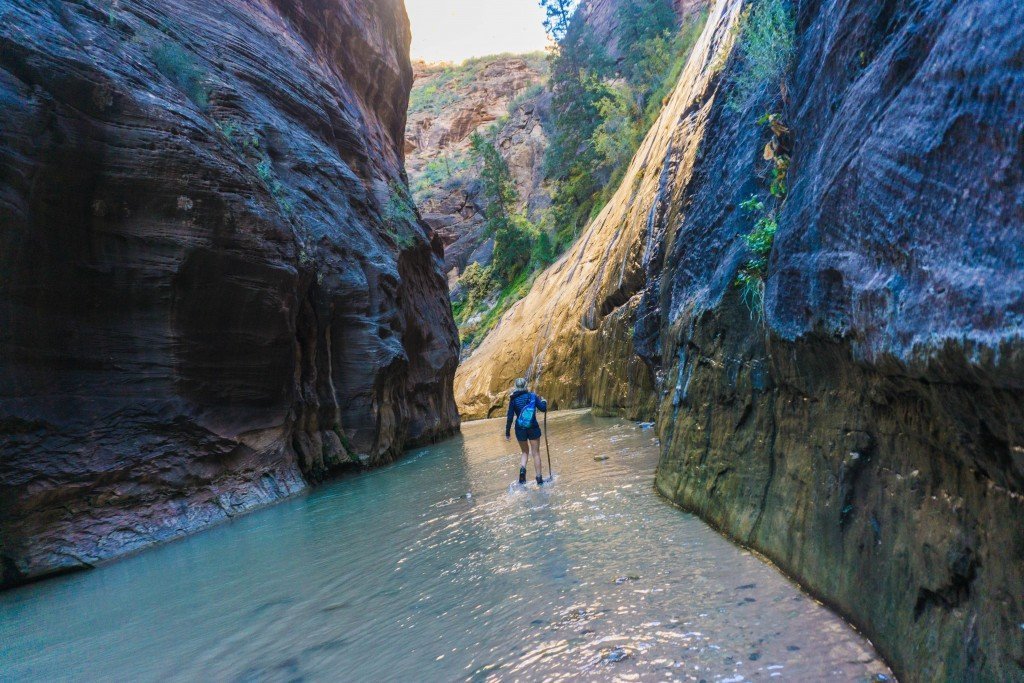
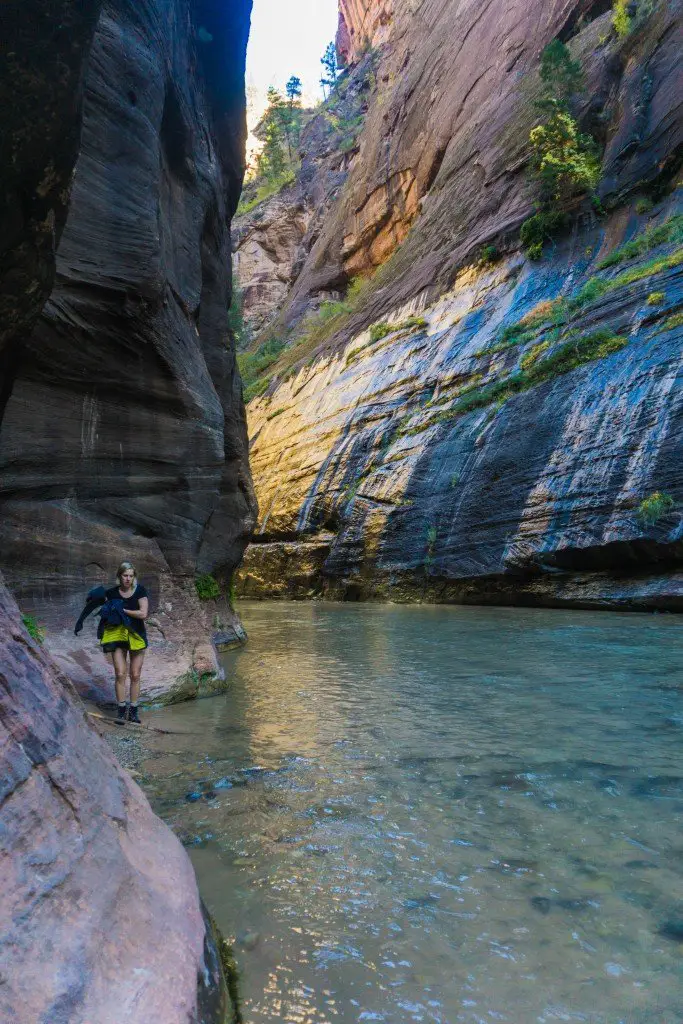
The Narrows Hike
We took the shuttle two more stops to the Temple of Sinawava stop at the very end of the shuttle route. This is the beginning of the Narrows hike which is basically walking in between the canyons of Zion. There’s a flowing stream throughout the entire hike and you’re basically walking in knee to waist deep water the entire time. Our lack of planning really festered here as we did not have the right shoes or pants.
The park actually rents waterproof shoes for this specific hike but we decided we were too cool for that (for whatever reason), and we ended up hiking in our sneakers. We saw other people that were doing this too, but after that first dip in the somewhat freezing water, I knew it was going to be a rough hike. The water is not warm in October but eventually, my feet either lost feeling or got used to the cold water and I wasn’t as bothered.
The current was strong however, and there were times I almost slipped on the rocks which would have resulted in me swimming.
The entire hike reminded me of the Canyons in Isalo National Park in Madagascar. In fact, all of Zion National Park and much of the American southwest reminded me of Isalo. The rock formations, colors, and even some of the foliage were all similar in nature. However, Isalo does have numerous species of lemurs to look at which of course, Zion does not!
This is an out-and-back hike. We hiked for 2-3 miles through the cold water until we couldn’t handle it anymore. I heard there were a few great stops if we went further into the Narrows but that will have to be for a better prepared day!
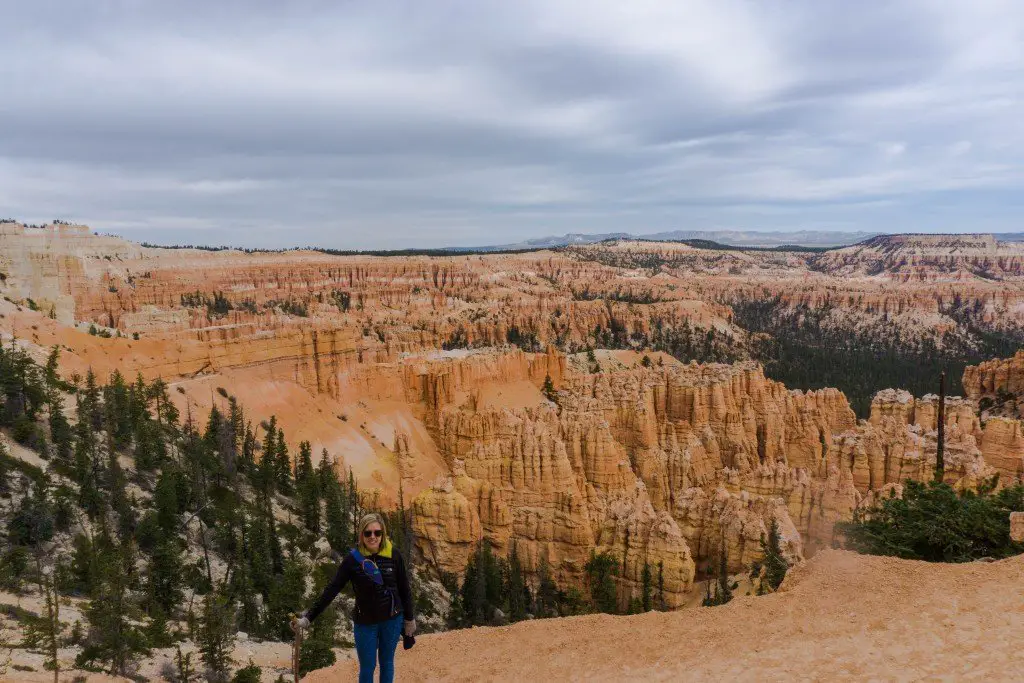
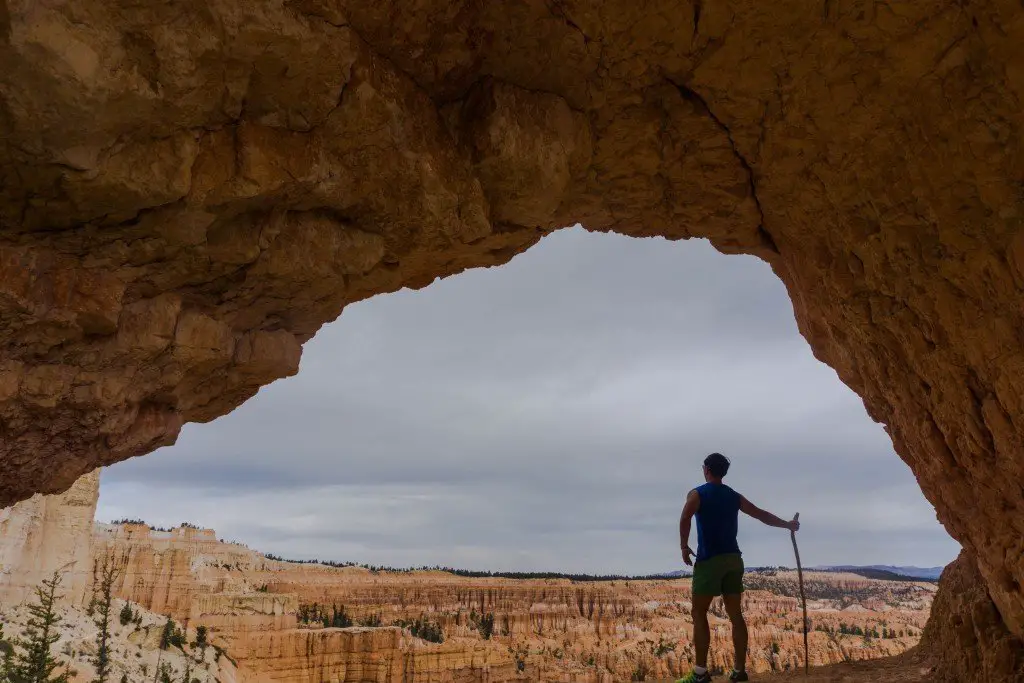
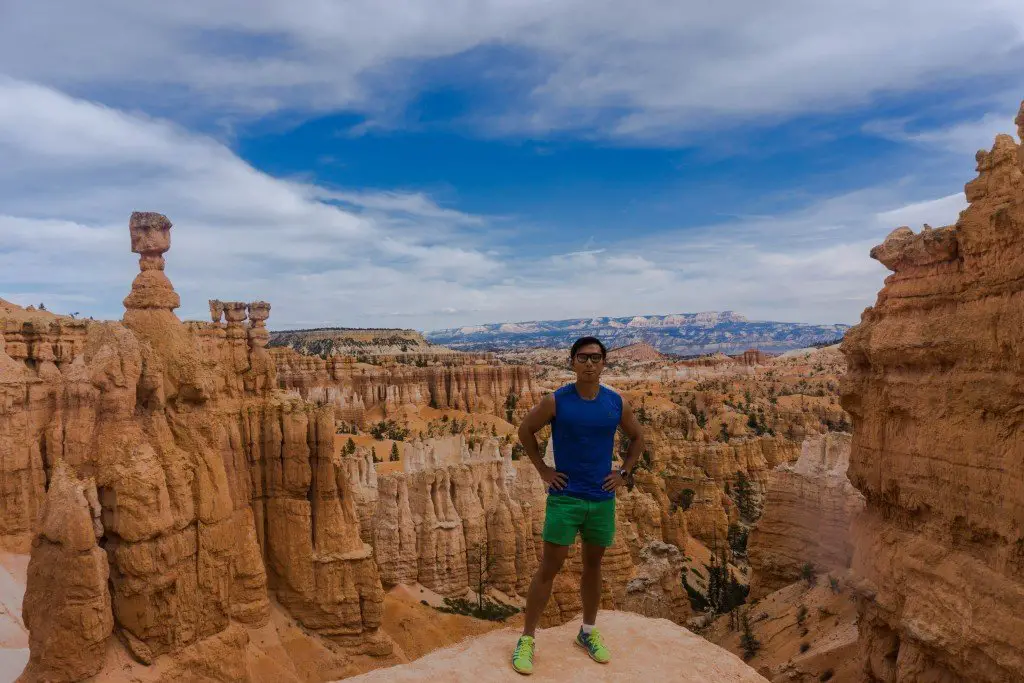
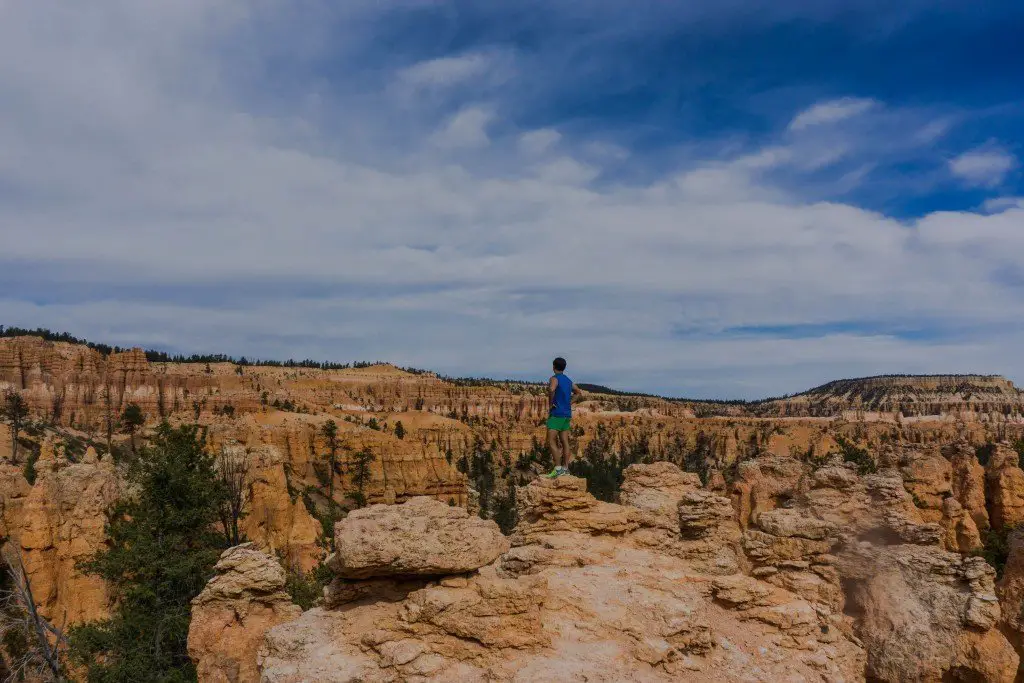
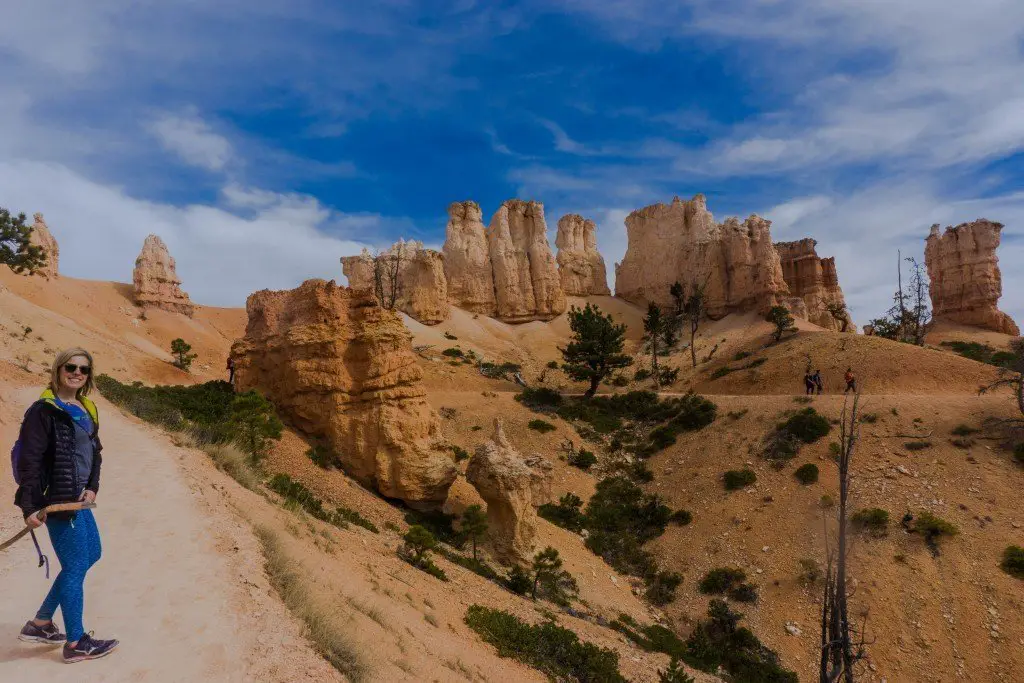
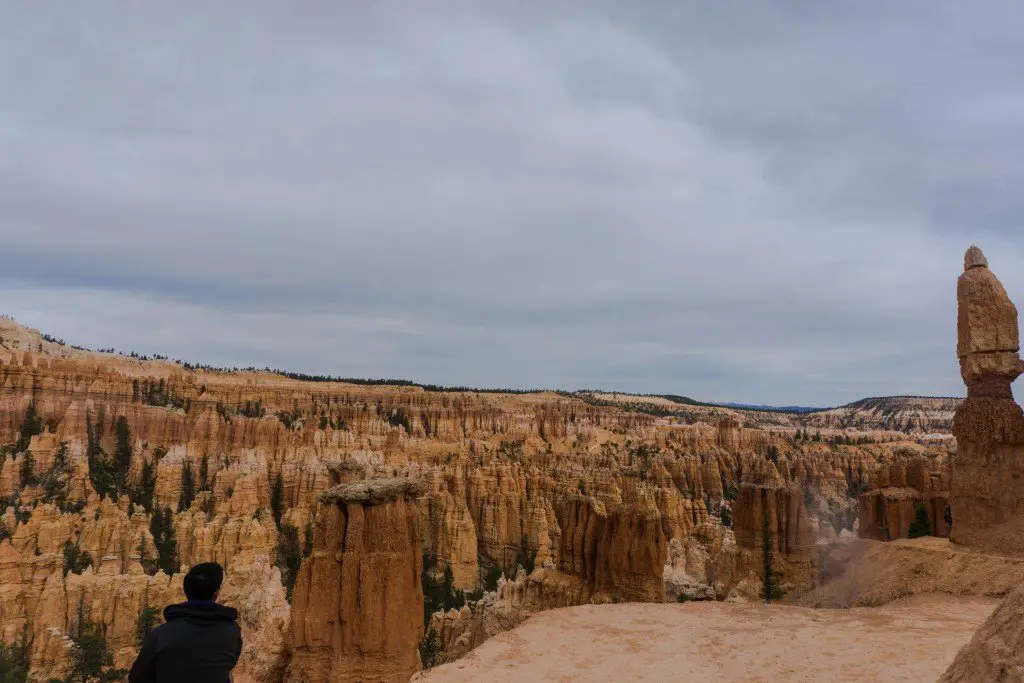
Day 3-4: Bryce National Park
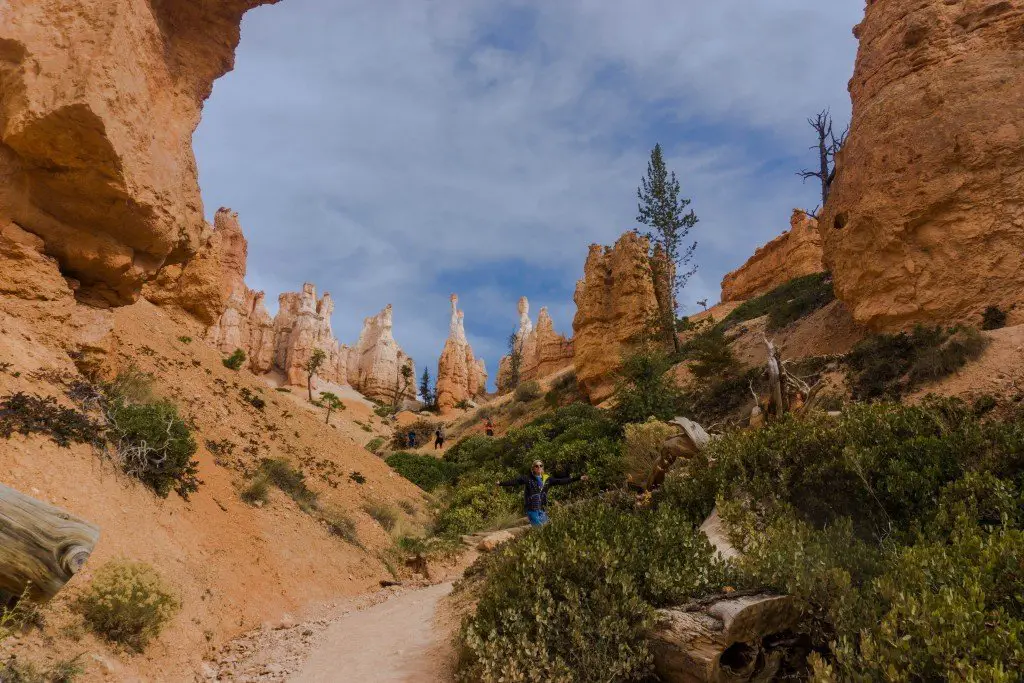
Bryce and Zion are so close, that they are very commonly done together. Bryce Canyon is the perfect example of how erosion affects landscapes. It’s famous for its phantom-like rock spires, also known as “hoodoos” that dot the landscape for miles. There are many hiking trails throughout the park with varying degrees of difficulty. It’s a big park, and like Zion, there is a free shuttle that drops people off at the main points of attraction.
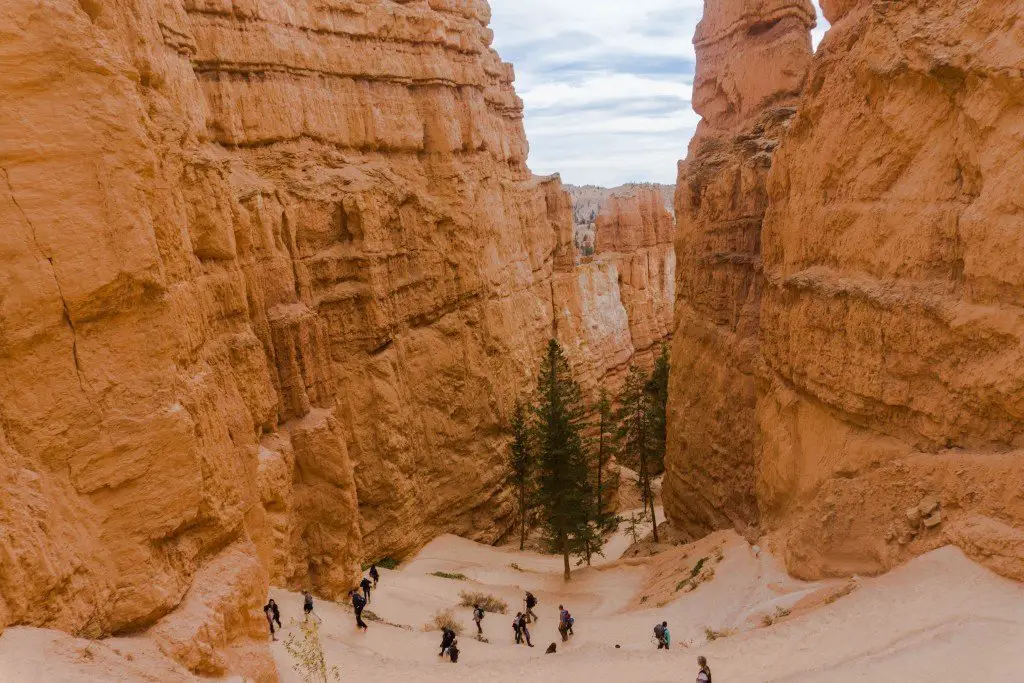
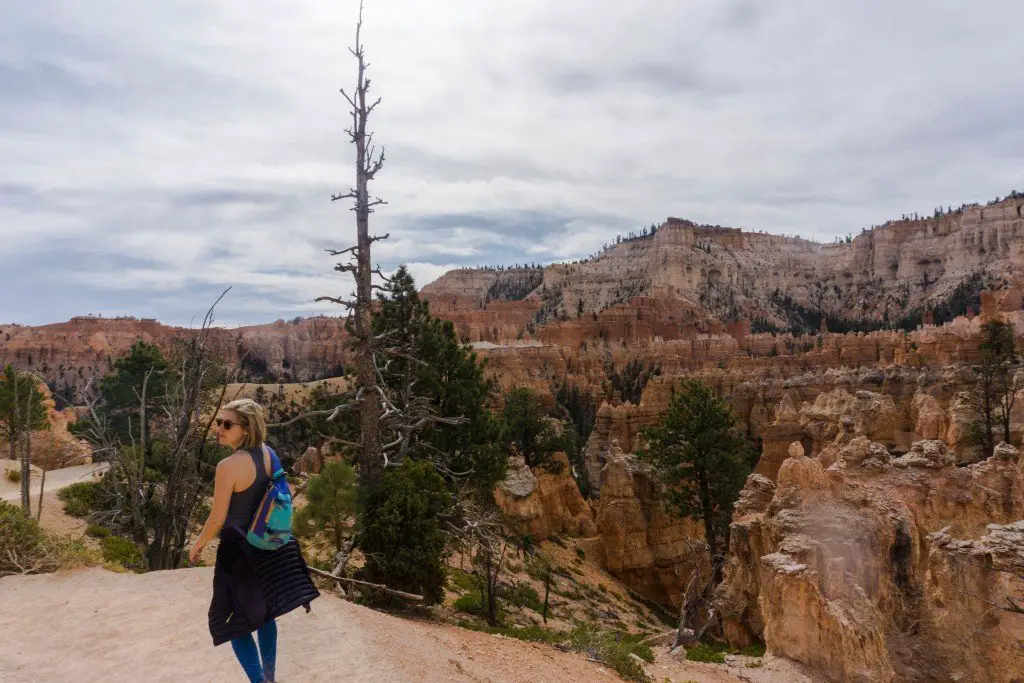
We started driving early in the morning to various lookout points on the map that were deeper into the park before driving back and starting our hike. There were so many hiking options that all sounded amazing. It was tough to decide on what to do as we only had the day.
We settled on starting the hike at Bryce Point, and ending it at Sunset Point. We stopped through the wall of windows, the peekaboo loop trail, amphitheatre, Thor’s hammer, and numerous lookout points with amazing views of the hoodoos.
I’ve never seen anything like Bryce Canyon before. The hoodoos are amazing. They kind of remind me of the chimney rock formations in Cappadocia, Turkey, with a more orange, and dramatic feel. There were far less people in Bryce than Zion, and many times where there were no people around us. All in all, I think Bryce was our favorite park on the trip.
Day 5: Driving to Moab, UT
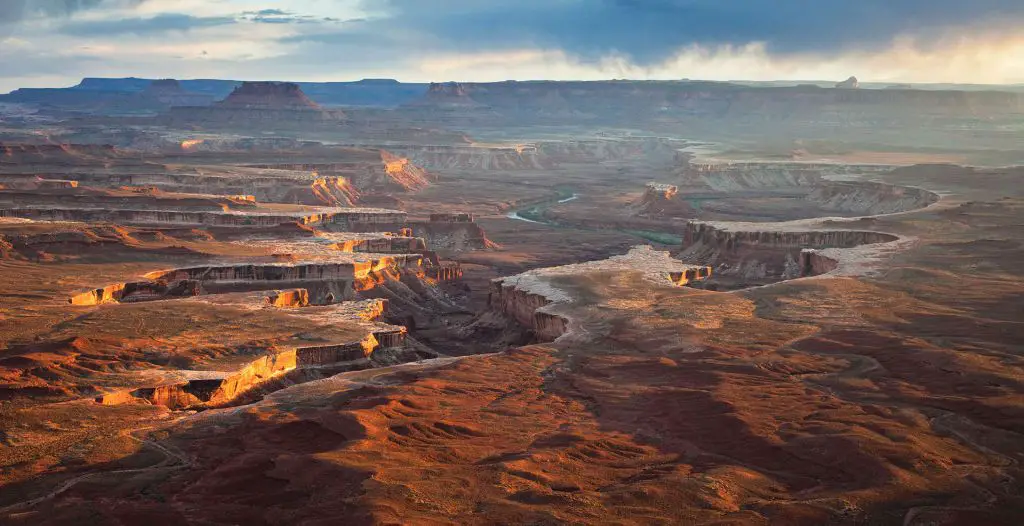
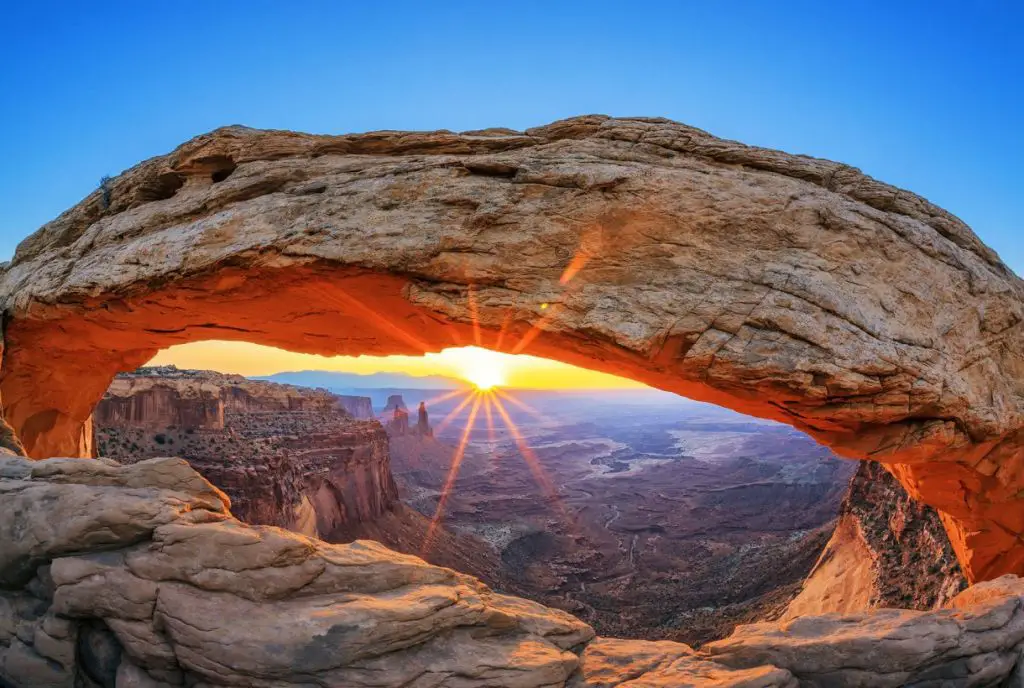
Day 4 is a long day of driving. From Bryce Canyon, it is roughly 5 hours to Moab, UT, the gateway town to the beautiful Arches National Park and Canyonlands National Park. The drive will take up the greater part of the day and I planned out my day so I would arrive in the Canyonlands National Park at 3pm or so. To do this, I left Bryce Canyon National Park at 9am after a early morning sunrise and hike.
The main thing to see in the Canyonlands National Park is the Grand View Point. It is especially spectacular during sunset. I suggest stopping by Mesa Arch, which frames a breathtaking view of canyons below. It is an easy half mile hike one way to the arch from the trailhead. You can also stop by Deadhorse State Park while you are in the area.You’ll need to pay a separate entrance fee, but the view from Deadhorse Point is well worth it, with canyon views that rival those of the Grand Canyon (which is later on this itinerary). Either Mesa Arch or Deadhorse State Park are excellent places to view the sunset.
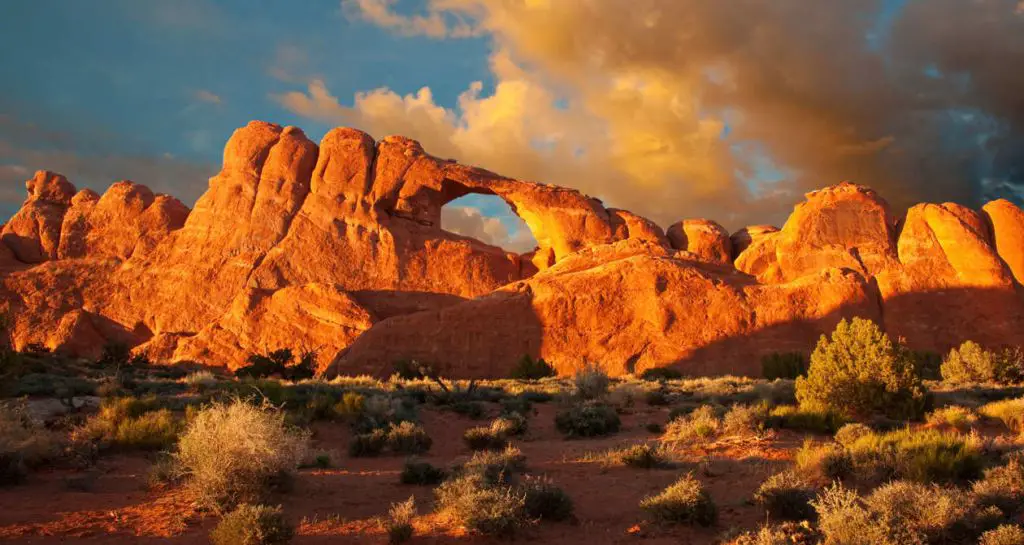
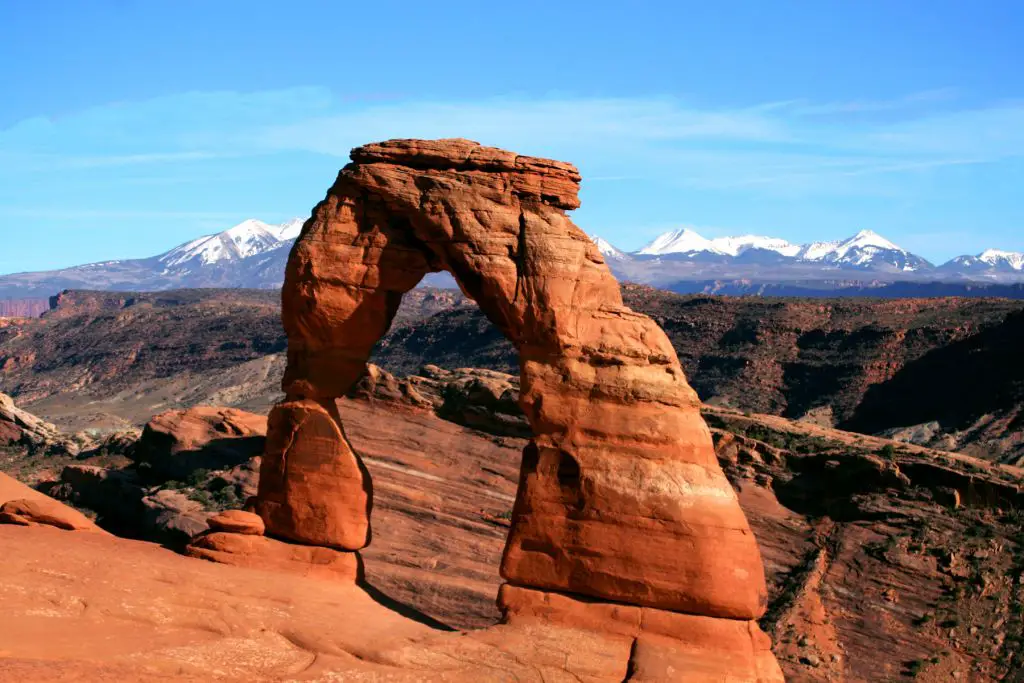
Day 6: Arches National Park
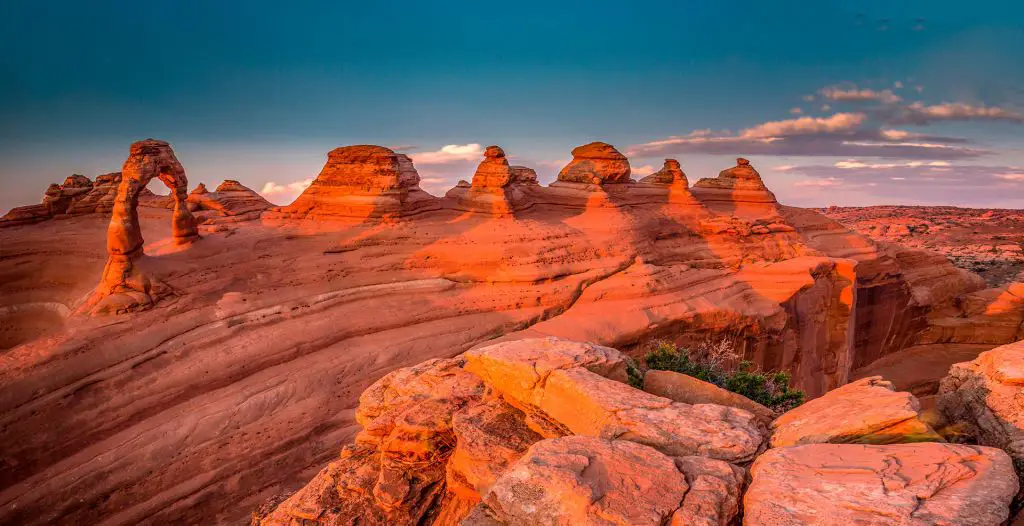
With just one day to spend in Moab, you should not miss visiting the two national parks that are in the area. You can visit both Arches and Canyonlands in the same day if you are here during the summer when you have daylight for a long stretch. Take a lunch with you so that you do not have to travel back to town between trips.
First, I suggest visiting Arches National Park, which has world-famous arches and rock formations. If you are here during the summer, I suggest going early to avoid crowds and the heat as much as possible. If you like hiking, I suggest hiking through Park Avenue, hiking up to Delicate Arch and hiking through Devil’s Garden, where you can see Landscape Arch, which has longest span of any natural arch in the world. I also suggest stopping by the Windows Section of Arches, which has several arches within easy walking distance from the parking lot.
You should be able to cover all these points in 7 hours or less. If you do not want to do a lot of hiking, you can just stop by the viewpoint for Park Avenue, walk up to a viewpoint for Delicate Arch and stop by the Windows Section. This should allow you to see highlights of the park in three to four hours.
Day 7: Monument Valley and Horseshoe Bend
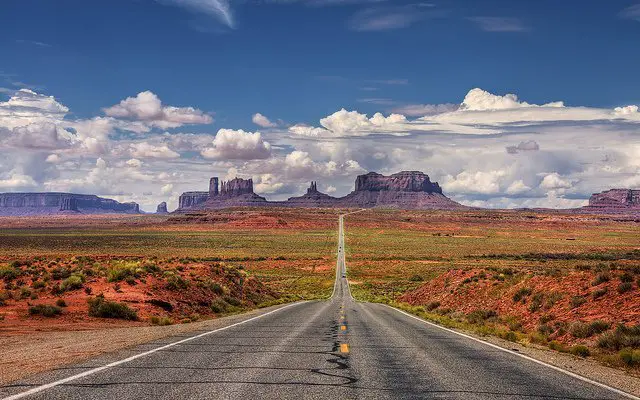
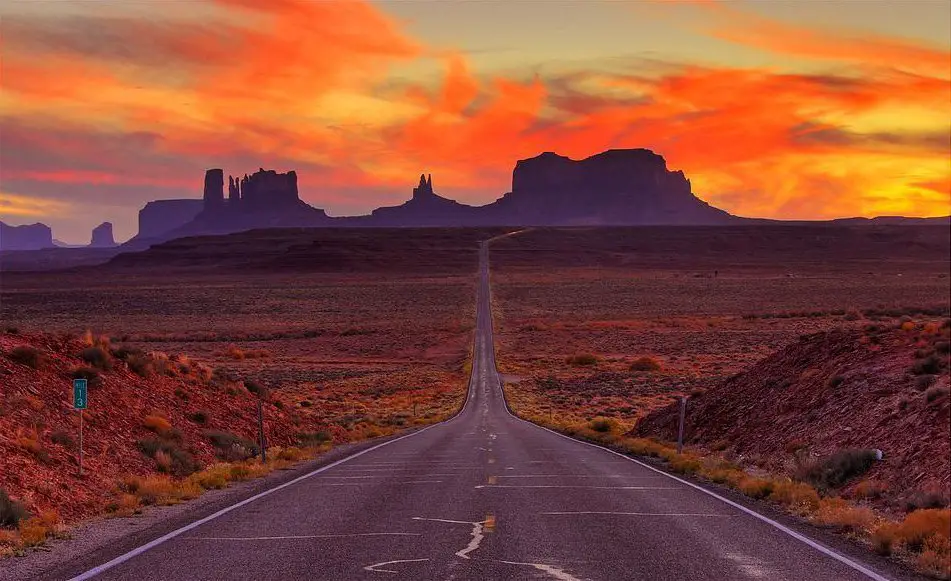
This day will be like Day 5 which is mostly driving. However, day 7 is special because two of the most iconic landmarks in the USA, and perhaps the world are on the schedule. From Moab, UT, it is about 3 hour drive to the wonderful and impossibly picturesque Monument Valley.
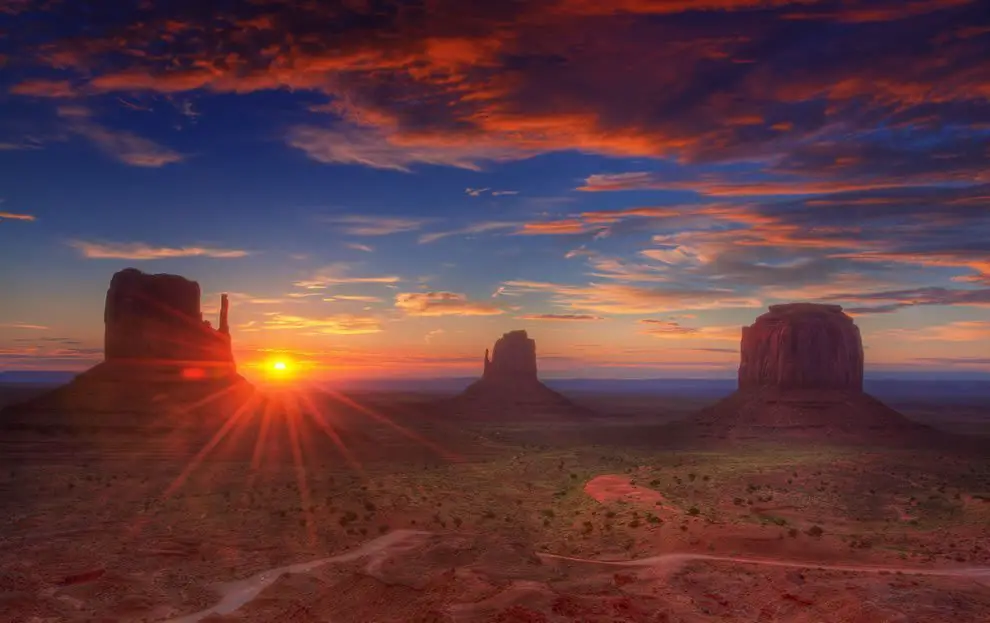
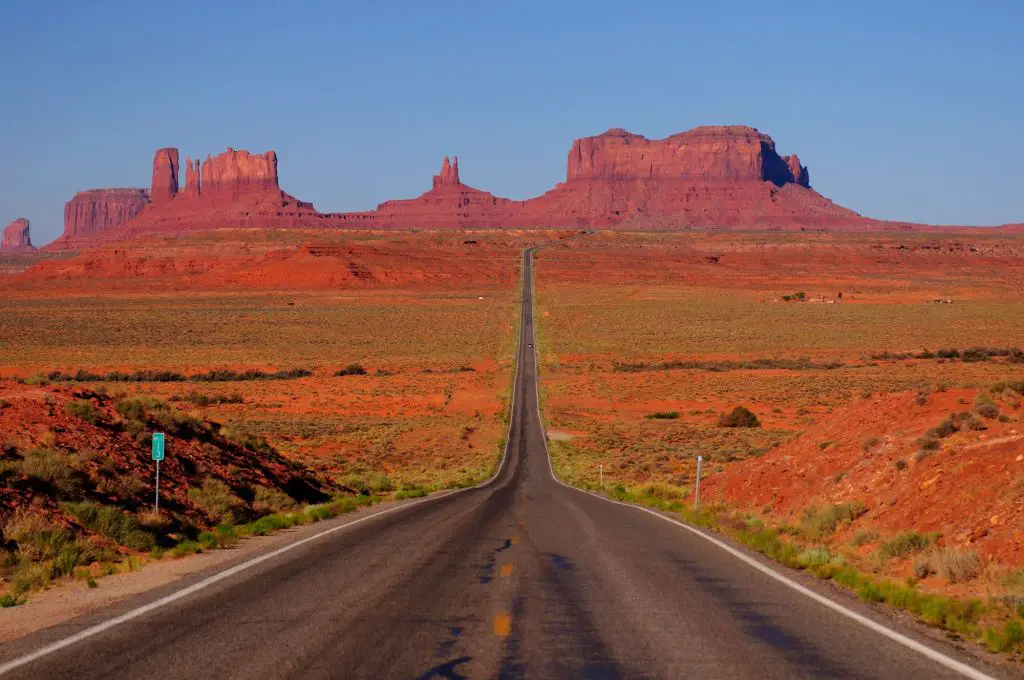
Monument Valley’s sandstone buttes and mesas are among the most iconic images of the southwest. The majestic landscape has been the backdrop for more than sixteen movies, including Stagecoach, Forrest Gump, and 2001: A Space Odyssey, plus dozens of television shows, music videos, and commercials. Straddling the border of southeastern Utah and northern Arizona, Monument Valley lies within the Navajo Nation Reservation’s borders.
There isn’t much to do per se here besides drive the open road with the towering sandstone formations in front of you. It is a 17 mile round trip drive and takes roughly 1-2 hours to see. I’d say most of the time you’ll be busy pulling over to the side of the road and snapping photos of the empty road with the rock spires in the background.
I think if I could do it again, I would stay the night here as I think sunset pictures of this place would be something quite special.
From Monument Valley, it is another 2 hours drive to Page, AZ which is home to the famous Horseshoe Bend and Antelope Canyon.
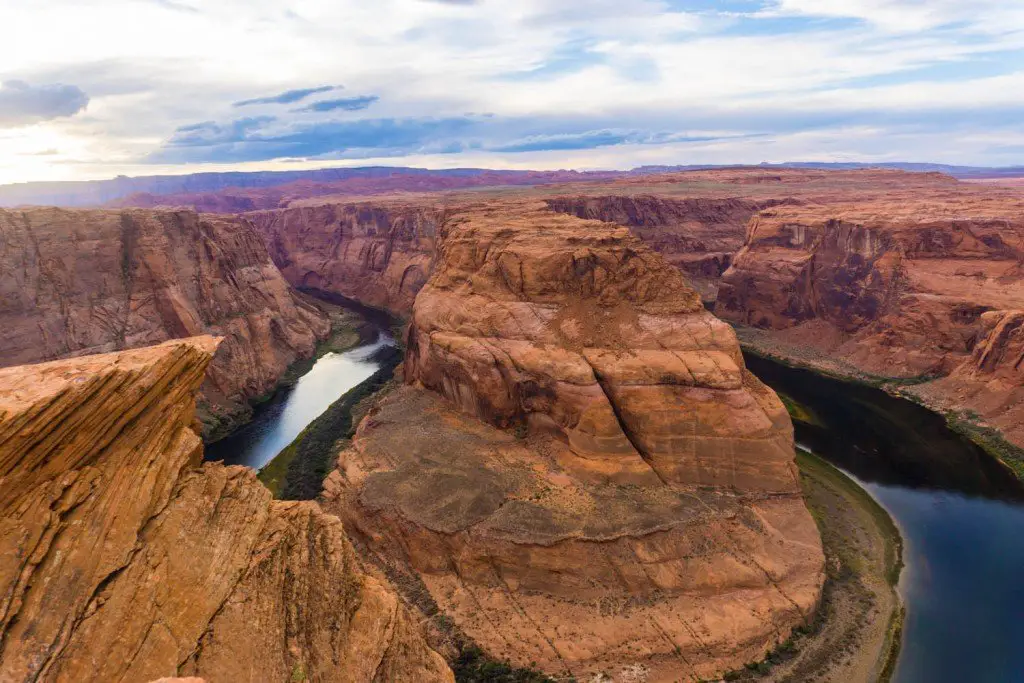
Horseshoe Bend
Horseshoe bend is an incredibly dramatic section of the Colorado river. It’s one of those wonders that was carved out over millenia by the waters of the Colorado River as it made its way down through Grand Canyon. It’s located a few minutes outside of Lake Powell and is just 15 minute walk from the parking lot to the view points. I wouldn’t classify this as a hike of any sort. It’s just a park the car, and check out the views. What a view it is!
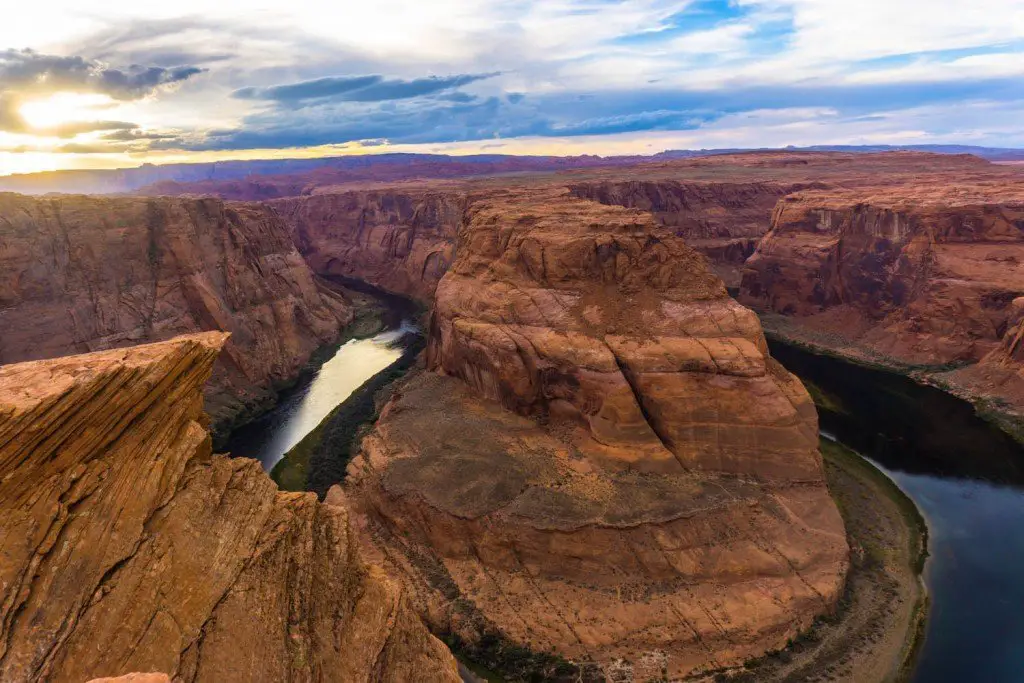
I’ve seen numerous photos of this place but it is SO much bigger and more stunning in person. It’s cheesy to say pictures do it no justice, but it’s never been more true than here as I stood at the edge of the canyon in awe. We were recommended to visit during sunset as the sun lights up the canyon’s rock with a orange/yellowish hue and really bringing out the colors of the rocks.
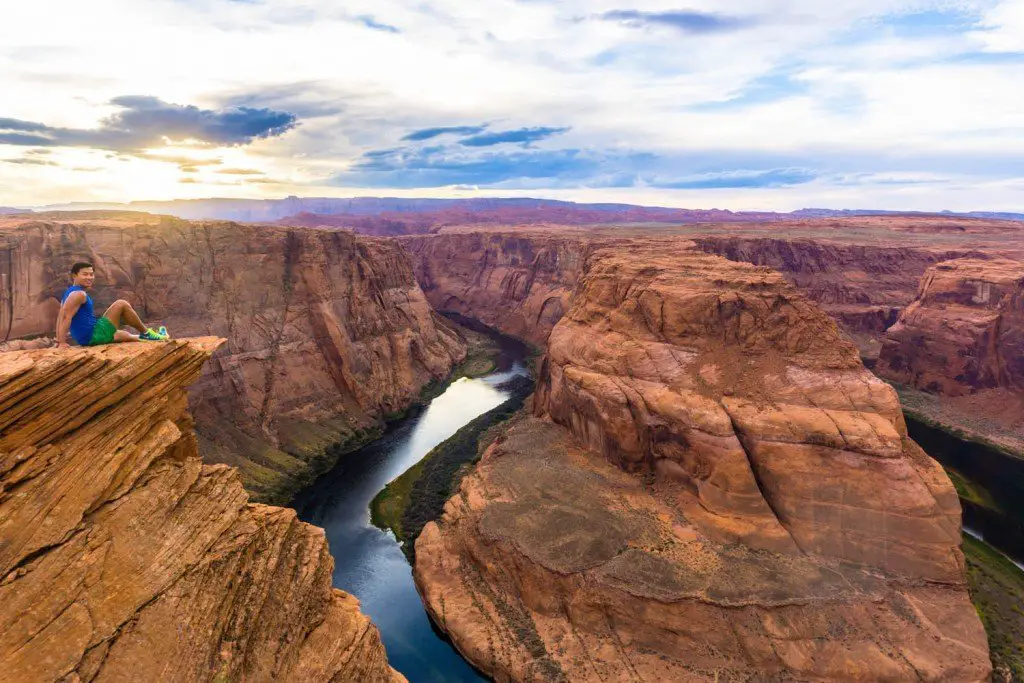
Again, no hikes are required but it’s just an amazing place to take some (many) photos. There are a lot of visitors to Horseshoe Bend, but it’s such a big area, it’s easy to find an are away from the crowds.
Dinner at Big John’s Texas BBQ
After soaking up the views at Horseshoe Bend, we had dinner at Big John’s BBQ. Not sure any meat loving person can hate good BBQ, and Big John’s was delicious. Their ribs and brisket were absolutely amazing. Definitely the best meal we had on our trip. They even had locals dressed in country gear, playing country music for the majority foreign clientele to reaffirm their ideas of the USA.
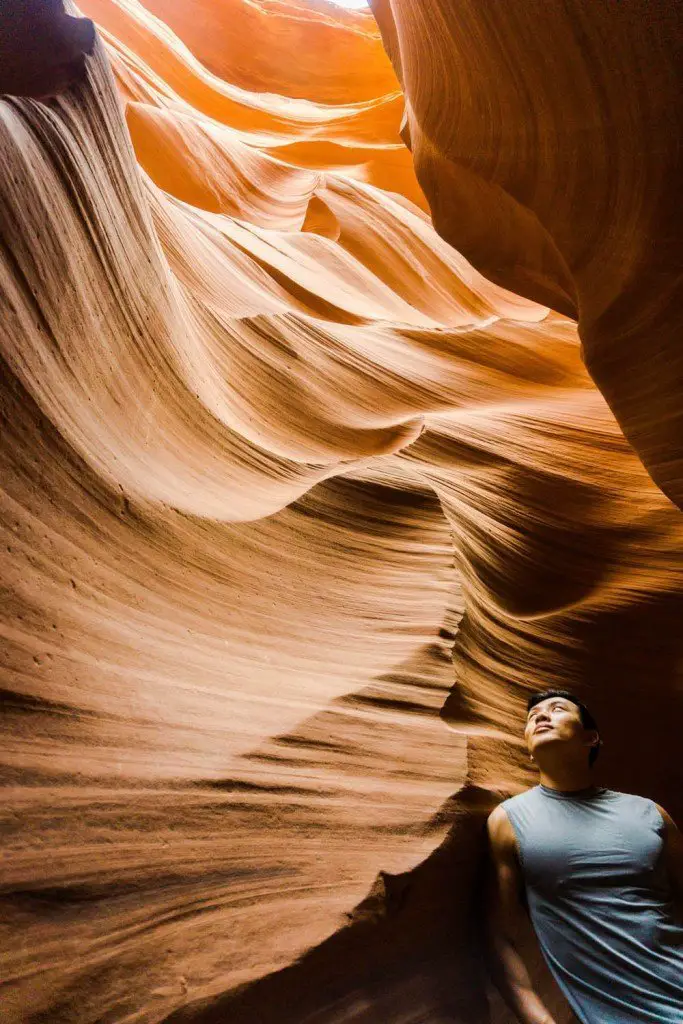
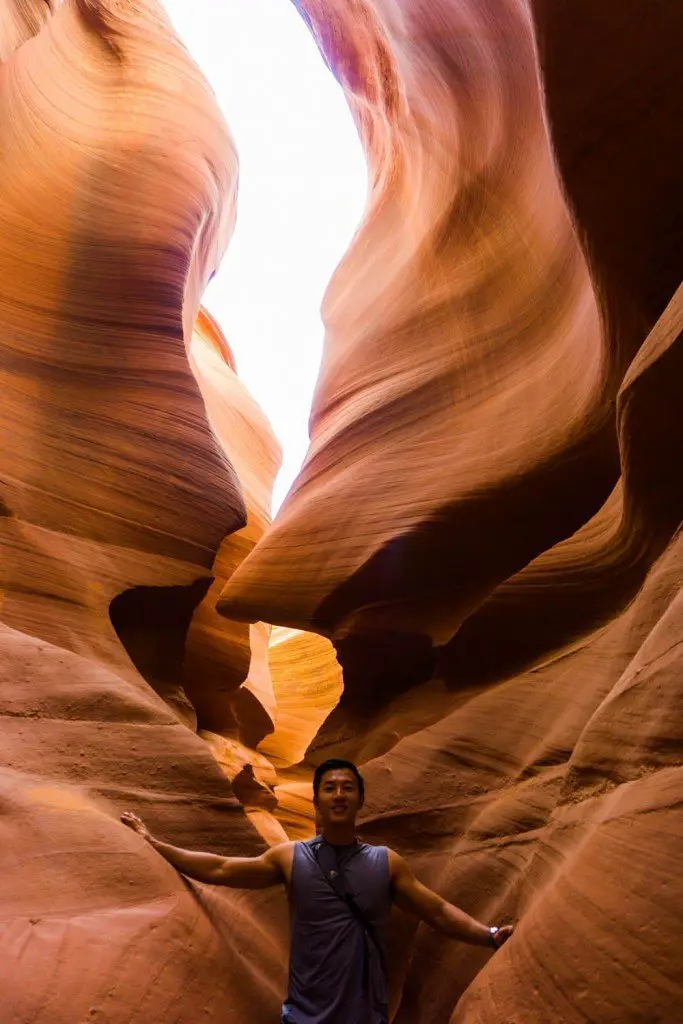
Day 8 Morning: Antelope Canyon
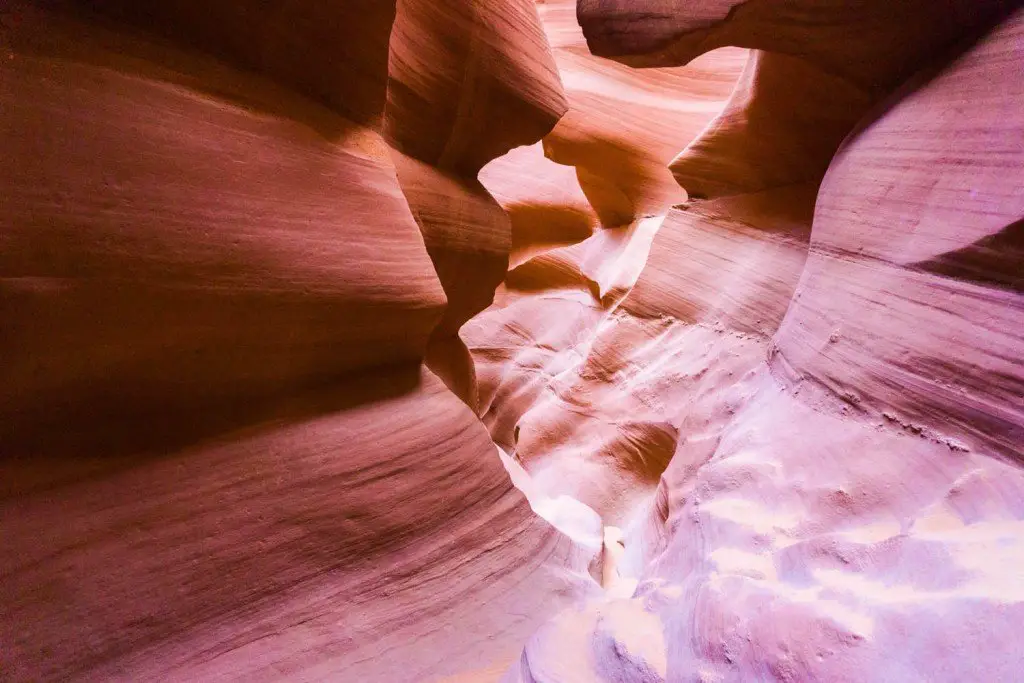
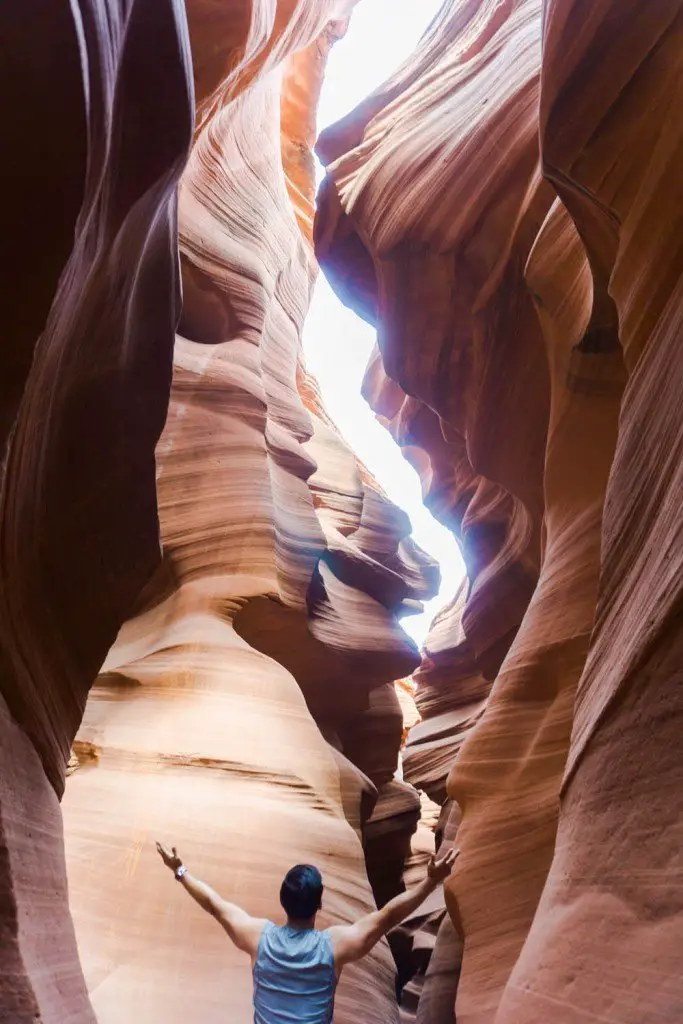
No trip is complete to Arizona without a trip to the famous Antelope Canyon. It’s become infinitely more popular in recent years as social media and high end photography have really been able to highlight the beauty of the slot canyons. Created by rushing and powerful water, Antelope Canyon was discovered many centuries ago by Najavo tribes and given the English name ‘Antelope’ due to the many antelope that grazed here during the winter season.
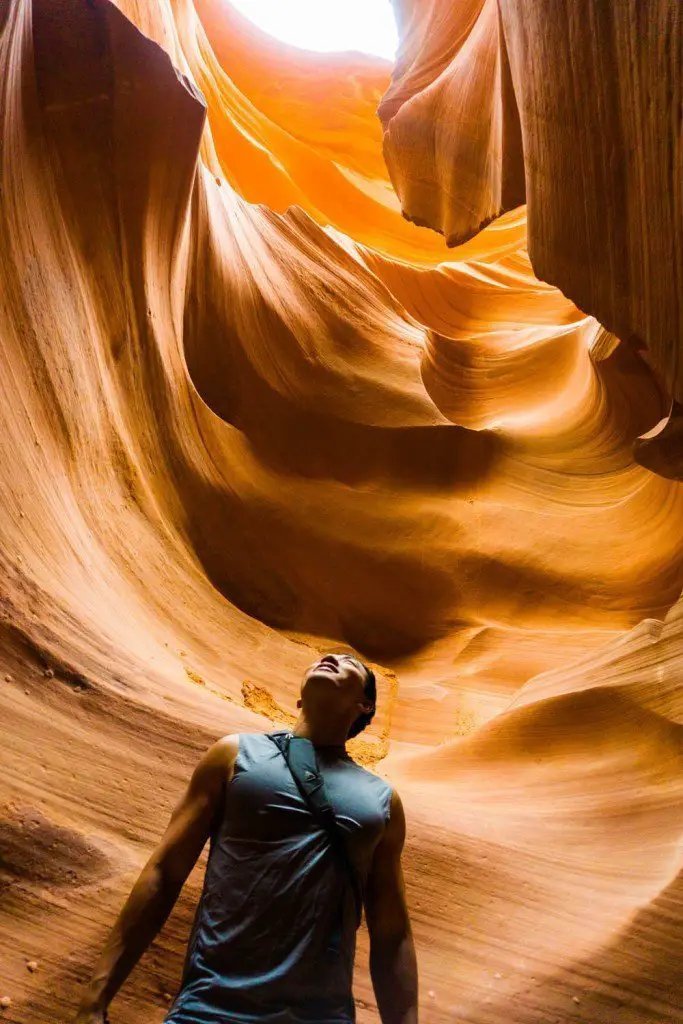
Because Antelope Canyon is located in Navajo territory, it is 100% mandatory to book a tour through the local operators in the area. The cost is around $30 per person. All tours essentially take the same route walking through the slot canyons. There are two areas, the upper Antelope canyon and the lower Antelope Canyon. I elected with the upper canyon but I’m told both will blow your mind (and I believe it).
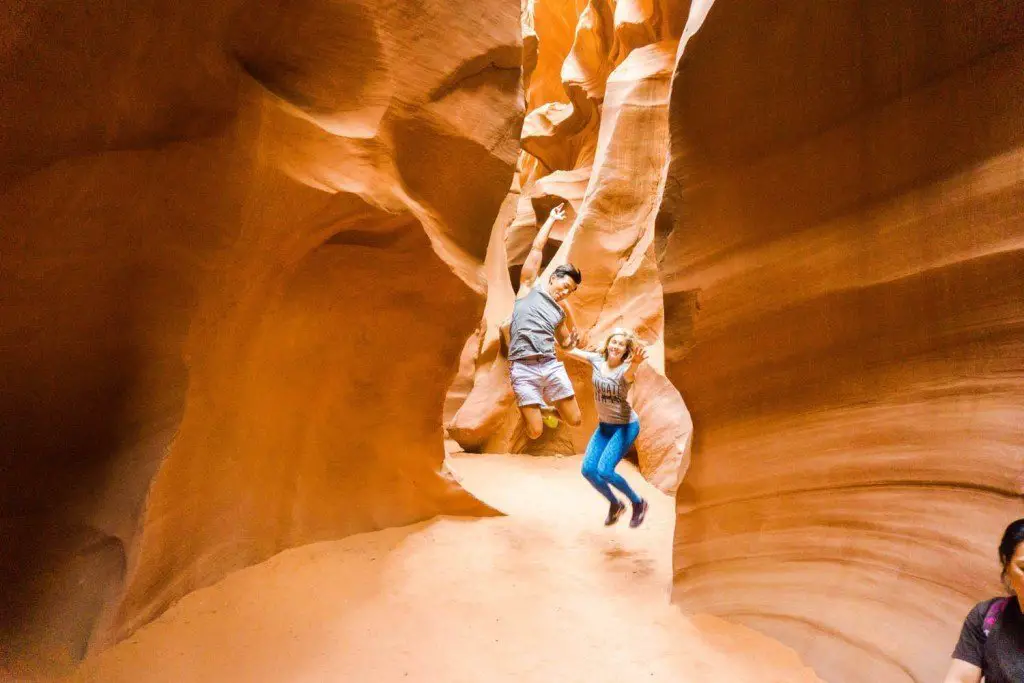
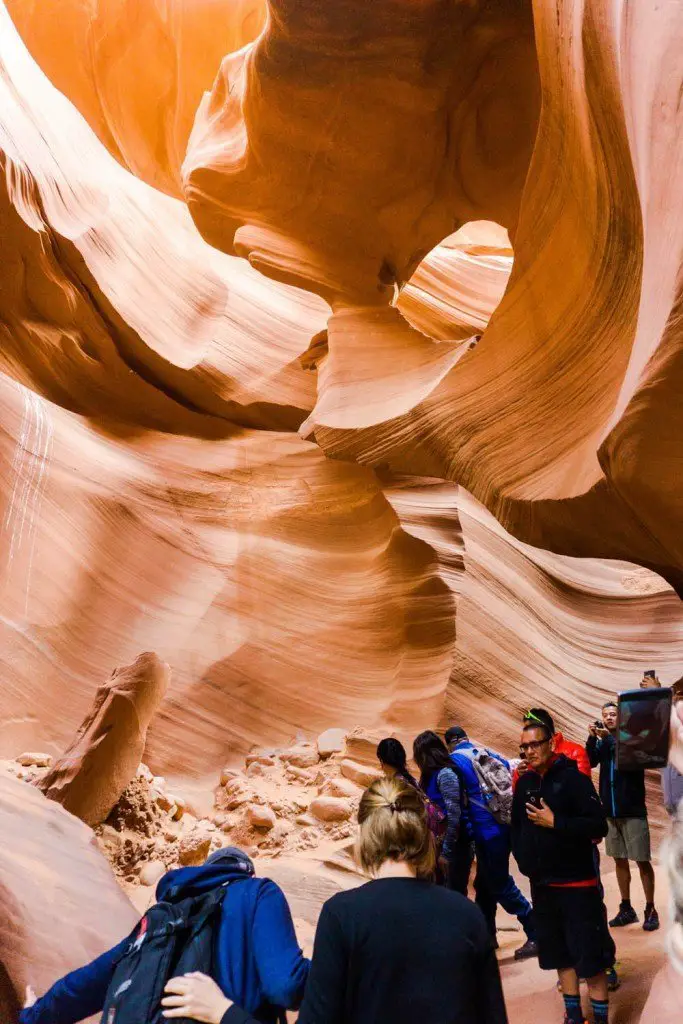
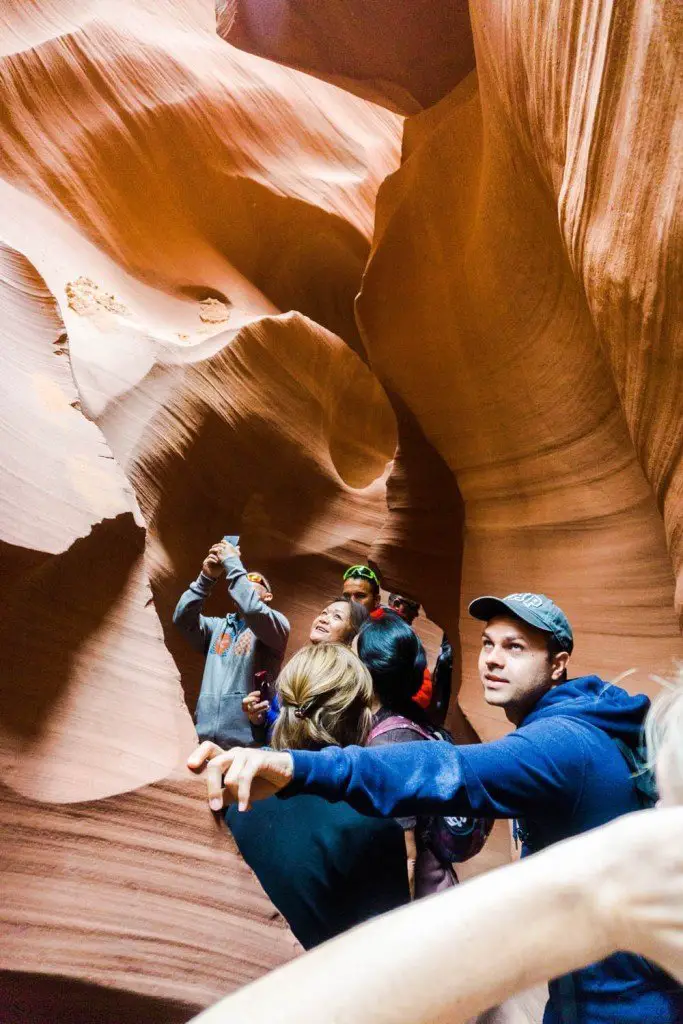
The light beams in Antelope Canyon are, to me, what makes this place is so unforgettable. They only occur at certain times of the day and only last for a short while but when they shine through the openings up top it’s truly a sight to see.
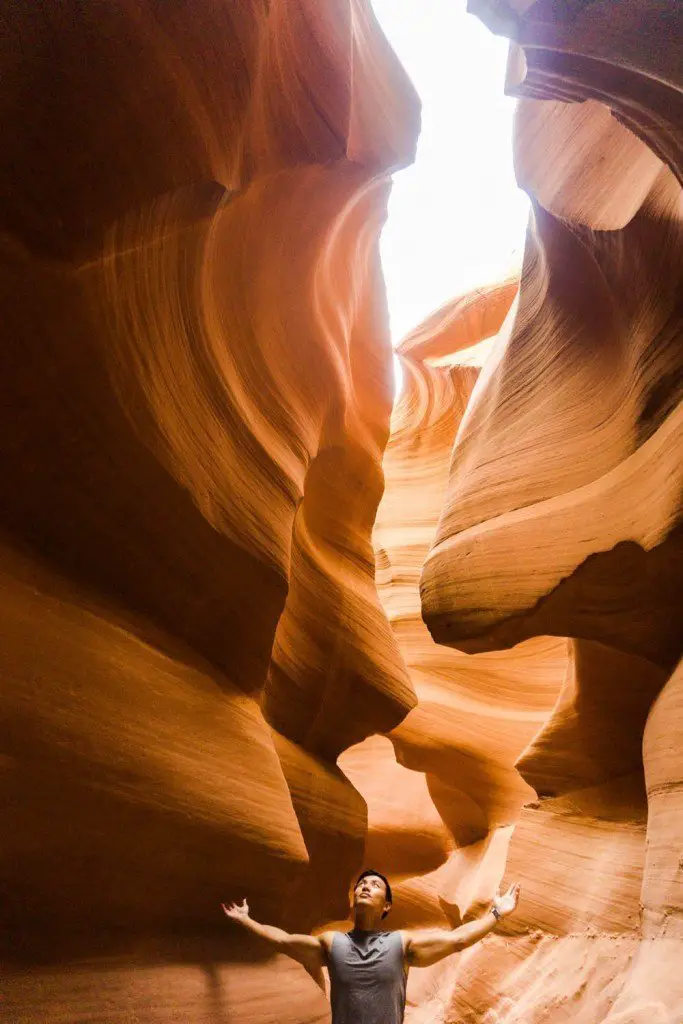
Tours run regularly on the hour, and more often during busy seasons. Tours last over an hour and there’s minimal hiking involved. Just follow the path, and enjoy the incredible views. This place is a photographers heaven, and there are tours specifically for those looking to take the best photos.
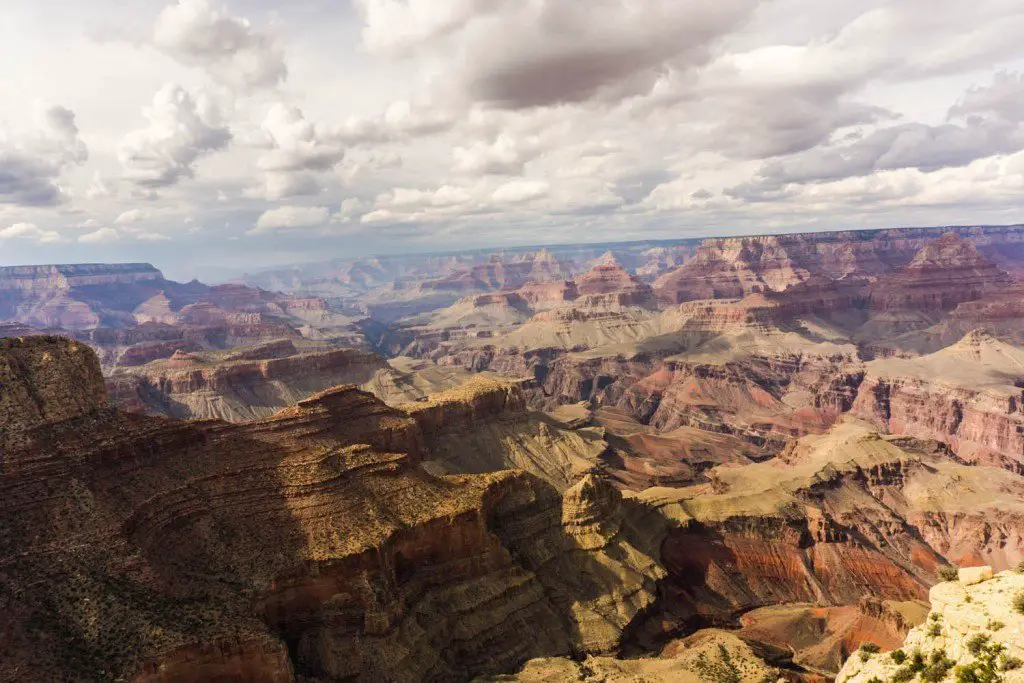
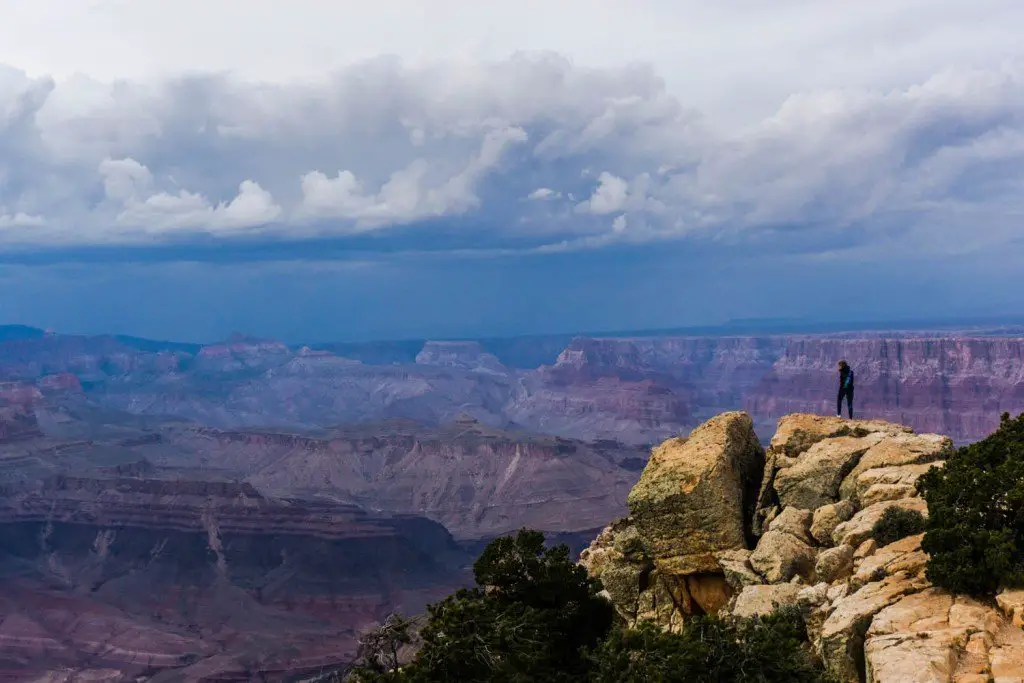
Day 8 Afternoon and Day 9: Grand Canyon
After our morning jaunt in the Antelope Canyon, we left Page and drove south to the Grand Canyon. The drive two hours through some very scenic terrain. The Grand Canyon is probably the most iconic of all the American National Parks. It’s almost like a right of passage to visit this park for all park enthusiasts. It is the largest canyon in the world at almost 2000 square miles. The next largest canyon is the Fish River Canyon in Namibia, which seemed huge at the time, until I came to the Grand Canyon.
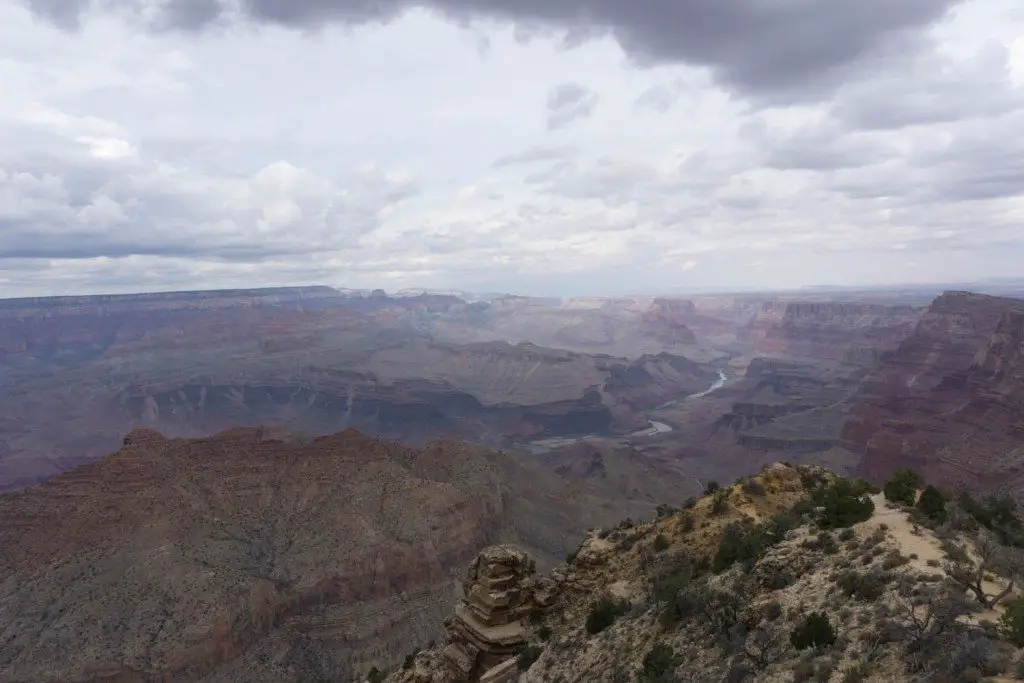
South Rim
There are two sides to the Grand Canyon, the North Rim and the South Rim. They are 4 hours away from each other so doing both in the same day is tough. The north rim is only open during the summer season which means I could only go to the South Rim.

The South Rim is the much more popular of the two and offers the most breathtaking views. Like most of the other parks in the area, sunrise/sunset is the best time to see the Canyon. As the sun comes closer to setting or rising the sun will illuminate off these canyon walls in an array of colors. The golden hours of the desert are truly golden, and the Grand Canyon is no exception. The Grand Canyon reminded me in some ways of my trip to Cappadocia in Turkey. The rock formations are similar in color and design (minus the rock chimneys of course!)
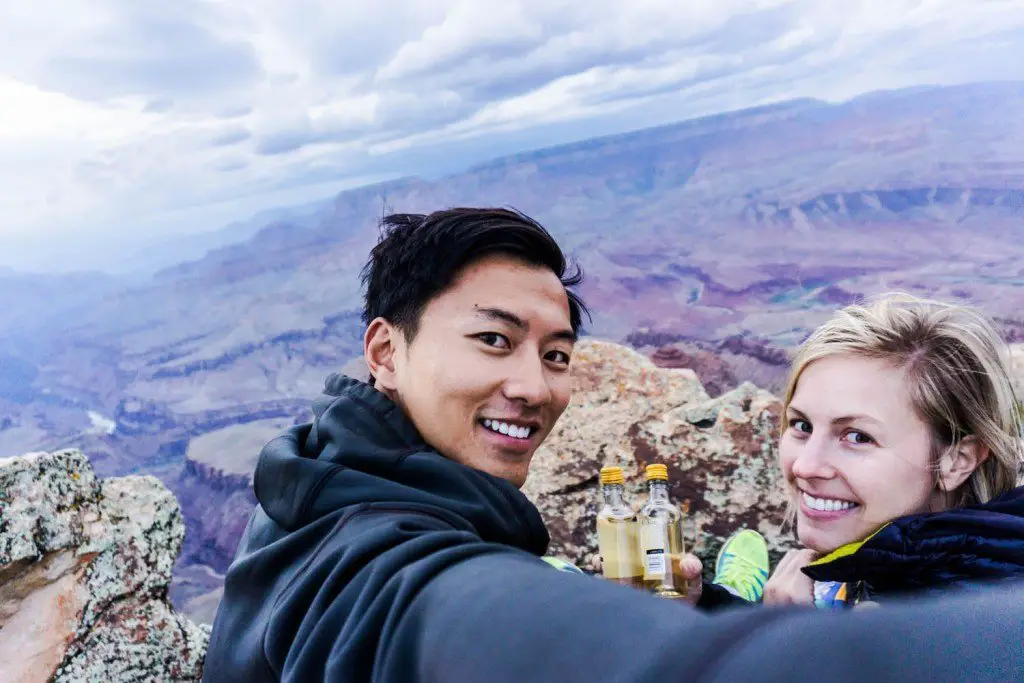
The Grand Canyon is highlighted by numerous viewpoints all around the park. They are all located within a few miles from each other and a car is perfect for this purpose. Like the other parks, there is a free shuttle bus that goes through the park. Each viewpoint is just exactly that, a viewpoint. They give different perspectives of the canyon but they’re all similar to each other so you don’t need much time at each place. There is no hiking involved at the viewpoints but some viewpoints have areas where you can go off trail. I ended up driving to most of the viewpoints but my favorites were Lipan Point, Grandview Point, and Mohave Point.
Where to eat and stay
There are a handful of acommodation options within the park itself. They are mostly expensive and are booked up well in advance. We stayed at a hotel just outside of the canyon in the town of Tusayan. We had dinner and brunch at the El Tovar hotel in the Grand Canyon. Excellent food with great views of the canyon (almost made me want to pay the $300 a night to stay at the place).
Day 10-11: Sedona
On our last day, we drove to the Grand Canyon early in the morning to catch the sunrise. We went to some of the viewpoints we did not go to the previous day. After breakfast at El Tovar (great brunch), we drove two hours south to the town of Sedona.
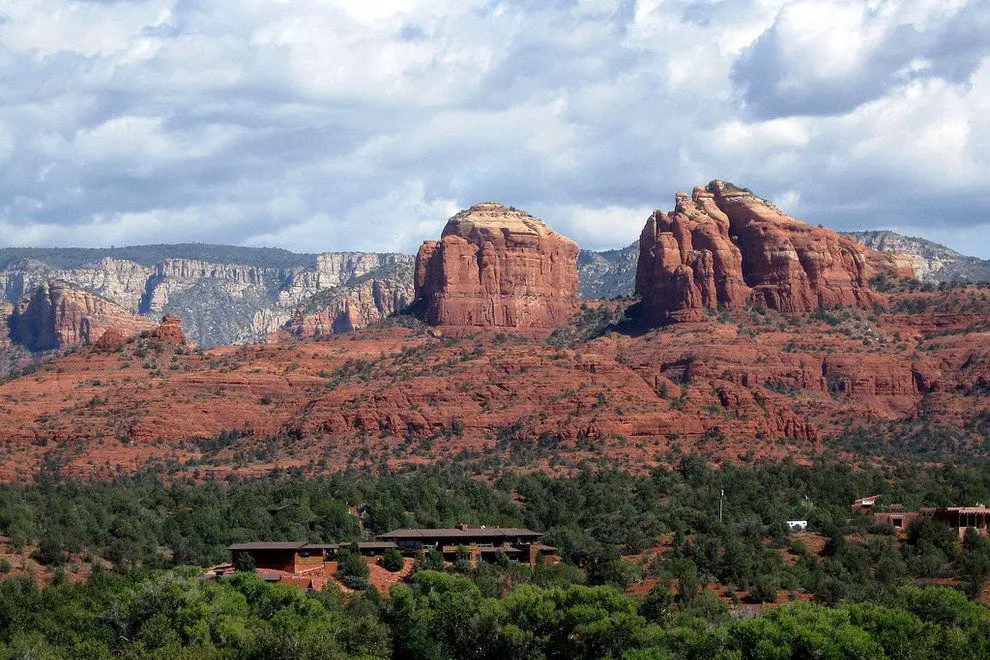
As if we hadn’t seen one amazing place after the other, Sedona was a great way to finish the trip. The town is holds some old school Western charm, and is surrounded by these big red mountains. We did a short hike at the Red Rock National Park just outside of Sedona which wasn’t difficult at all, but offered fantastic views of the giant rock formations.
We finished with lunch at Hideaway House which had great food and amazing views of the mountains. There’s lots of restaurants, wineries, and things to do in this town, we could have easily stayed a few nights. I can see why so many tourists and retirees flock to this part of the country.
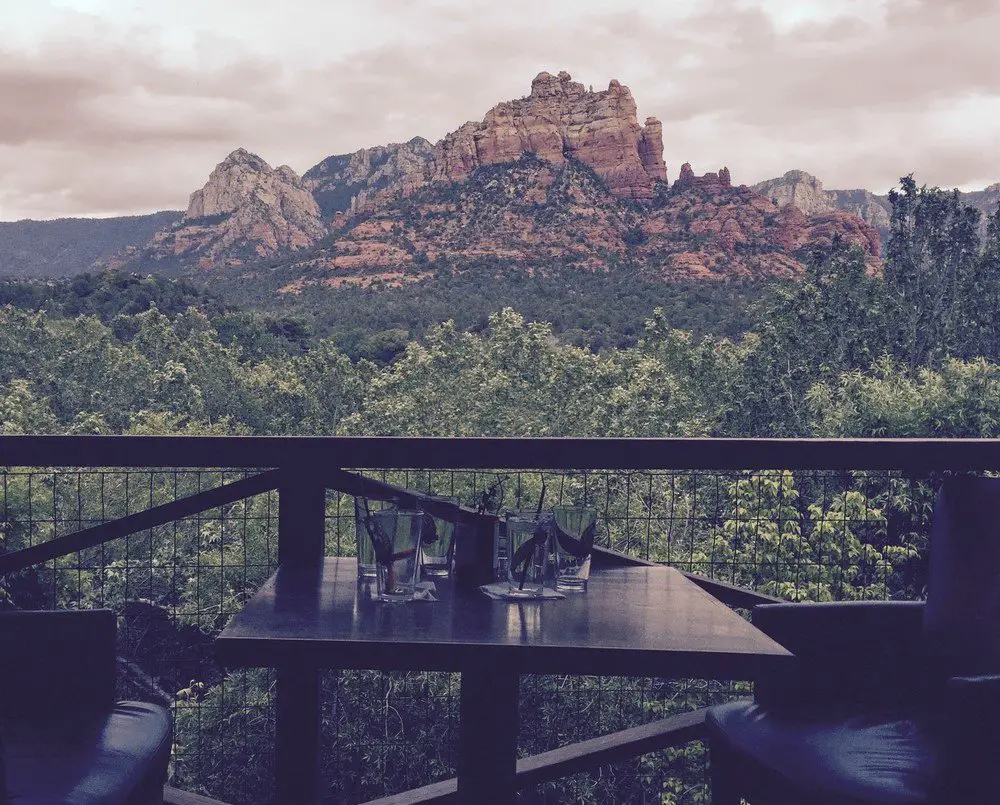
I think this is a good place to relax and recharge before the next batch of national parks in California. There are plenty of great guesthouses like the Sedona Cathedral Inn and the Las Posadas Inn,
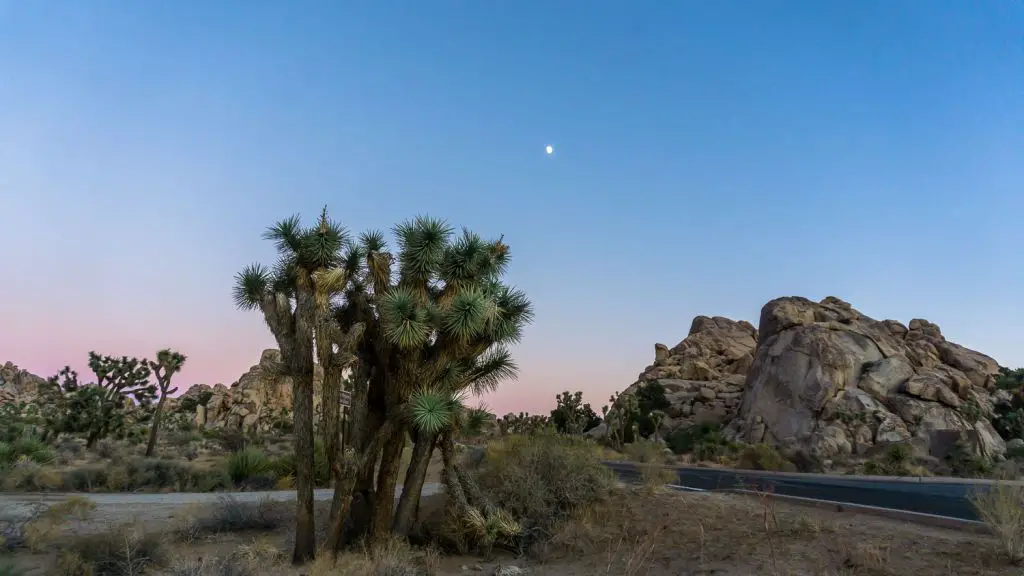
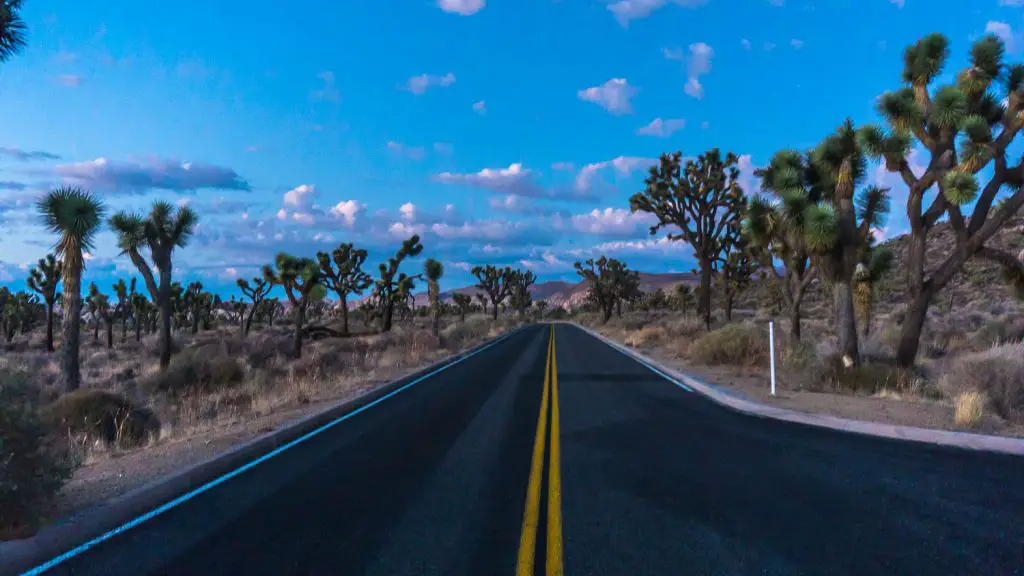
Day 12-13: Joshua Tree National Park
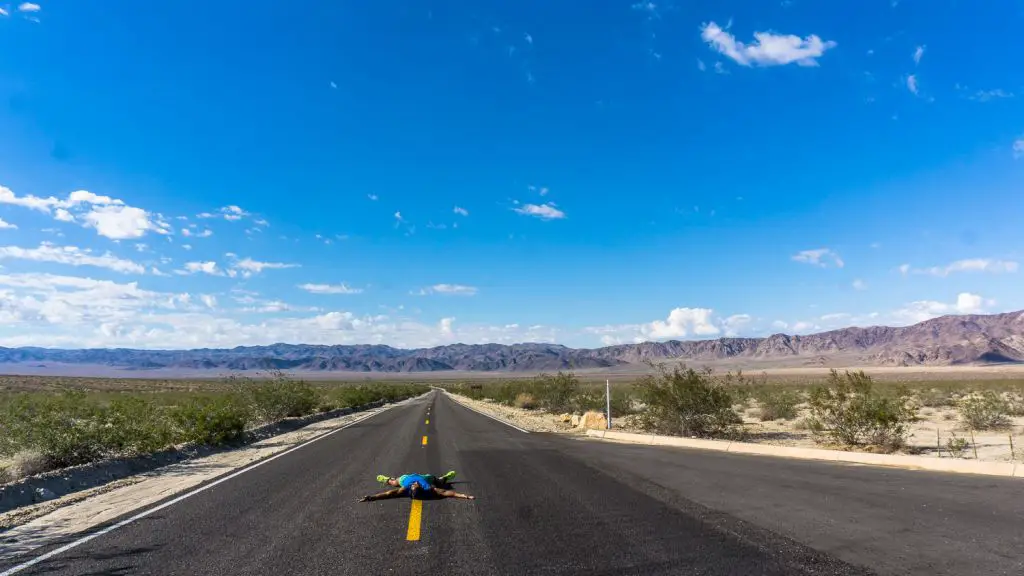
Day 12 begins with a long drive to Joshua Tree California, Follow the iconic Route 66 until you get there. The drive will be 5-6 hours which means you should arrive at Joshua Tree before sunset.
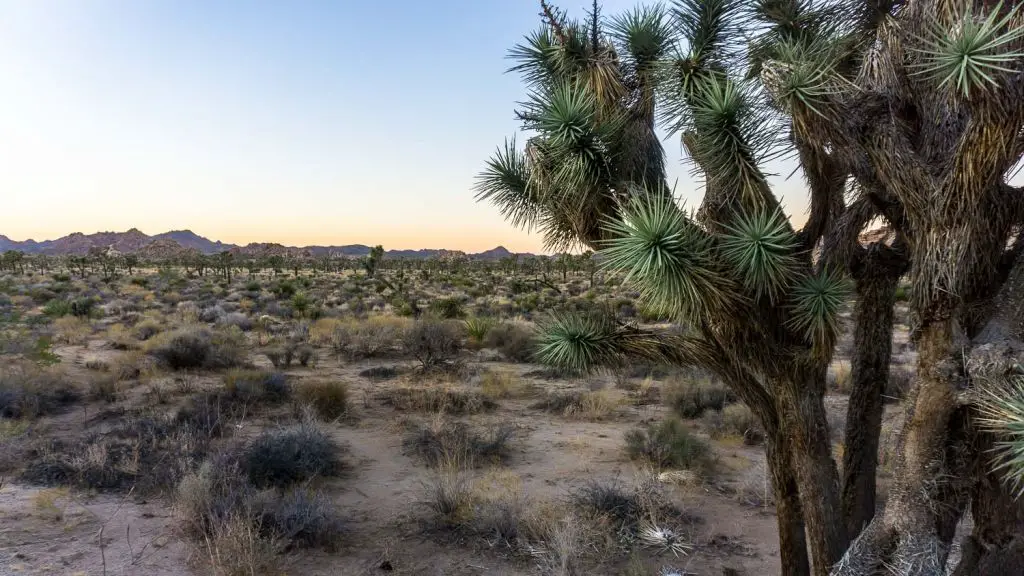
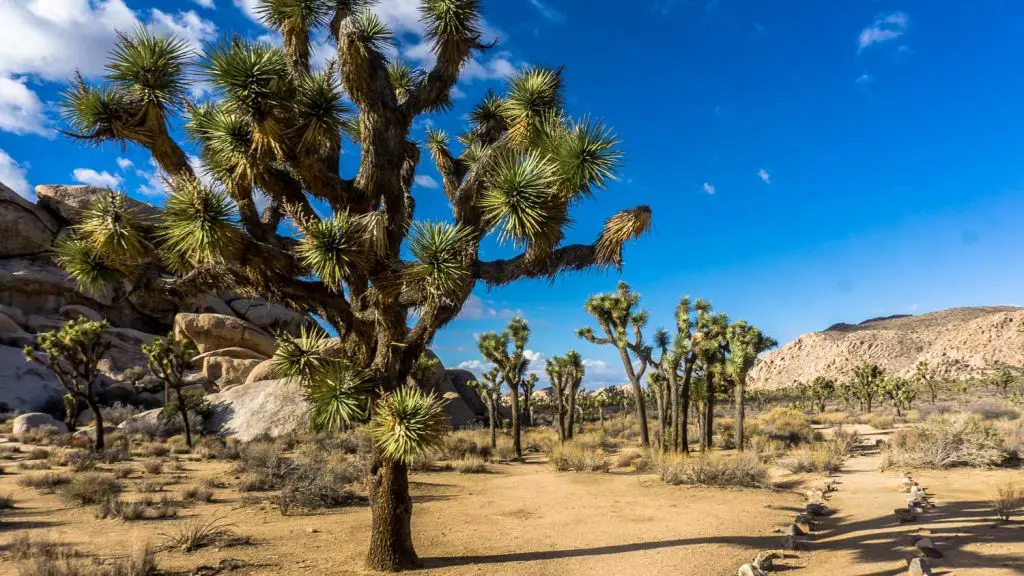
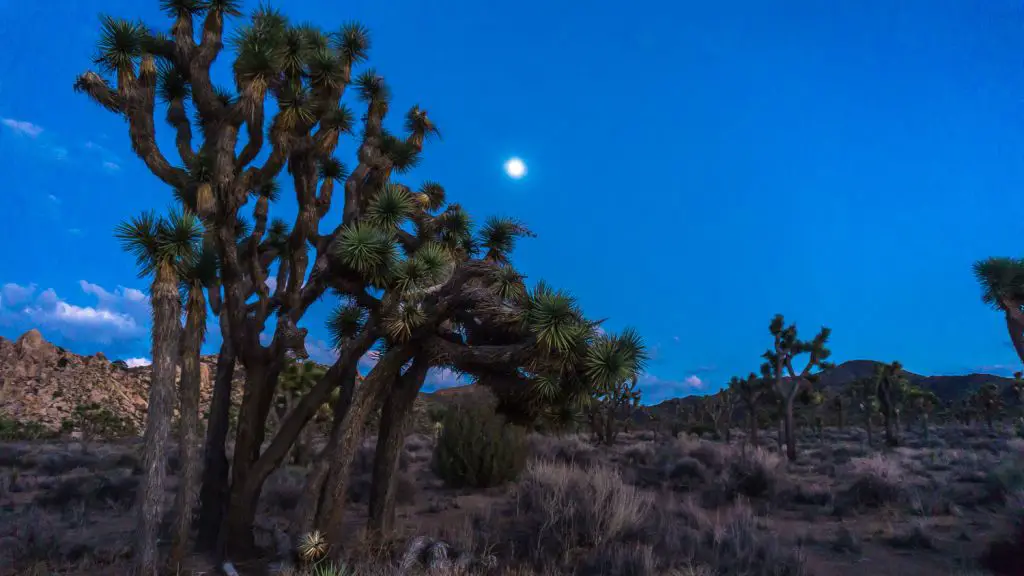
Joshua Tree National Park is a landscape rich with beauty and plenty of adventure. For those looking to fall off the map or get a little lost, whether in thought or in destination, Joshua Tree has this in excess. It is one of the most popular parks and it’s easy to see why.

It’s home to the famous Joshua tree, which grows plentiful among the otherwise baron High Desert terrain. The plant’s name is said to have come from a group of Mormons who were traversing the High Desert in the mid 19th century. The shape of the tree reminded them of the Biblical tale of Joshua, as the branches seem to mimick his motion of reaching his arms to the sky in prayer.
An Instagrammable Park
Nowadays, Joshua Tree is the de-facto National Park for the Instagram generation. The Joshua Trees, perfectly arranged boulders, and natural landscapes make for the perfect backdrop to have eclectic photoshoots embracing their inner hippie haute lifestyle. It’s no surprise that the Coachella festival is next door. I can’t compete with the cute blondes and their white vintage dresses posing next to a Joshua Tree but I will take a picture the old school way and put them up on my travel blog.

Whether you’re looking to become the next influencer, or just take regular photos (and maybe post them on Instagram), it is difficult to take a bad photo in this park.
Staying in an Airstream Airbnb
While looking for accommodations in and around Joshua Tree, I quickly ruled out hotels as there is nothing inside the park, and the nearby hotels were mediocre at best. Airbnb is my preferred way of travel and oh my goodness does the Joshua Tree area have some absolutely stunning options for the wanderlust deprived traveler.
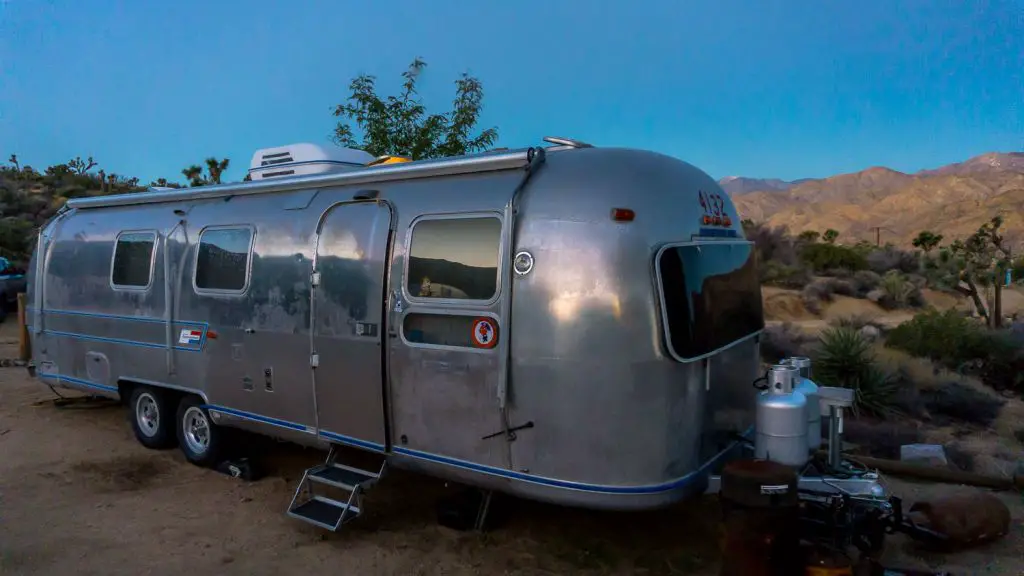
What caught my eye immediately were the Airstreams that have been converted into Airbnb rentals. There are a ton of these airstreams in the Joshua Tree area for rent, along with trailers, RVs, and other van type hippie style accommodations. It’s comical to think that back int he 60s, people staying in Airstreams were considered outcasts and generally strange people in society. Nowadays, my millennial brethren will pay upwards of $300 a night for the novelty of staying in one of these things.
For more details about staying in an Airstream, read my Joshua Tree and Death Valley post in detail!
Day 13: Joshua Tree Full Day Itinerary
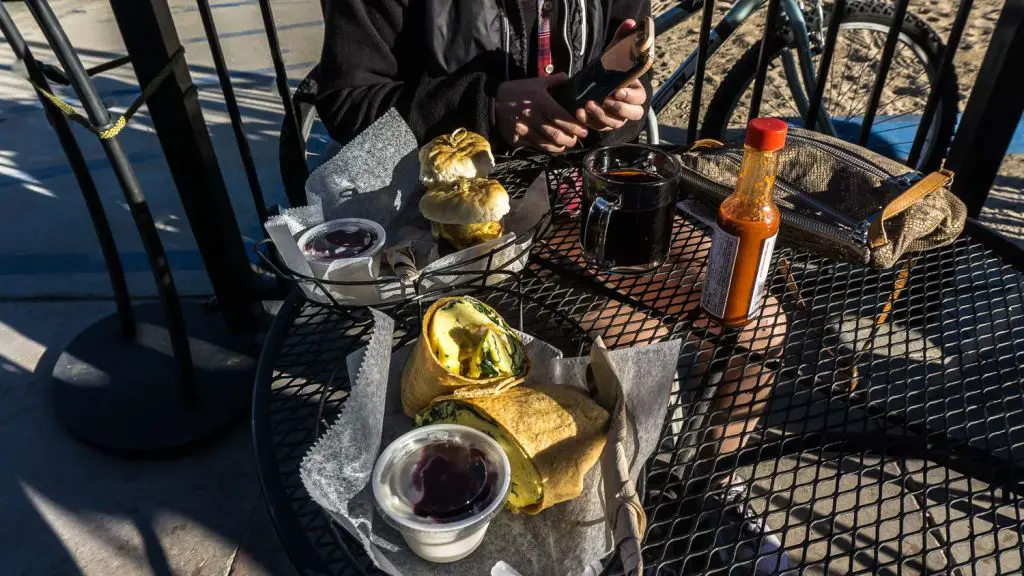
In addition to exploring the park the previous late afternoon, I dedicated an entire day today to exploring Joshua Tree. We woke up before dawn to witness the sunrise from our airstream trailer (which was epic). We went to breakfast at Crossroads breakfast for a delicious breakfast, got a breakfast burrito to go for our lunch, and made our way to the entrance of Joshua Tree at 8am.
Joshua Tree National Park has one main road that goes from the west entrance to the south entrance. Most of the main sights are along the main road, or a short drive on a smaller side road. I wouldn’t call many of the main stops “hikes”, but rather trail-walking (1 to 2 miles round trip) along mostly flat and comfortable roads. We focused our day on the hikes around the park. There were a few sights I wish I had visited like Key’s Ranch and the abandoned mill but next time!
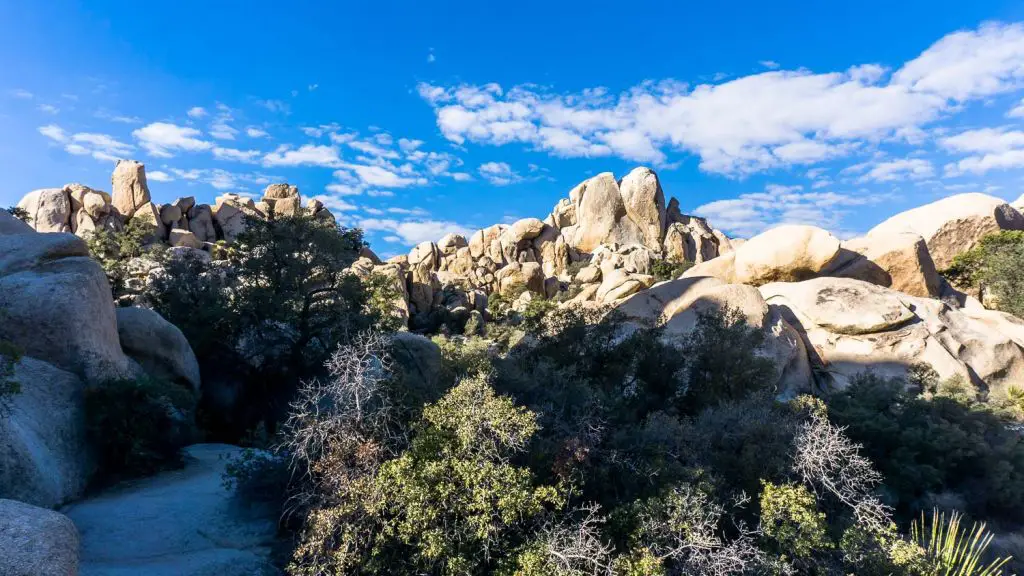
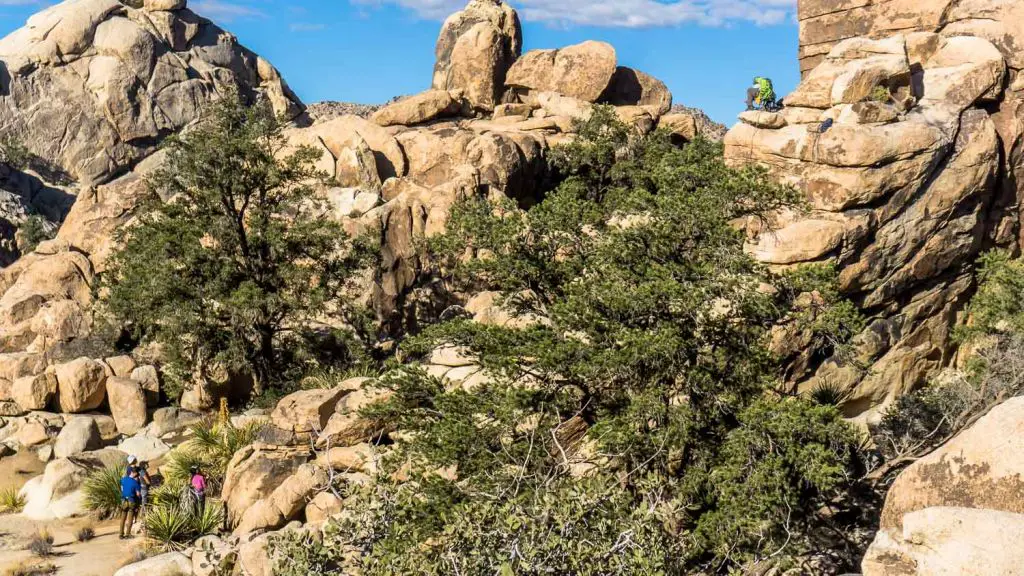
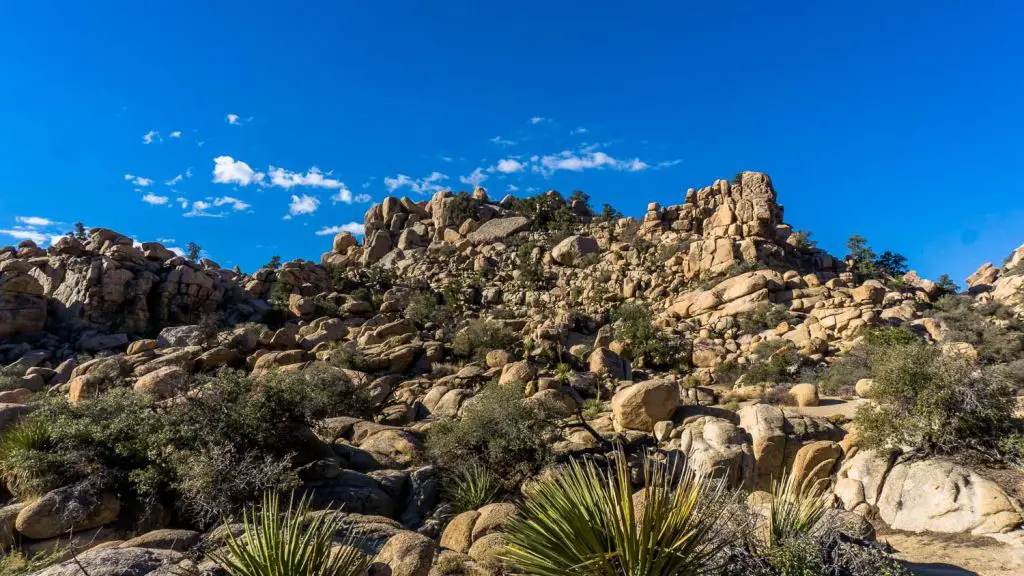
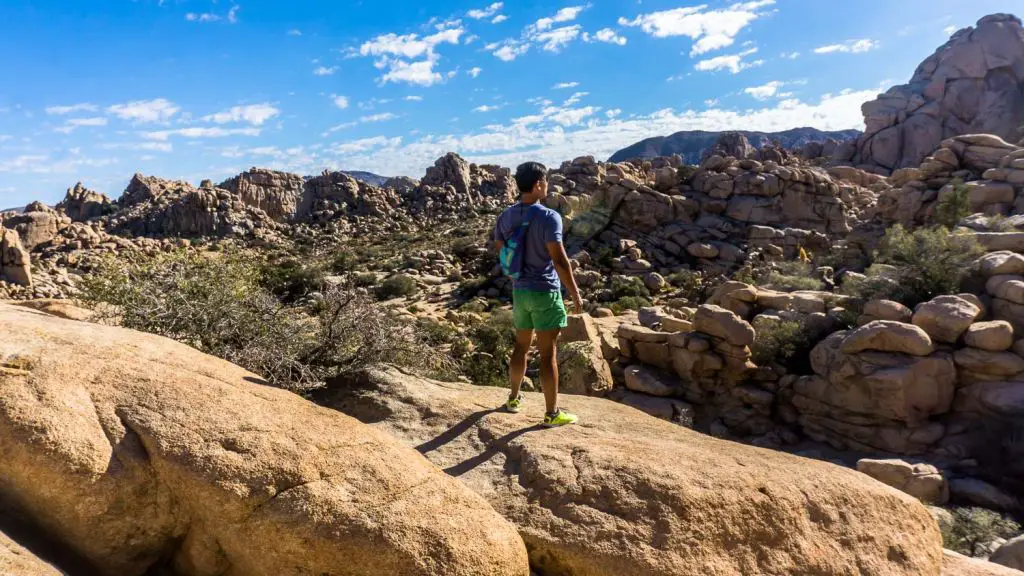
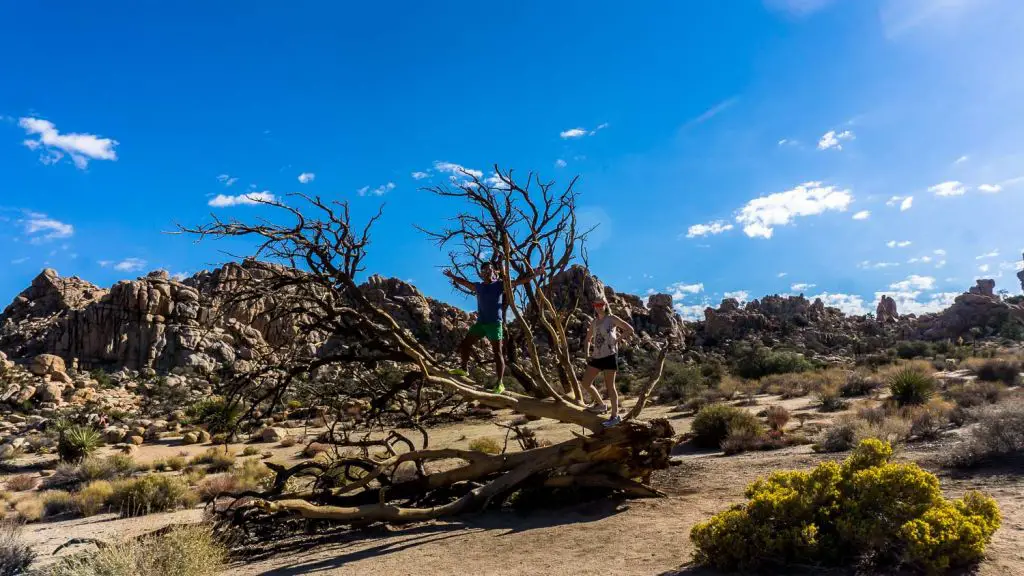
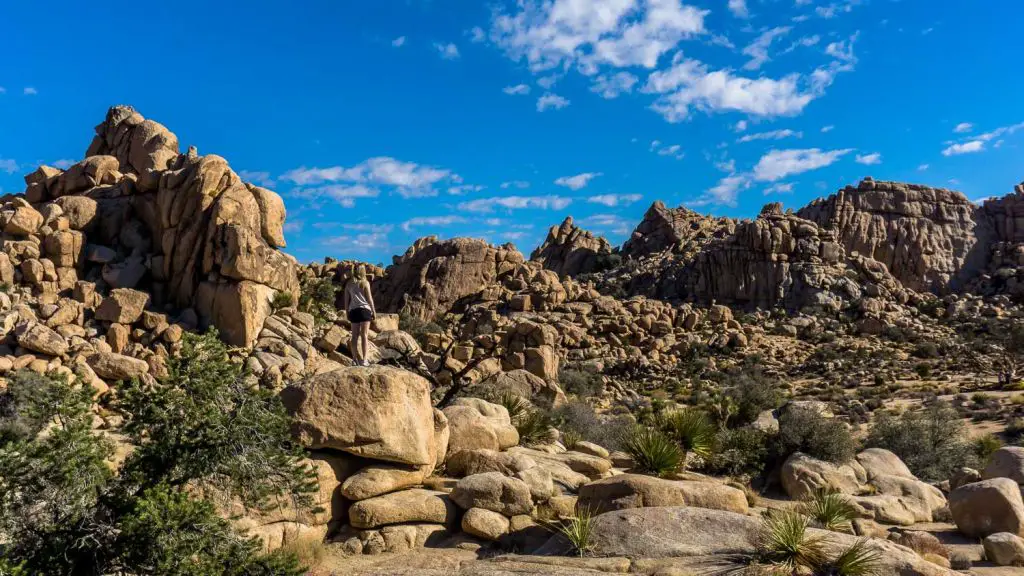
Hidden Valley – 8:00am to 10:00 am
Driving in from the main west side entrance, you’ll see Hidden Valley as one of the first main stops along the main road. The trail is located opposite the Hidden Valley campsite where we saw loads of people with their tents and RVs camping in the park. What a great place to camp!
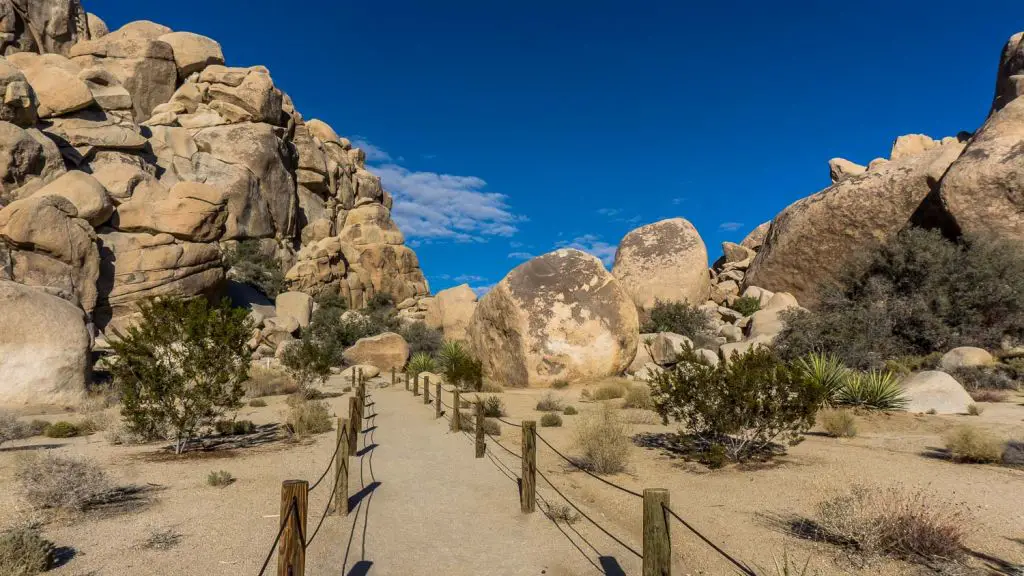
The hike itself is just a 1 to 1.5 mile loop and is mostly flat. As such, this trail attracts many visitors so we decided to come here first thing in the morning to avoid the crowds.
Once you have crested the ridge you will feel totally isolated from the humming roadway. Next, you’ll enter Hidden Valley and be treated to beautiful rock towers and cliffs on every side. Made of monzogranite rock, these formations are the most well known part of the park! They where formed over 100 million years ago when magma cooled into monzogranite beneath the surface of the earth.
There is an abundance of Joshua Trees here so any picture you take will likely turn out fantastic.

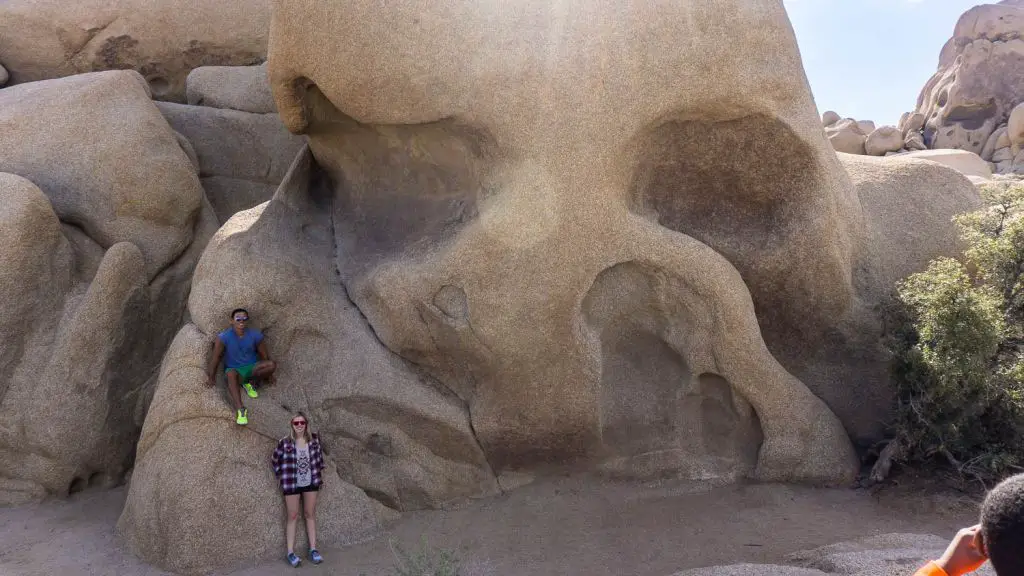
Jumbo Rocks/Skull Rocks – 10:00am to 12:00pm
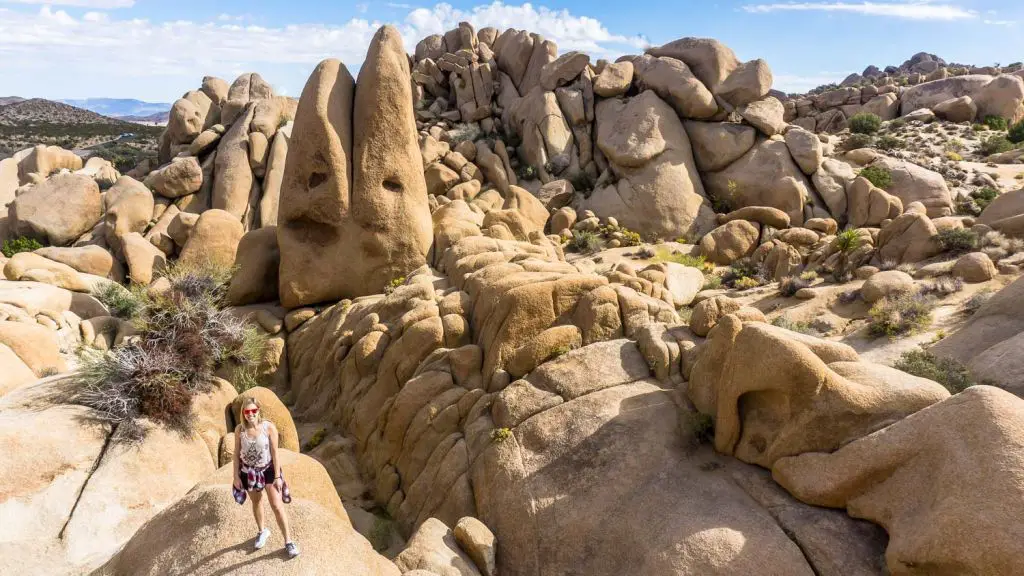
Jumbo Rocks starts off with a marked trail but like most hiking trails in Joshua Tree, it turns into a choose your own adventure type hike. A lot of the hikes involve climbing the rocks in some capacity and I just chose which rock looked the most climbable. The rocks here are incredibly grippy making it easy to climb with even tennis shoes. Any problems that arise normally do not come with climbing up, but with climbing down! It is more difficult and scarier to come down!
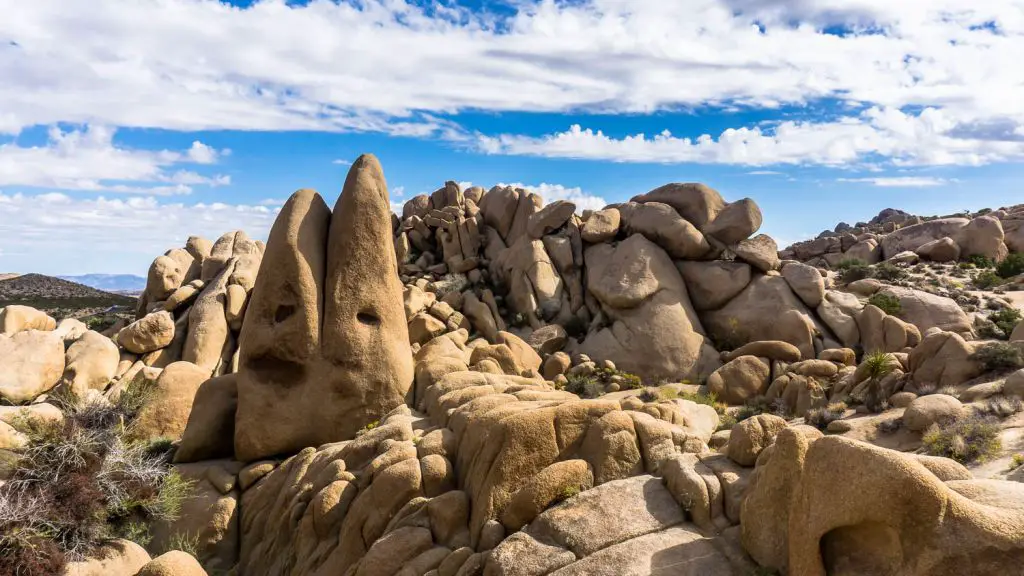
Jumbo Rock and Skull rock are located next to each other and are one of the highlights of the park. Like its name, Jumbo rocks is a formation of larger than normal rocks and skull rock is simply a rock shaped like a skull.
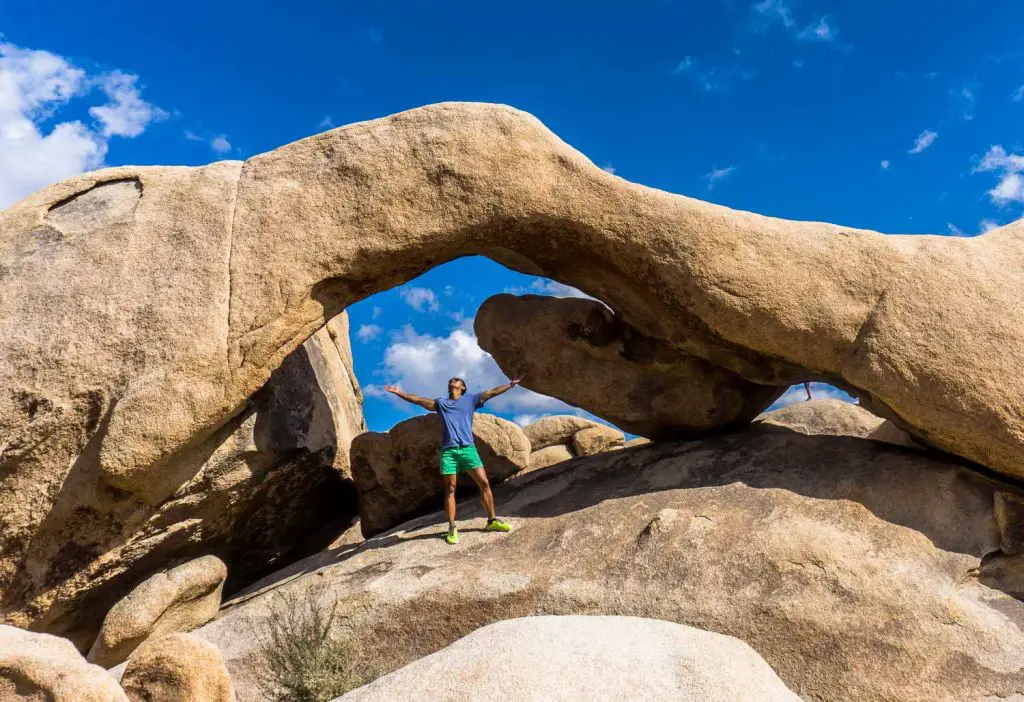
Arch Rock – 12:30 pm to 1:30 pm
Following the main road, the next stop is Arch Rock. It is located at the White Tank campground (not labeled on any of the official maps). It is a short 0.5m hike to the arch rock. We also had lunch here which was a treat.
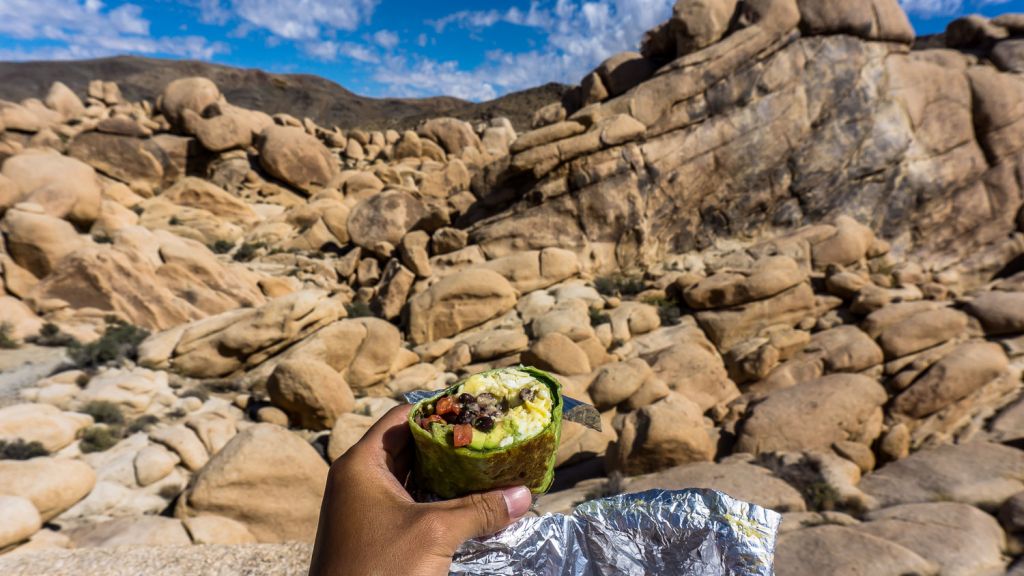
As the name suggests, the sight to see here is the arch rock formation here. Great for pictures! I also climbed on top of the arch which is a much scarier experience than it looks.
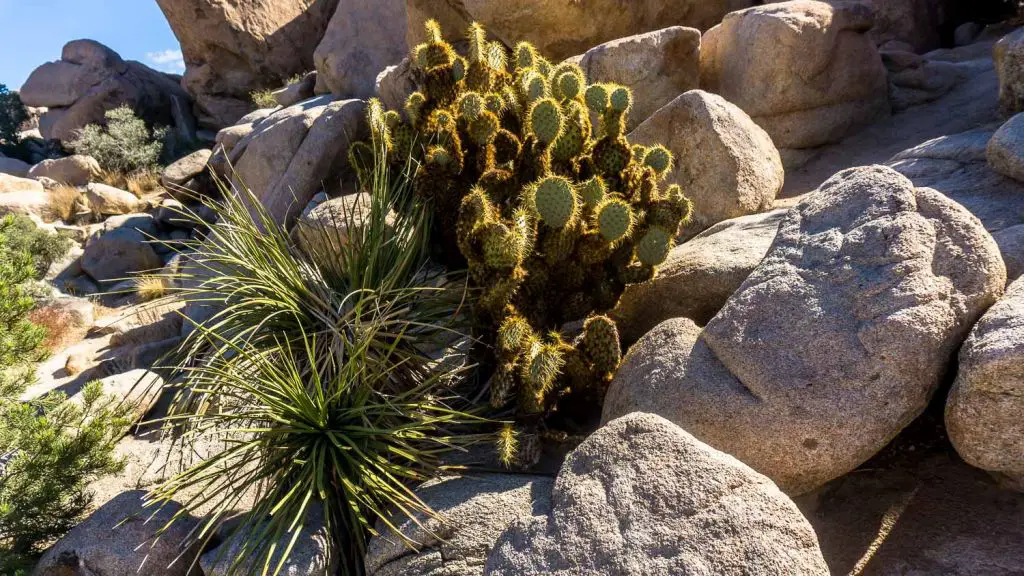
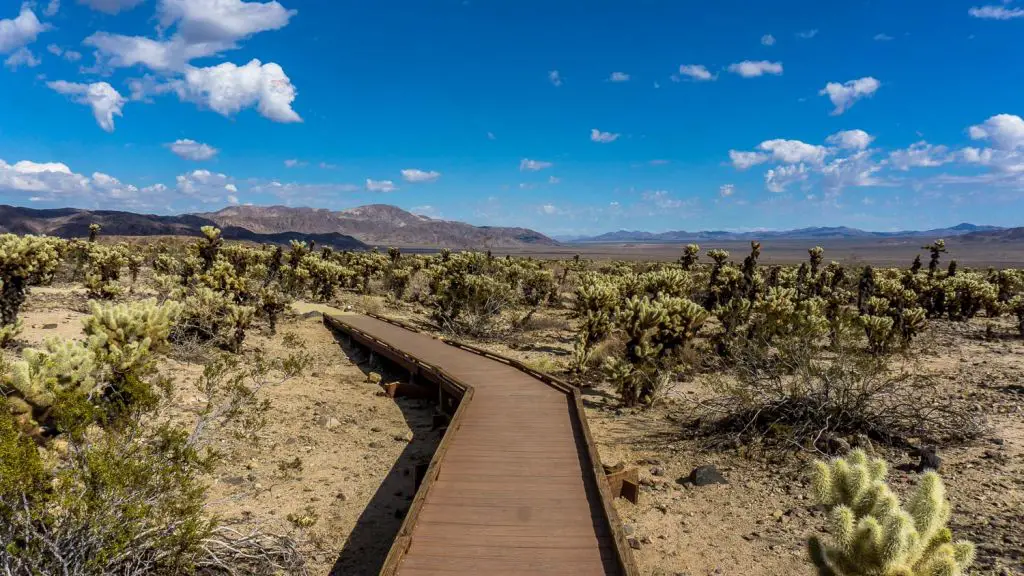
Cholla Cactus Garden – 2:00 pm to 2:30 pm
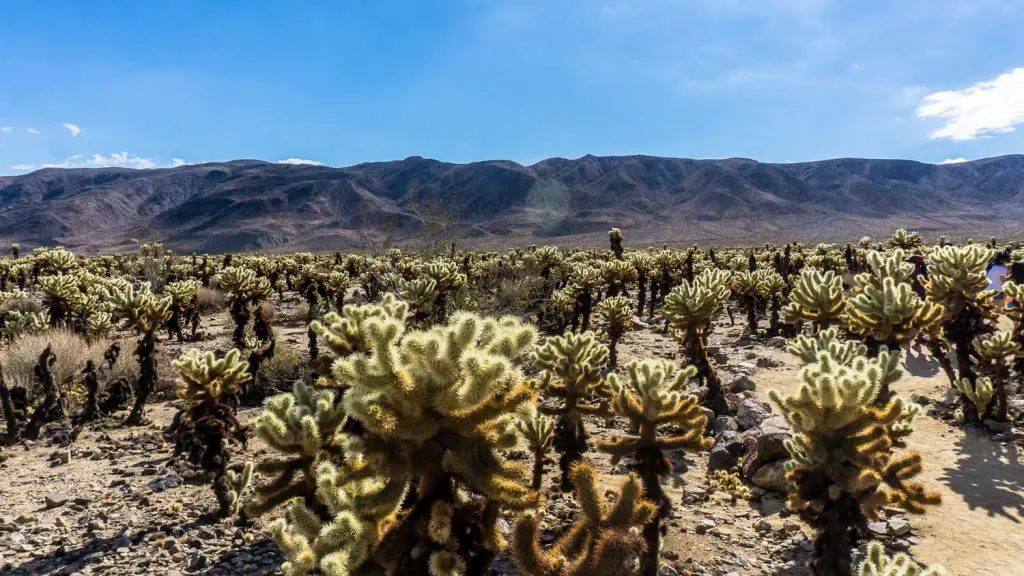
Located near the south entrance of Joshua Tree National Park, the cholla cactus gardens is a one of a kind garden of cholla cactus where the upper Mojave desert and lower Colorado desert merge.
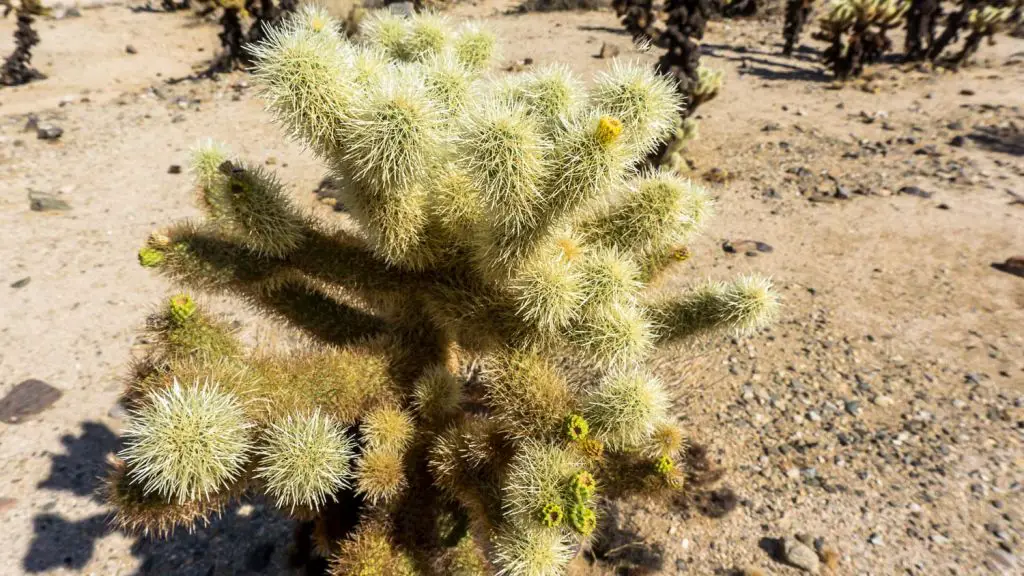
They are everywhere. On both sides of the road. There is a designated area with a 1/4 mile loop on one side of the road, which I highly recommend sticking to. We decided to be renegades and go to the other side of the road to avoid the crowds. These cactus might look cute and unassuming but they are the complete opposite.
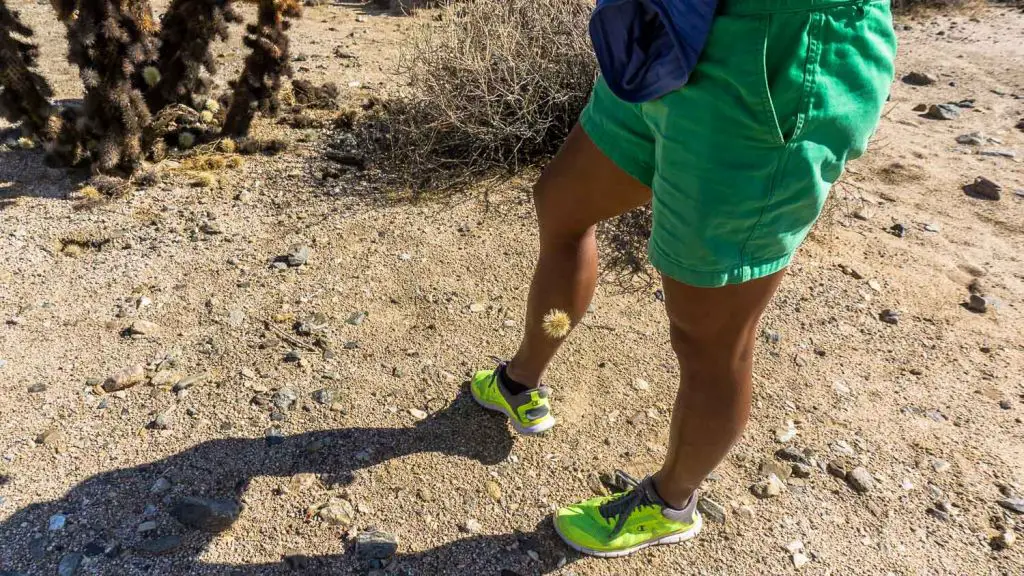
While walking along the cactus, I felt something on the back of my shoe and my natural inclination was to brush it off. Not thinking it could be a rogue cholla cactus, I somehow swatted the cactus onto my calf! I was shocked! It didn’t actually hurt while it was on my leg but it did not want to come off my leg. Pulling on it was extremely painful and felt like it made it just sink into my flesh more.
In the end, the trick is not to panic, take two rocks, and give one hard pull. It will be painful, there is no way around that, but it will come off.
Cottonwood Springs – 2:30 to 3:30 pm
As evidenced on the map, most of Joshua Tree’s most iconic spots are on the west side in the upper Mojave desert. This is where you see the big rocks and clusters of Joshua Tree. The eastern side is a totally different landscape, taking on a more arid desert like feel similar to what we’d see in Death Valley. There are not many stops to be made here besides a few lookout areas.
This area also sees far less visitors as traffic was almost non-existent.
Hall of Horrors – 4:00 pm to 4:30 pm
Hall of Horrors is a group of rocks across the road from Saddle Rocks which are arranged in parallel fashion forming a series of “halls”. This is a fairly popular area but it holds large numbers of people fairly well with the various faces of the formations acting as a natural buffer. Whatever sort of climbing you’re looking for, be it moderate cracks, difficult sport routes or even runout slabs look no further.
Keys View – 5:00 pm to 6:30 pm
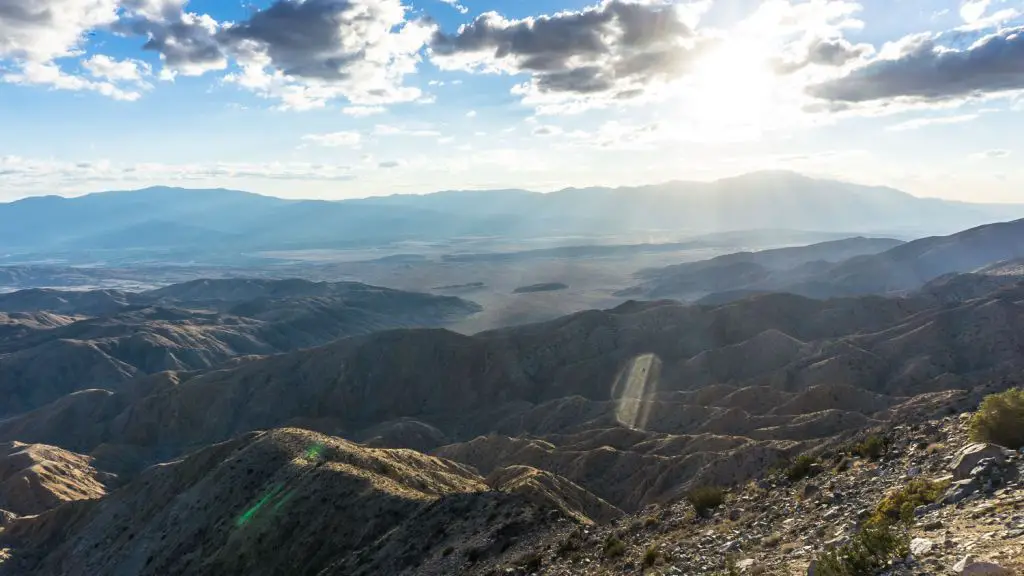
For sunset, I decided to head up to Keys View, one of the highest and most popular viewpoints in Joshua Tree. You can even see Palm Springs and Coachella from here. The crowds all came in for sunset as the sun sets directly in front of the viewpoint here.
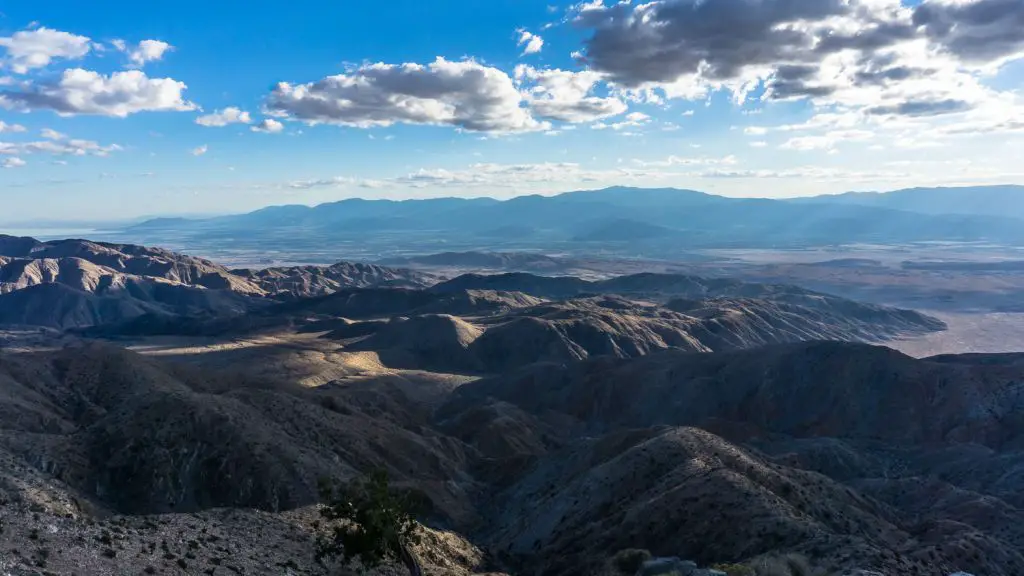
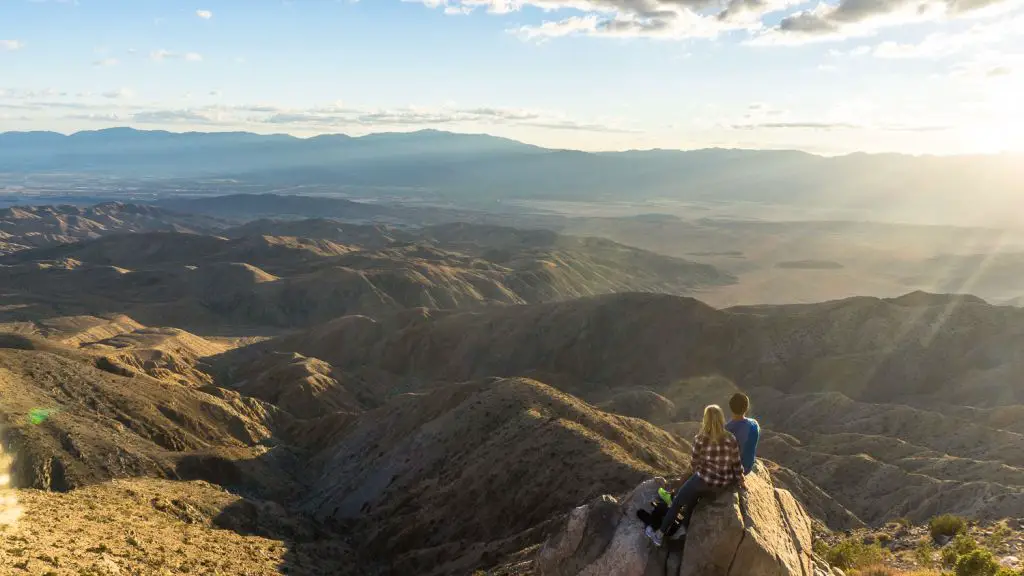
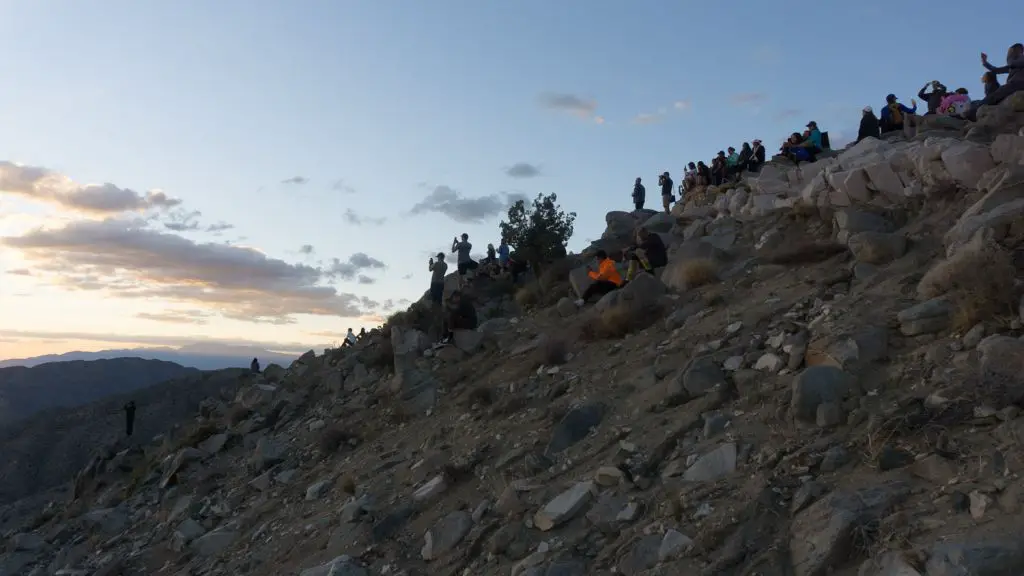
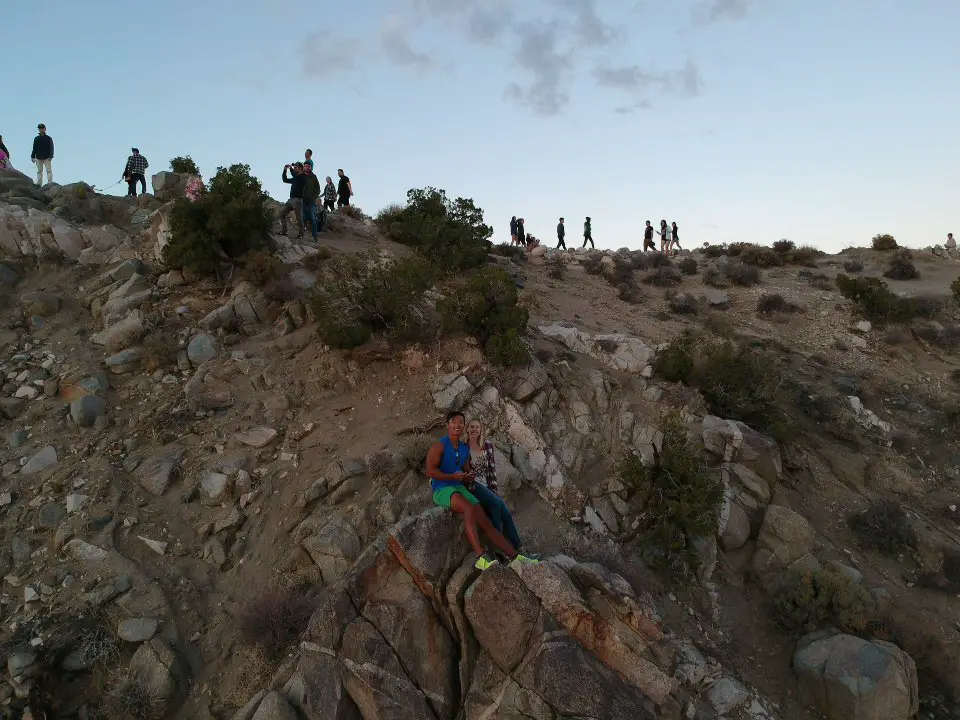
There are no Joshua Trees around Keys View however, and I think the sun setting over a forest of Joshua Trees perched up on a high boulder is actually more picturesque than Keys View. Nevertheless, we very much enjoyed this sunset with our bottle of wine.
Pappy and Harriets in Pioneertown- 7:00 to ???
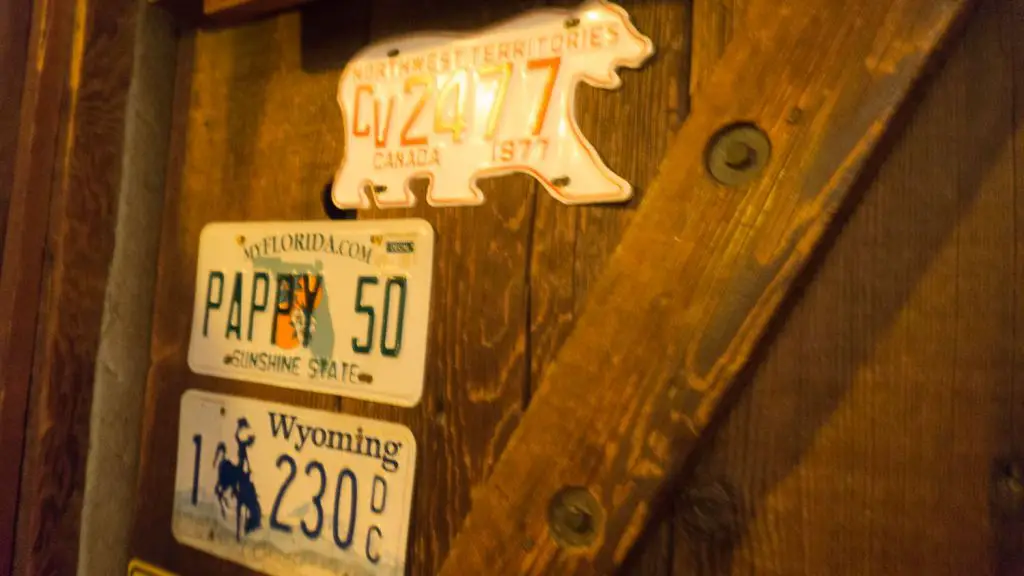
One of the top restaurants that was recommended to us was Pappy’s. No trip out to Joshua Tree is complete without a night at Pappy And Harriet’s. The iconic restaurant/saloon/outdoor music venue has history dating back to the 1940s when the original building (and the surrounding Pioneertown) was designed to be a 1800s frontier set for Hollywood movies.
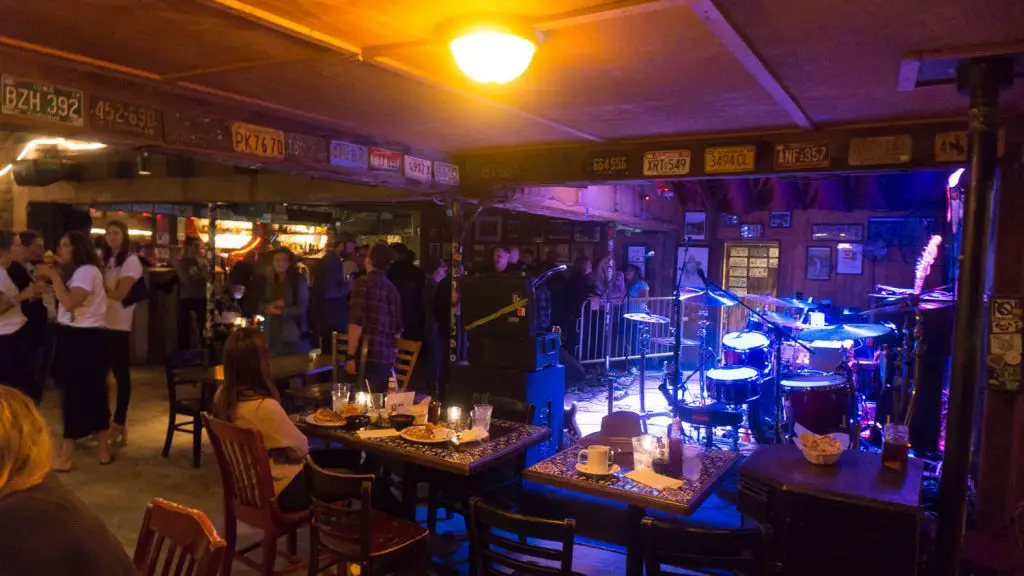
Nowadays, it’s no longer used as a film set but is a restaurant and live music bar that welcomes all travelers and locals alike. They had decent food here and a wide selection of beers. It seems like in a town as small as Joshua Tree, Pappy’s was the main spot in town for everyone to congregate on a Friday and Saturday night.
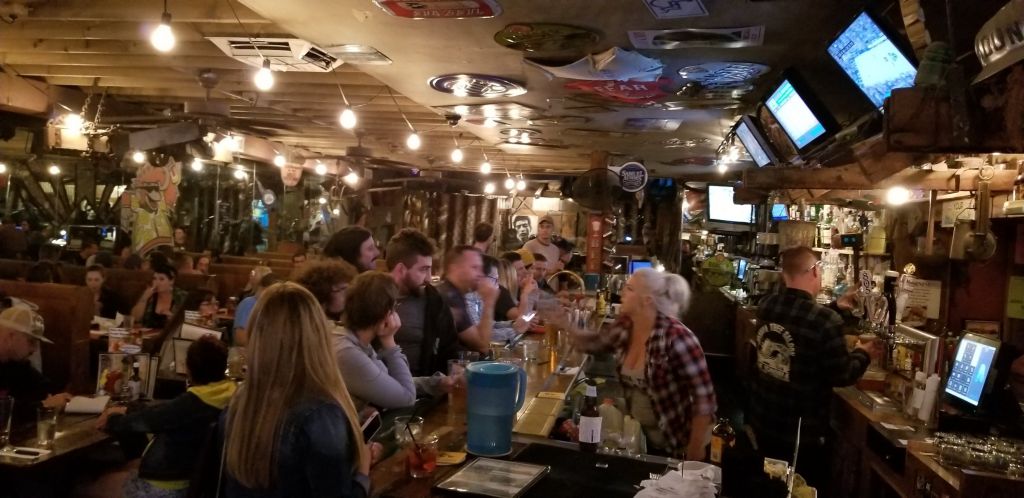
The previous night we ate at the other famed establishment, Joshua Tree Saloon. I’d recommend both restaurants but be prepared for heavy, unhealthy, and large portioned American food in these joints.
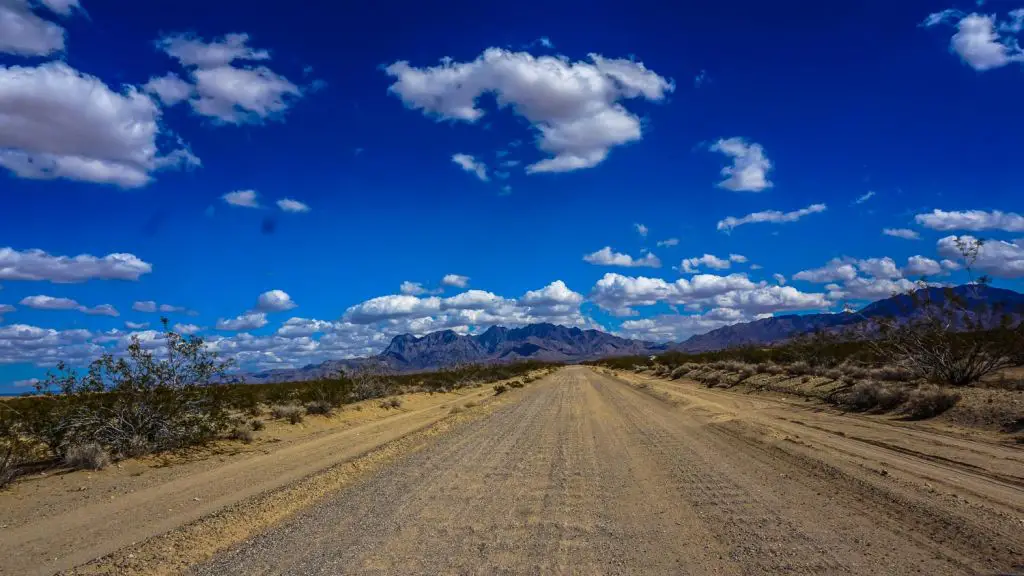
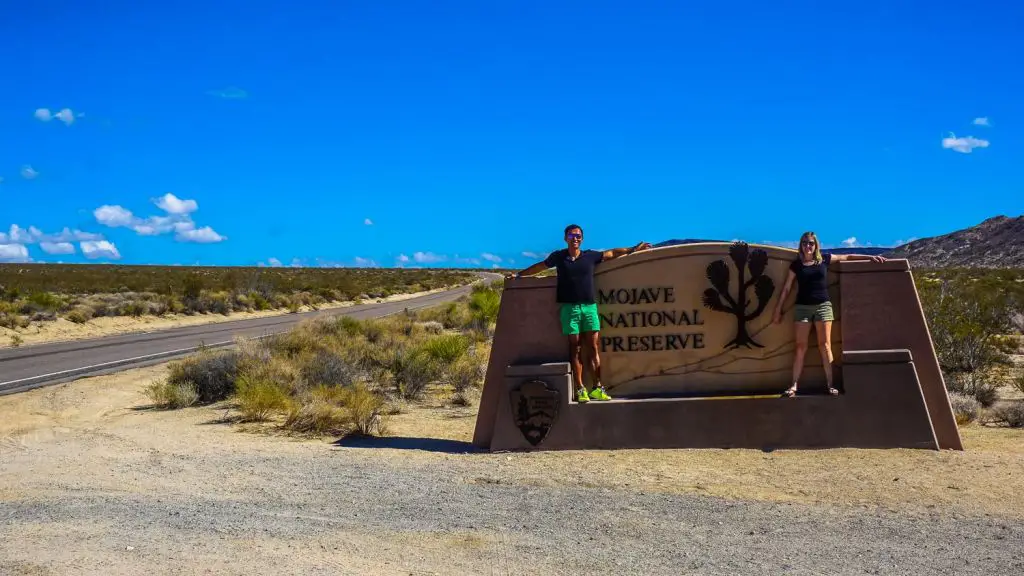
Day 14 Morning: Mojave National Preserve
After a fun night at the famous Pappy and Harriet’s bar in Pioneer Town, we woke up early again to catch another beautiful sunrise over our airstream trailer. Like all our days, we wanted to get an early start on the road as Day 3 included a lot of driving as well as sights to be seen.
We had our breakfast at the Natural Sister’s Cafe which is a popular breakfast cafe for the crowds looking to hike Joshua Tree early. While I’m not a big fan of vegetarian dishes, I needed a slight detox from the heavy meaty food I’d consumed the past few days. It’s strange enough to find a vegetarian restaurant in the middle of the desert but the food here was actually quite good.
From Joshua Tree, it is a relatively straight forward drive to the Mojave National Preserve. We passed through the town of 29 Palms at the northern entrance of Joshua Tree. I’d highly recommend filling up gas here as well as buying any snacks/supplies because it is quite remote going from here and the gas will be much pricier once you do find some.
Kelso Dunes

Arriving at the Kelso Dunes around 10:30, we didn’t have much time to see all the wonderful sights of the park. We chose what I thought is the highlight of the place at Kelso dunes. Like the Mesquite sand dunes we’d see in Death Valley, these are even larger dunes in the middle of the Mojave.
They are almost twice the height of the Mesquite sand dunes and offer views of the entire park. We didn’t have time to hike up to the top because we parked at the wrong area unfortunately but the views and pictures from other people seem fantastic. If you have 2 hours or so, it is easy to summit the dunes and back as the sand is harder than a place like the Sahara.

There is so much to explore here and I think the sunset at the top of Kelso Dunes would have been stunning.
Lunch in Baker, CA
I wish we had more time in the Mojave as there is so much more to explore. The Joshua Tree forest looks incredible, even though we had just been to the Joshua Tree National Park for the days prior. There are actually many more Joshua Trees in the Mojave National Preserve than the park itself!
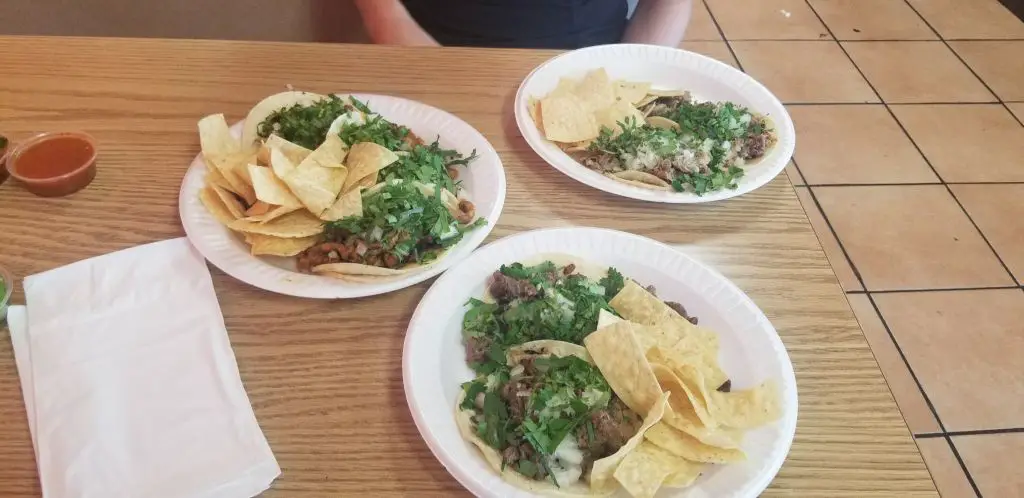
Day 14 Afternoon: Death Valley
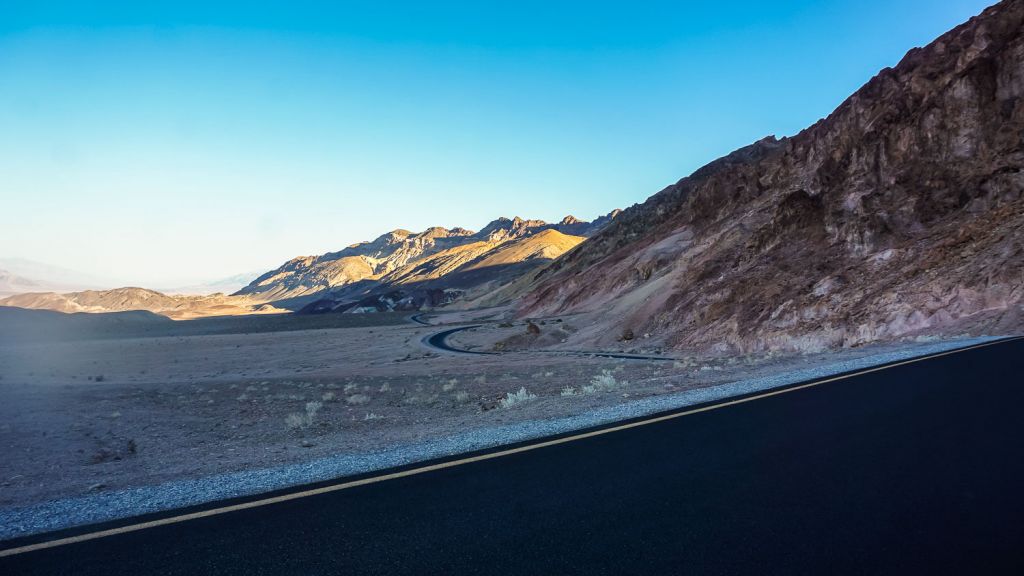
After a delicious lunch of tacos, it was time to head to Death Valley. From Baker, CA it is a two hour drive to Death Valley. Our plan was to spend the remaining hours at the Mesquite Dunes after reading that sunsets here are gorgeous.
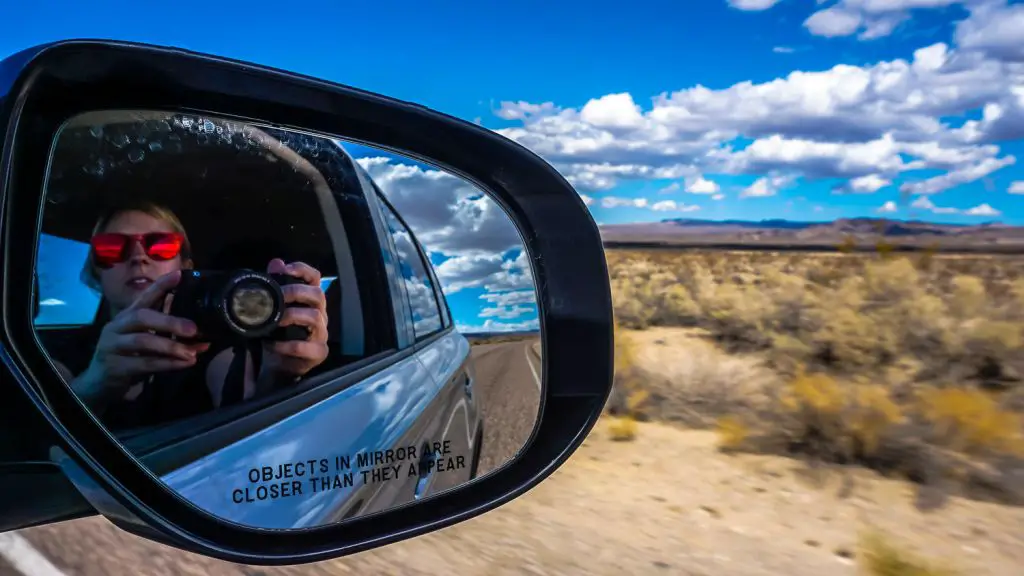
The drive from Baker, CA to Death Valley couldn’t be more beautiful. The drive touches on the outer ranges of Death Valley with towering and steep mountain ranges greeting us the entire way. The road is sparsely used and at times, it felt like I was the only person left in the world.

Describing Death Valley
Describing Death Valley is an essay in and of itself. Most people think of Death Valley as just a really hot place but it is so much more. To summarize as elegantly as possible, it is the ultimate display of nature’s superlatives. Extremes on all ends colliding in one small park in California. From dramatic mountain ranges, to volcanic craters, to rolling sand dunes, to salt flats, to stunning badlands, this park as extremes of all ends colliding in one park. You can drive a few minutes and be in a completely different landscape, all more stunning than the last.
Personally, it reminded me a lot of previous places I’d been to. Namibia’s landscapes really resonate with me here, especially the drive around the Fish River Canyon. Bolivia’s Salt Flats are an obvious comparison to the much smaller Badwater Basin, and Zabriskie Point is so similar to Rainbow Mountain in Peru. Death Valley truly is a mind blowing place.
Where we stayed
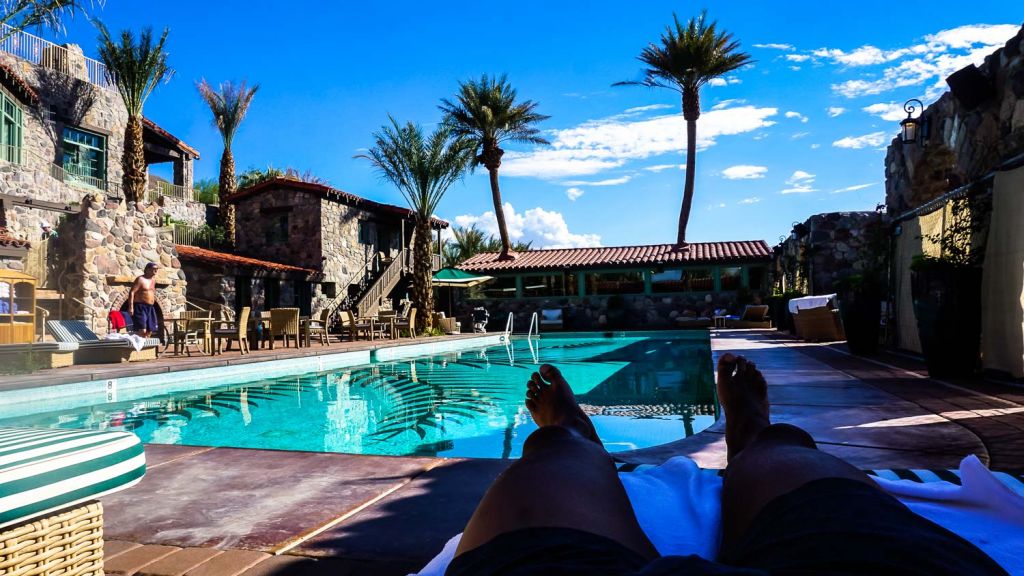
Within the National Park, there are essentially two “villages”, Stovepipe Wells, and Furnace Creek that are more or less just hotels with a gas station. There are only 3 hotels in the entire National Park: The Oasis Inn, The Furnace Creek Ranch, and Stovepipe Wells Hotel. The Oasis and Ranch are located next to each other in Furnace Creek and are owned by the same company.
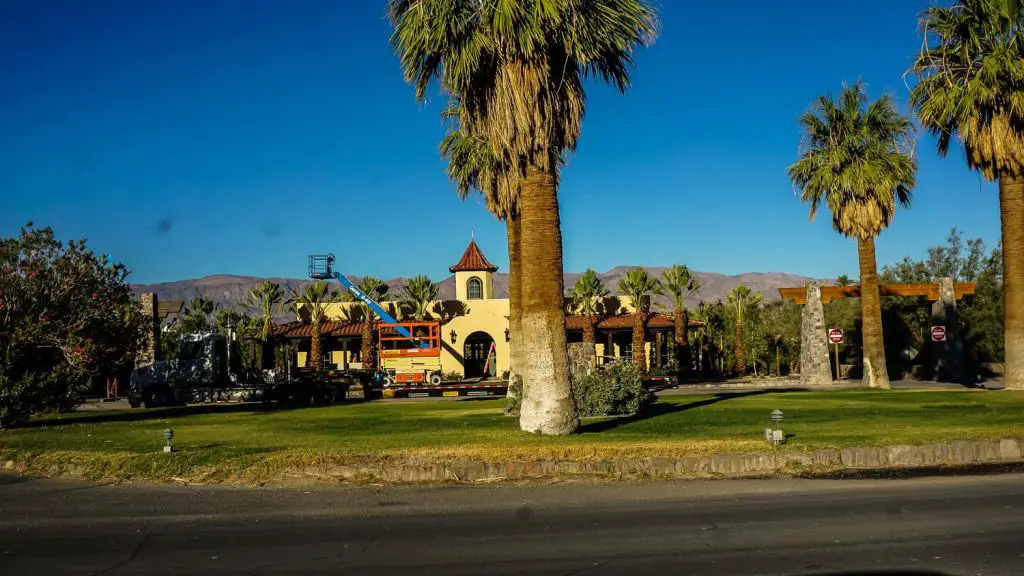
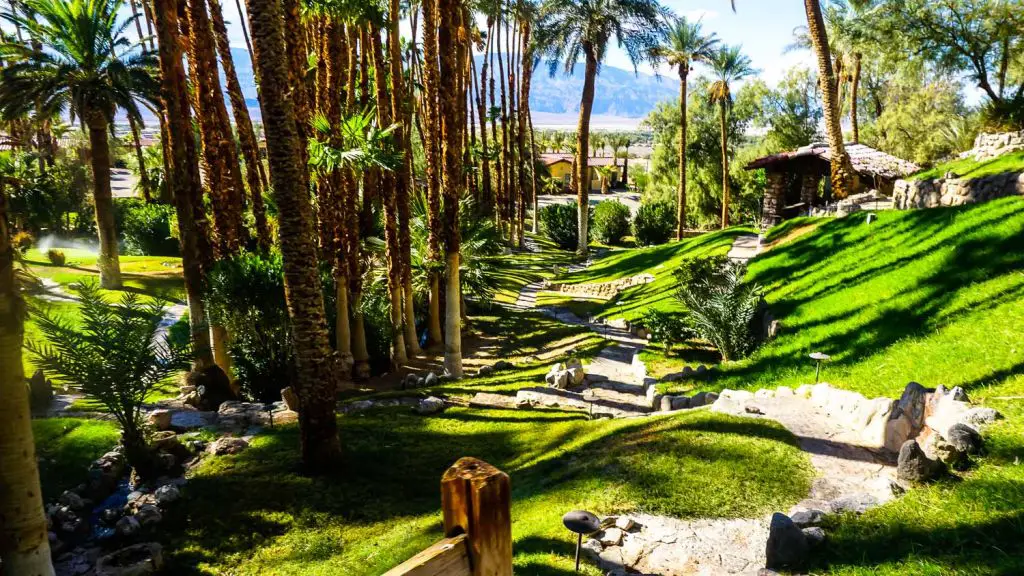

The Oasis Inn is incredibly nice, with high end dining, rooms, and a big pool area. The Ranch is slightly less luxurious but offers everything you need. We stayed at the Ranch as the rooms were much cheaper ($175/night vs $400+ at the Oasis). There are many accommodation options in the towns directly outside the park. Because the park is so big, we wanted to stay inside the park to avoid driving for so long to get in and out every day.
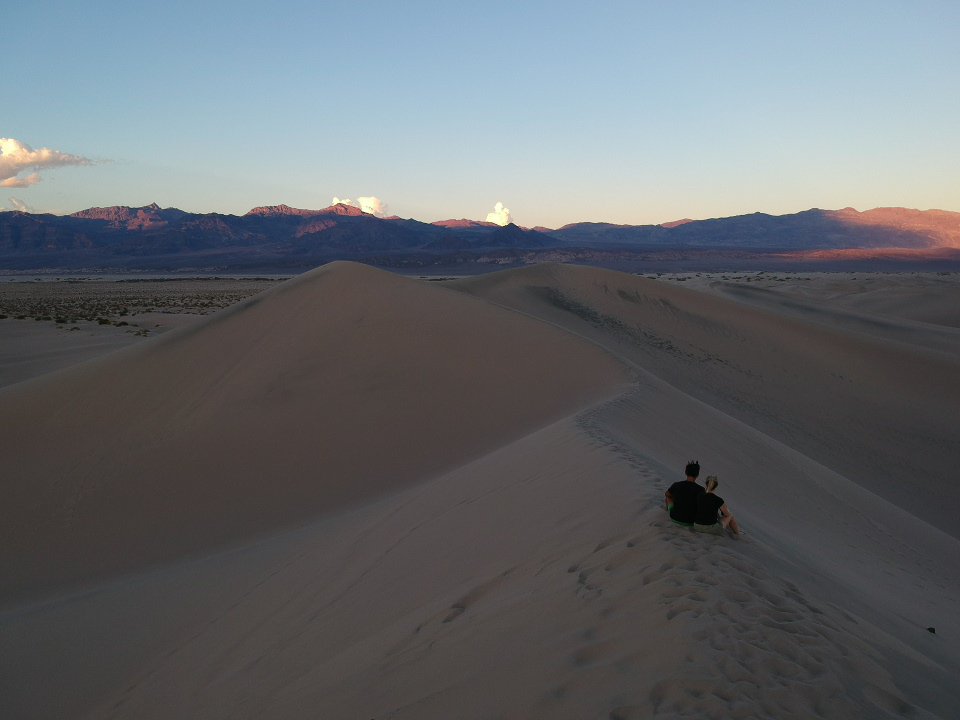
Mesquite Sand Dunes for Sunset – 4:30 pm to 6:30 pm
We arrived at the south entrance near Death Valley Junction around 4pm. The Mesquite Sand Dunes are about 30 minutes inside the park so we drove straight to it. While the dunes are nearly as big or expansive as other deserts I’ve been to like in Morocco, or Egypt, the surrounding landscapes of Death Valley give it that otherworldly feeling.
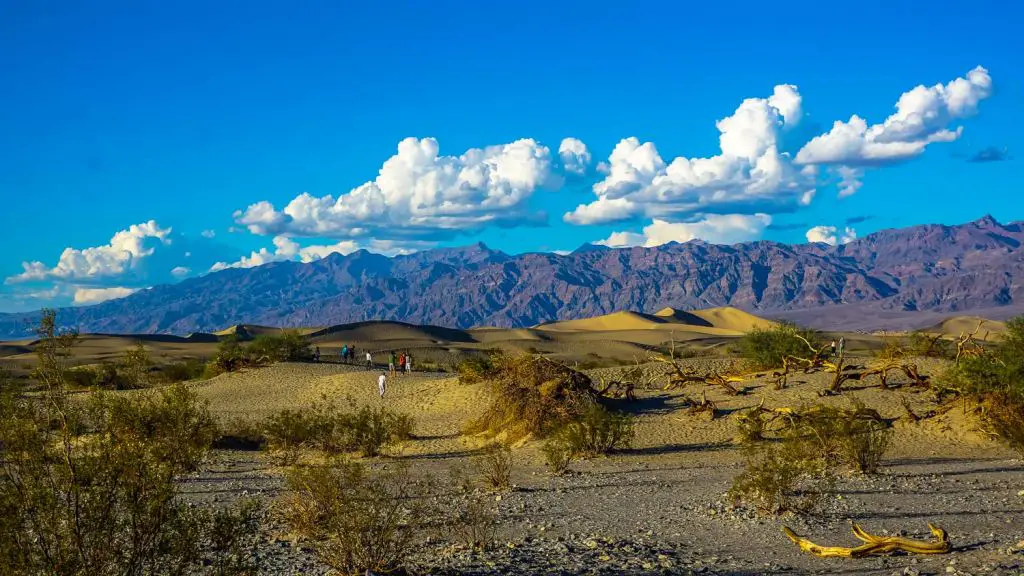

Most people park their cars and walk a few minutes out to snap some pictures. I wanted to hike deeper into the dunes and get away from the crowds. The dunes themselves are not too intimidating. The sand is pleasant to walk on but not sink to your knees soft like the ones in Sossusvlei, Namibia that made climbing them incredibly difficult. The highest dunes here are probably 30m/100ft in height making them totally manageable, especially during the cooler sunset hours.
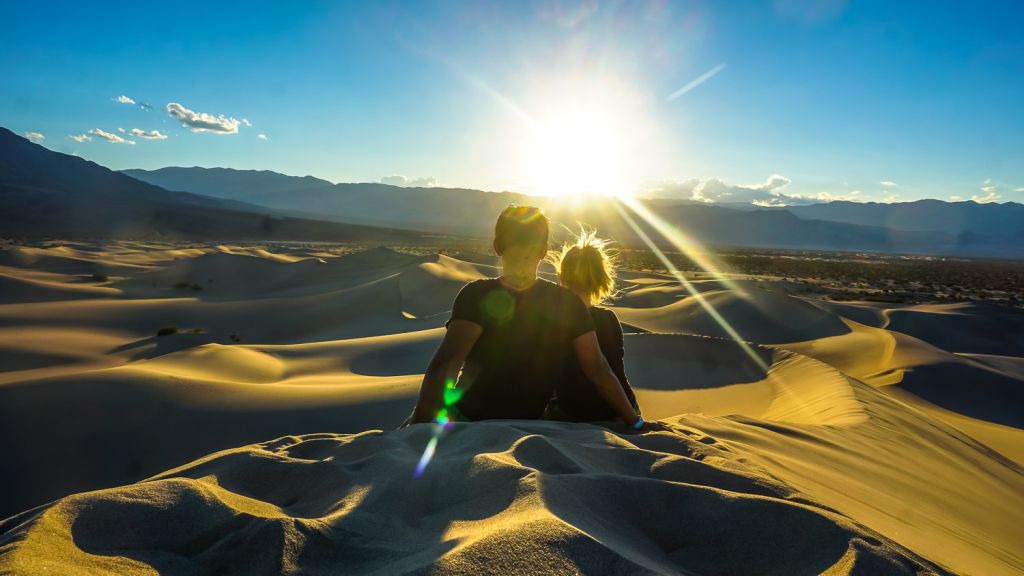
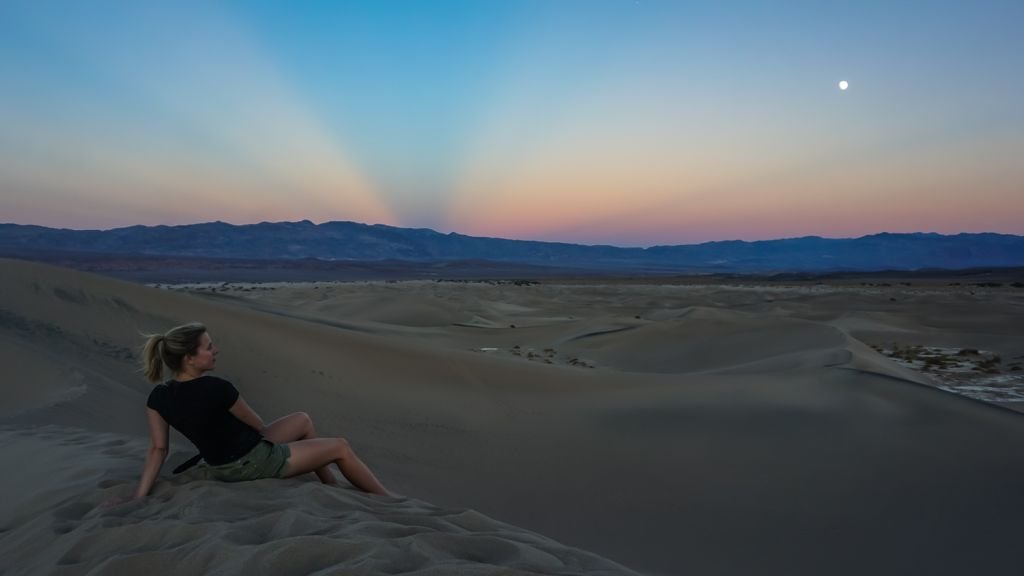
We walked for about 30 minutes until we pretty much got to the tallest dune in the area. We chilled here and watched the sunset over some wine. There was no one around us anymore and the views were totally worth it. As the sun set, the pink aura around the sky gave way to the moon rise which is just an amazing experience made even better.
And finally playing around with my drone yielded some great pics!
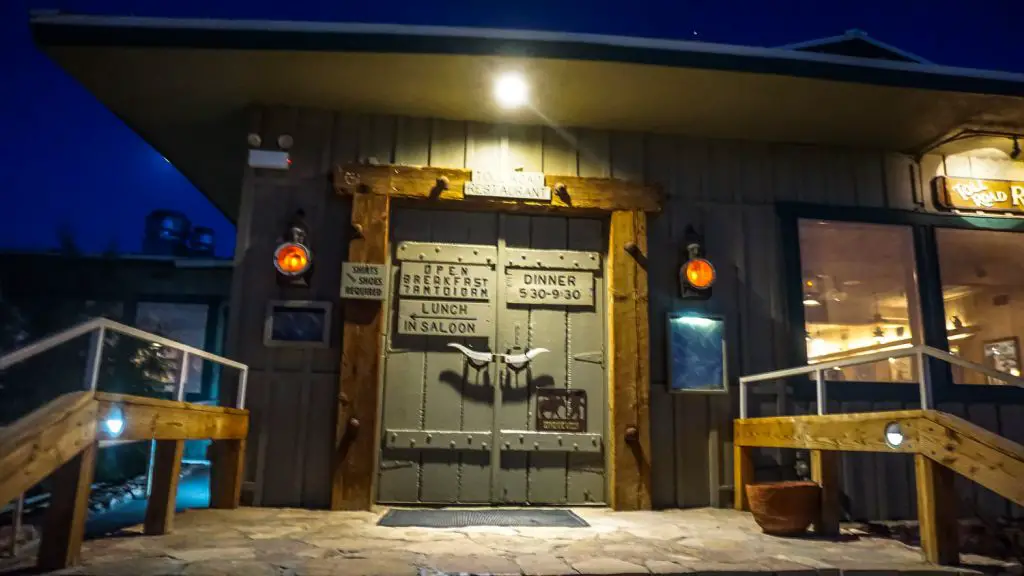
Dinner at Badwater Saloon
The Mesquite Sand Dunes are located next to the Stovepipe Wells Village. We had dinner at the old school bar and saloon here. The food was decent for what you could get being literally in the middle of nowhere. We shared a burger and some local beers before calling it an early night.
Day 15: Death Valley
This day is dedicated entirely to exploring Death Valley. We wanted to get up early enough to see the sunrise at Zabriskie’s Point. As with Joshua Tree, we packed our breakfast and lunch with us in the form of snacks/leftovers from previous dinners.
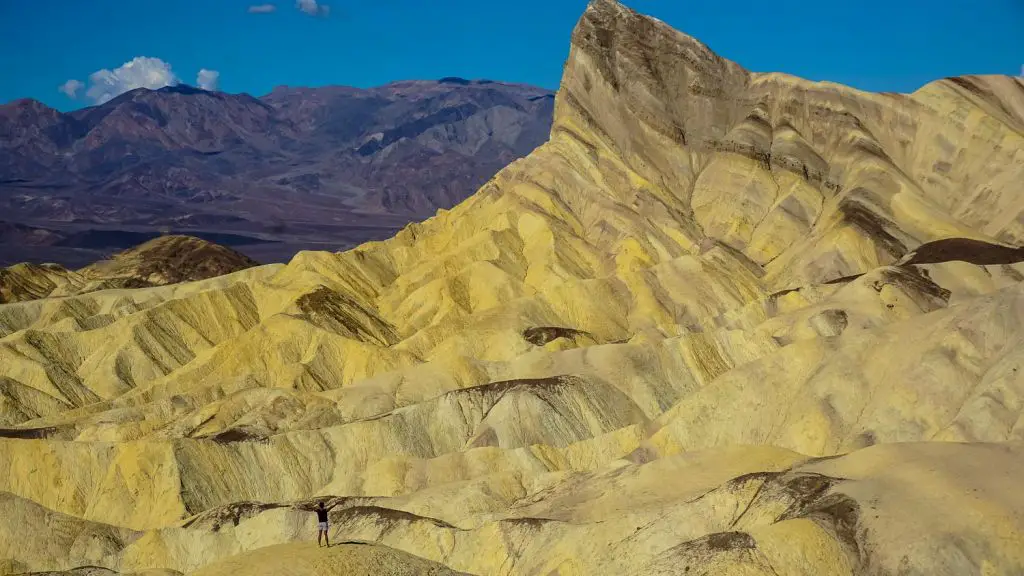
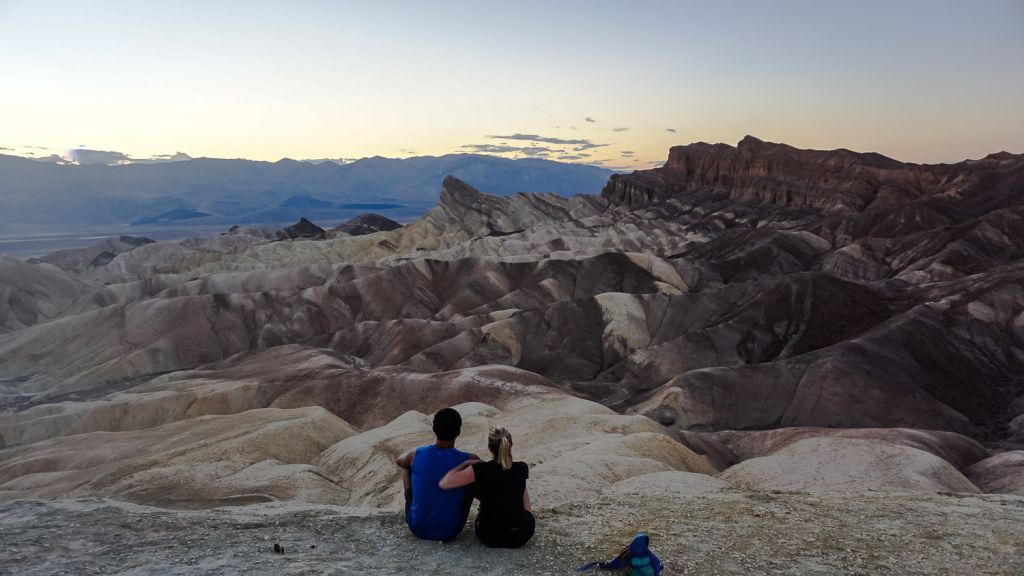
Zabriskie Point and Hike – 6:30am to 10:30am
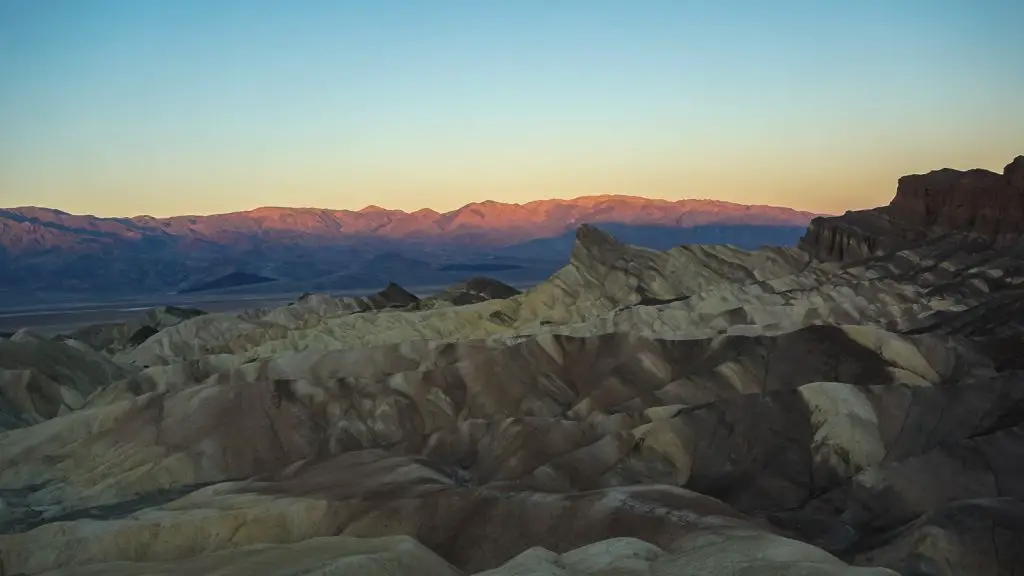
One of the most renowned vistas in Death Valley National Park can be had at Zabriskie Point, which features an impressive nest of badlands. These are heavily eroded and barren sedimentary formations, most famously associated with certain parts of the Great Plains but found in many dry regions of the globe. Set along Furnace Creek, the Zabriskie Point badlands, carved out of mudstone, are particularly scenic against the blank flats of Death Valley and the mountains looming beyond.
Some of Death Valley’s most iconic pictures are taken here. For the sunrise, there were 15-20 people perched at the lookout with their tripods waiting for the best picture opportunities.
After sunrise, I was about to leave until I saw signs near the parking lot for hiking trails. I had no idea you could walk onto these rocks but I’m glad I saw the sign!
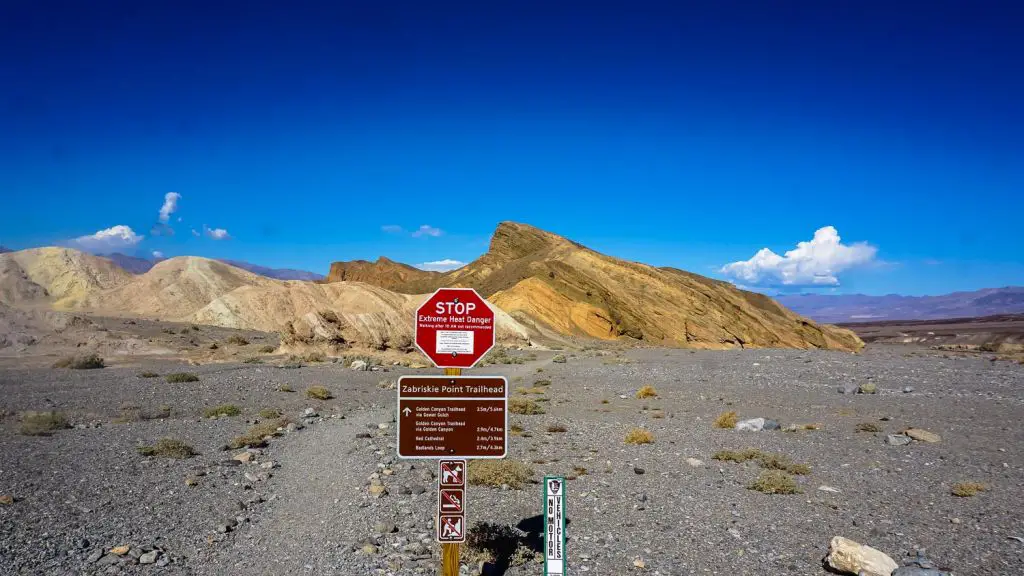
This is where the real magic is. It’s one thing to look at these badlands from afar but walking through them is special. We did the Golden Trail loop for about 5 miles round trip. Climbing up and down the rocks was not as difficult as I expected as the elevation is not so extreme. The views and picture opportunities here are effortlessly picturesque and it’s hard to take a bad picture.
The trails are marked as one way distance, NOT round trip. It said 3.5 miles for the Golden Canyon hike but that means 7 miles for the loop!
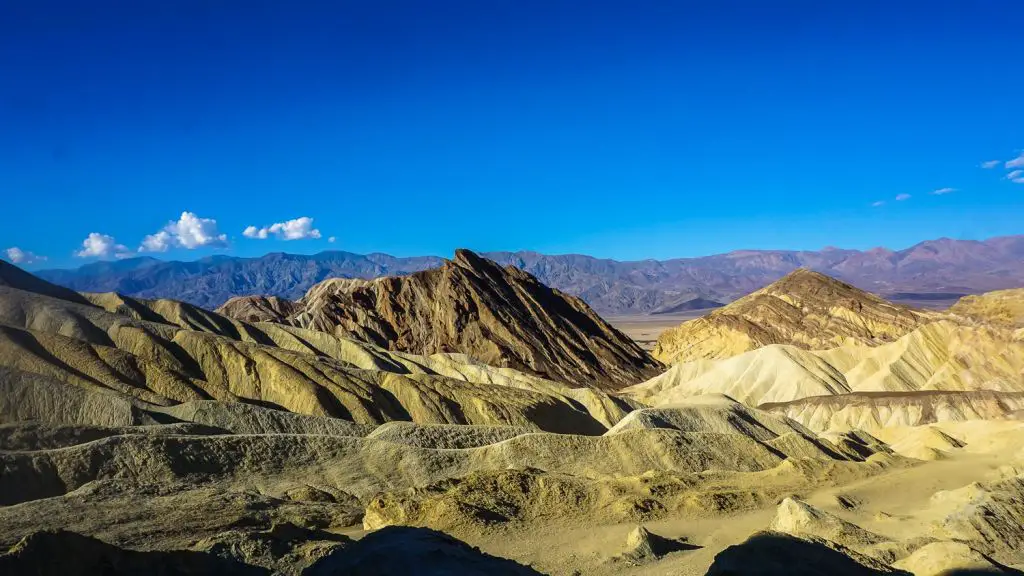
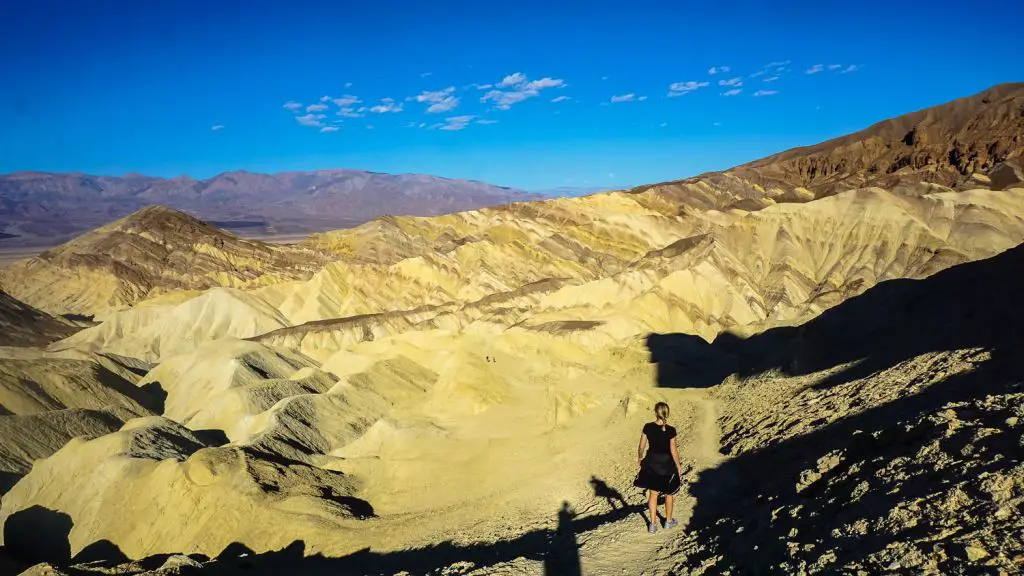
We spent 2.5 hours hiking up and down these rocks. I think it was because we left so early but we did not encounter a single person on our hike the entire time.
Although there are no bad pictures here, I think the coolest way to take a picture with someone in it is to take it from a distance. Zoom in on the person from afar with the background in the picture. Something like this:

Or this:
Devil’s Golf Course – 11:00am to 11:15am
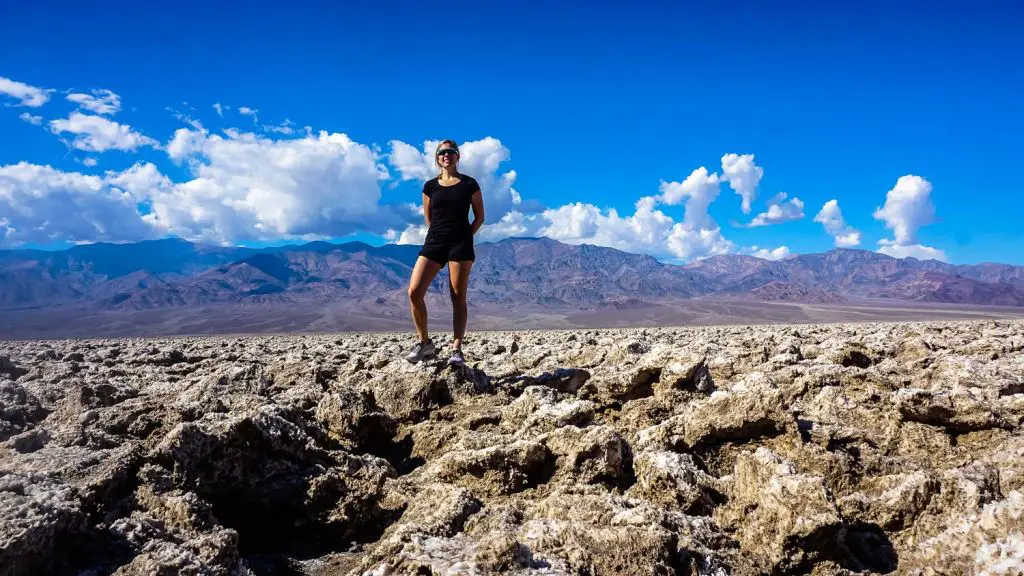
After Zabriskie Point, our plan was to drive to the Badwater Basin to look at the Salt Flats. Along the way, there are a few other sights to see including the Devil’s Golf Course. Located nearby to the Salt Flats, the Devil’s Golf Course is a salt pan covered with lumps and spires of crystalline salt.
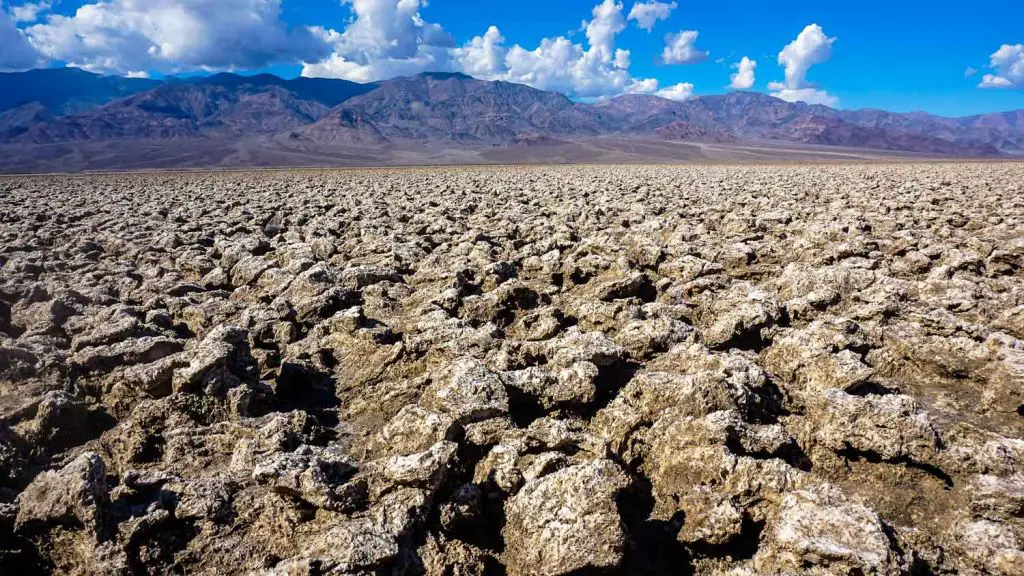
These clumps are incredibly sharp and there are warning signs all over saying do not fall, otherwise these incredibly sharp salt rocks will maim you. There isn’t much else to do here besides take a picture and check it off the list. You really will mess yourself up if you make one wrong turn. The pictures are worth a visit though!
Natural Bridge – 11:30am to 12:30pm
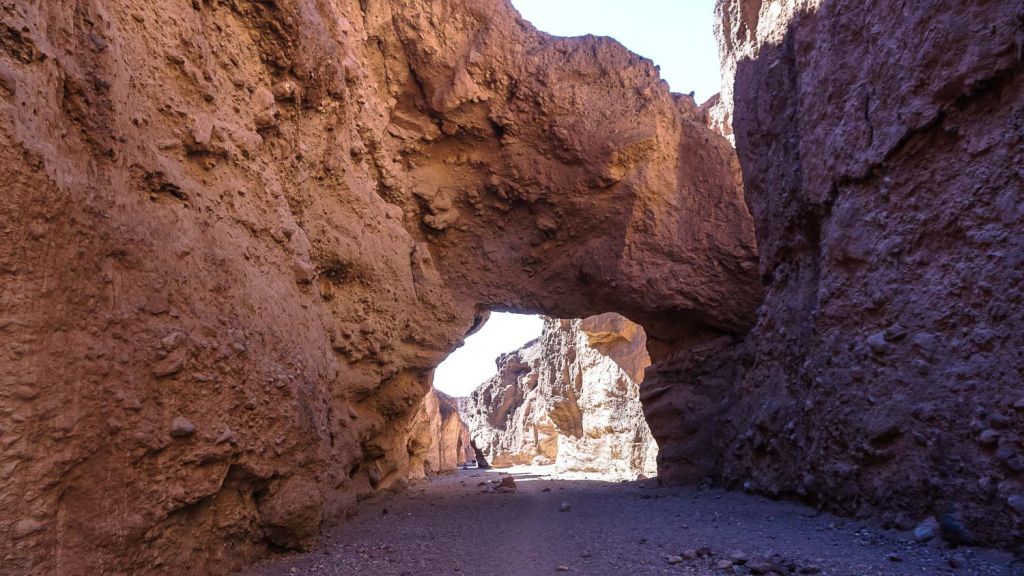
Or take a one-mile round-trip hike to Natural Bridge, a dramatic rock formation that spans a wash. And an unpaved road leads to Devil’s Golf Course, a jagged expanse of eroded rock salt. (Note that hiking is not advised during summer months.)
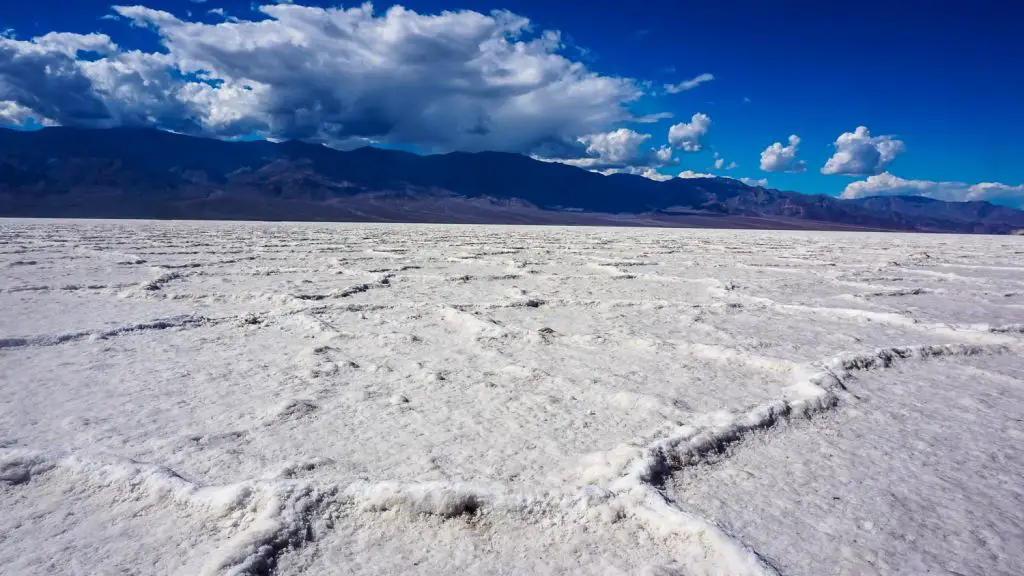
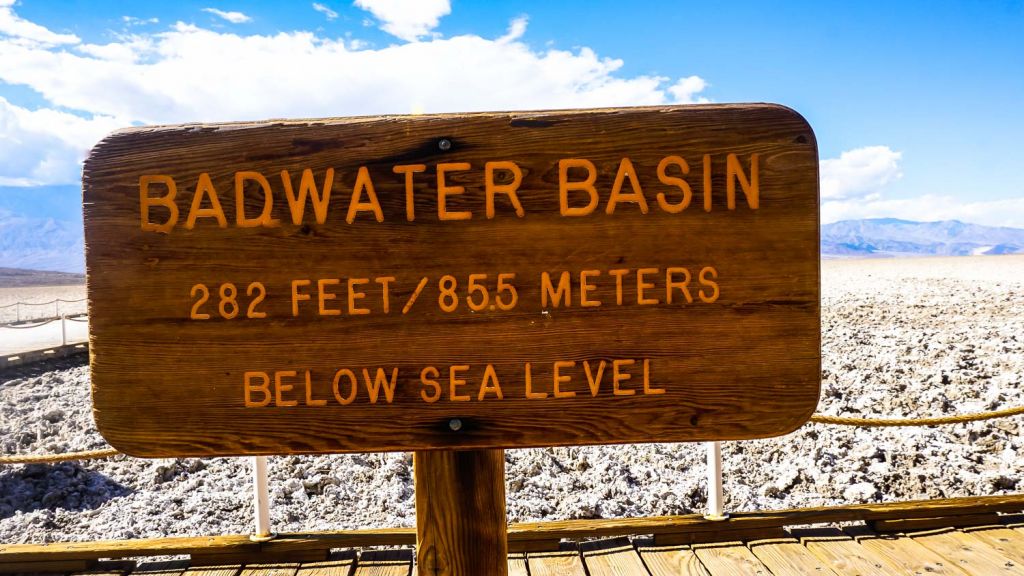
Badwater Basin – 1:00pm to 2:00pm
No trip to Death Valley would be complete without a visit to the Badwater Basin. Located at the southern part of the park, this is the lowest point in North America at 282 feet below sea level.
From the plaque at the entrance of the park:
“Badwater Basin in Death Valley National Park is the lowest point in North America, with an elevation of 282 ft below sea level. At Badwater, significant rainstorms flood the valley bottom periodically, covering the salt pan with a thin sheet of standing water. Each newly-formed lake does not last long though, because the 1.9 inches of average rainfall is overwhelmed by a 150-inch annual evaporation rate. This means that even a 12-foot-deep, 30-mile-long lake would dry up in a single year.”
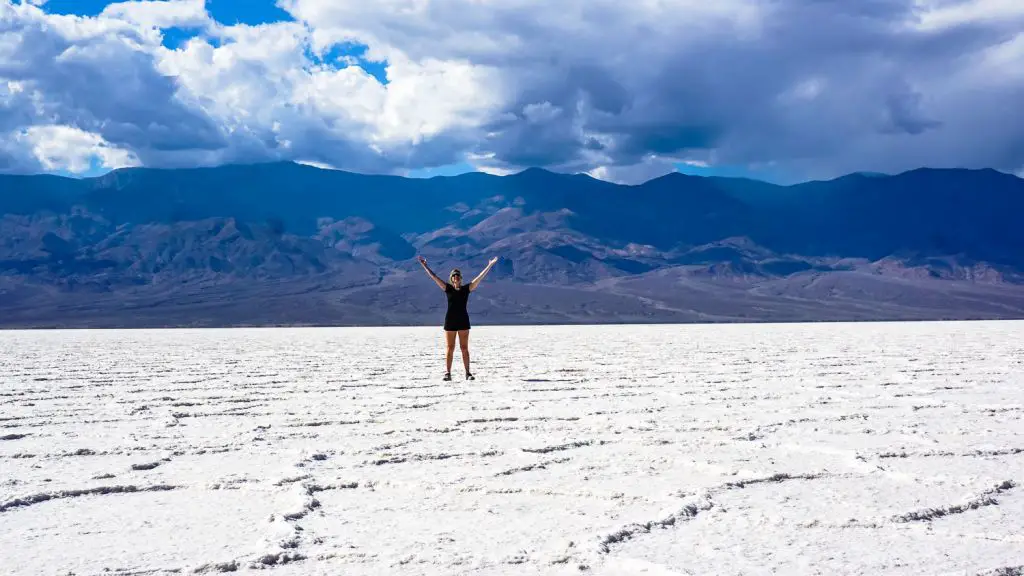
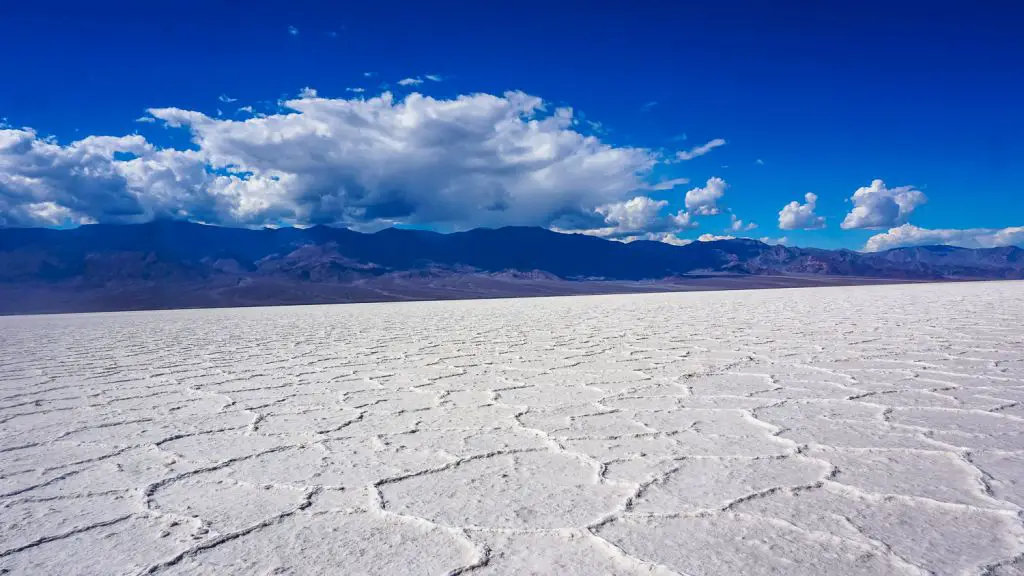
From the parking lot, it is about 20 minutes walking to the whitest part of the salt flats. Most people didn’t even walk to the expansive part of this attraction, but I would highly recommend walking past the brown part of the salt flats at the beginning of the park.

It is remarkable that something like this exists in a desert and mountainous area like Death Valley. It is very similar to the Uyuni Salt Flats of Bolivia, although only a fraction of the size. The salt crystals are much bigger than those in Uyuni which is why you see many cars driving through the Uyuni salt flats. Nevertheless, the surrounding dramatic mounts of the Badwater Basin makes this place very unique.
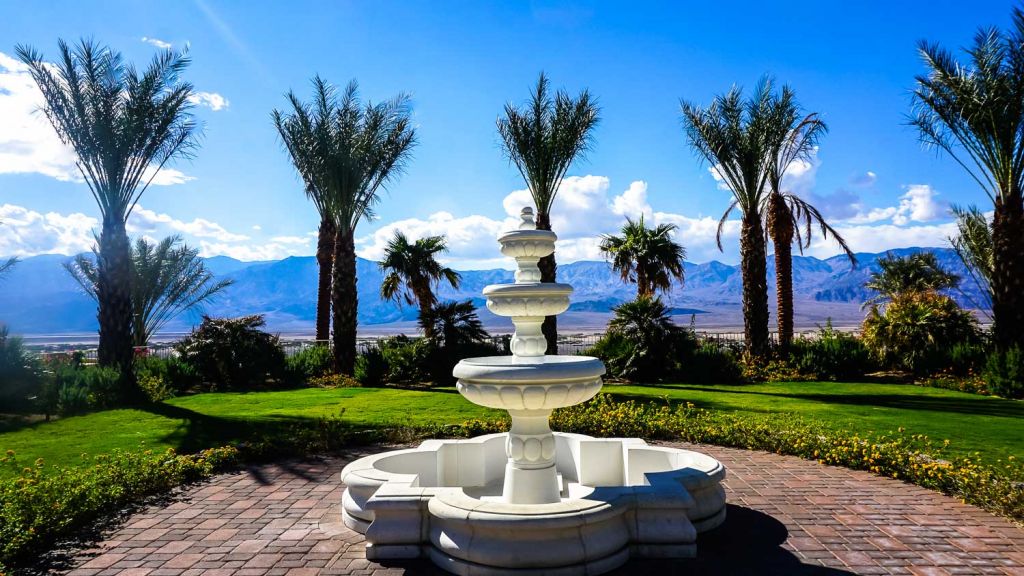
Relaxed at the Oasis Inn – 2:30 to 4:00pm
After Badwater Basin, it was getting very hot out (90F+/32C+) and we had been out since dawn so we decided to take a break at the Oasis Inn. We weren’t staying here (but at their other resort The Ranch) but no one seemed to mind. We took a dip and then a nap by their pool which was nice and refreshing.
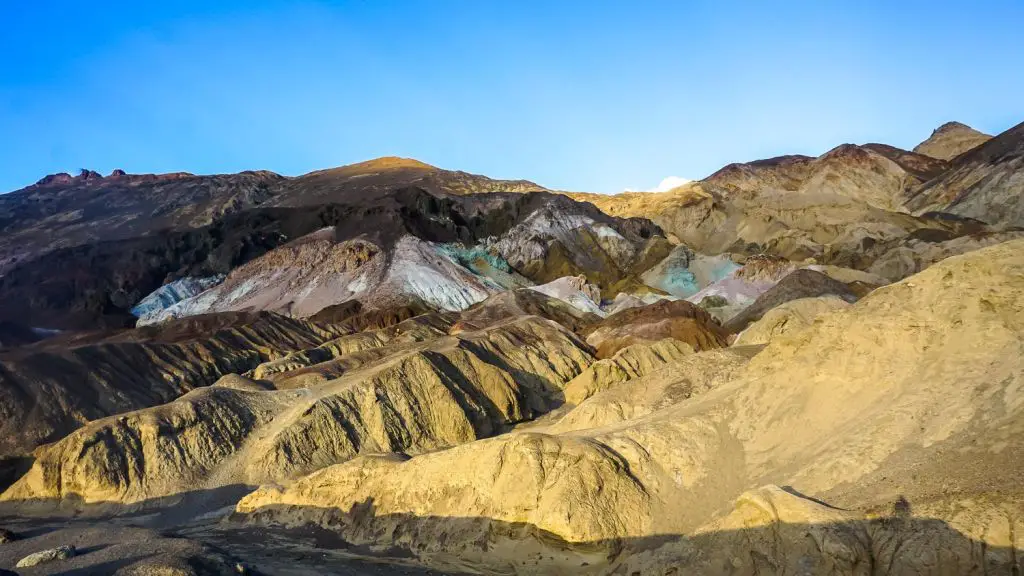
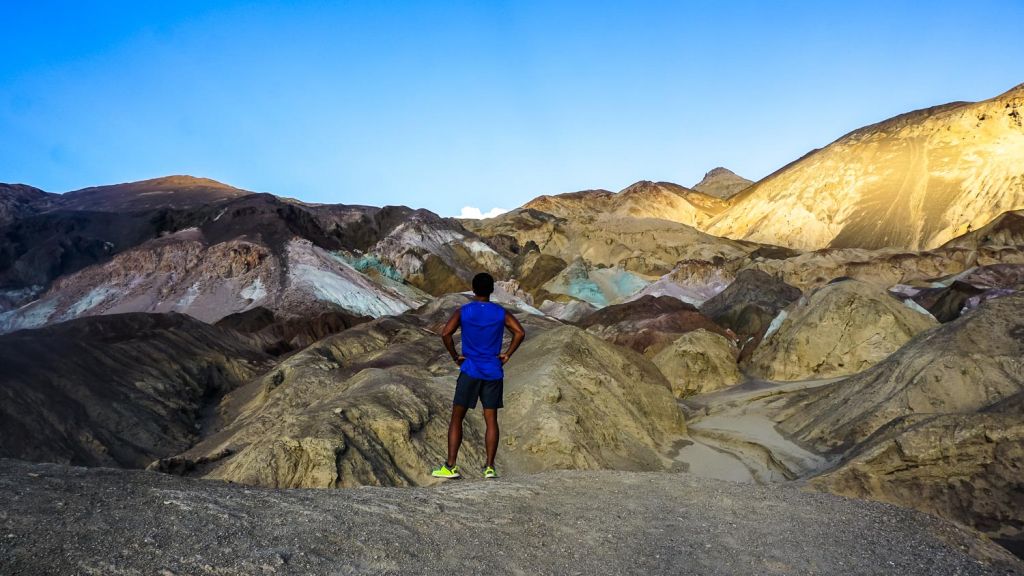
Artists Drive and Artists Palette – 4:00pm to 5:00pm
The Artists drive is a scenic side road near the Natural Bridge and the Badwater Basin. It goes through a series of colorful mountains hence the name Artists Drive. It culminates at the Artist’s Palette, a mountain that looks as if someone with a giant paintbrush dipped it in many different colors painted the mountainside. With shades of green, white, pink, brown and, yellow, this is one of the most iconic places in Death Valley.
Also coming here at different times of the day and of the year will yield a different image as sunlight, rainstorms, and windstorms re-arrange the color palette of the mountain.
Zabriskie Point Sunset – 5:30pm to 6:30pm
I was so impressed with Zabriskie Point that I wanted to go back and catch it at sunset. As with all of Death Valley, it’s all about time of day as different positions of the sun bring out different colors and hues. Zabriskie is a shining example of this. The colors at sunset were more pronounced as the sun made its way over the horizon. Was it better than sunrise? It’s hard to say but I can safely say it is a great place to drink some wine and enjoy nature at its finest.
Dinner at the Oasis Inn

We made reservations at the Oasis Inn for dinner. As it is by and far the nicest hotel in the park, and probably within many zip codes, the food here was fantastic. The menu changes seasonally but we drank cocktails and ate a shortrib dish that was absolutely delicious. A welcome reprieve from the countless burgers, fries, jerky, and random snacks we had been eating.
Day 16 Morning: Death Valley
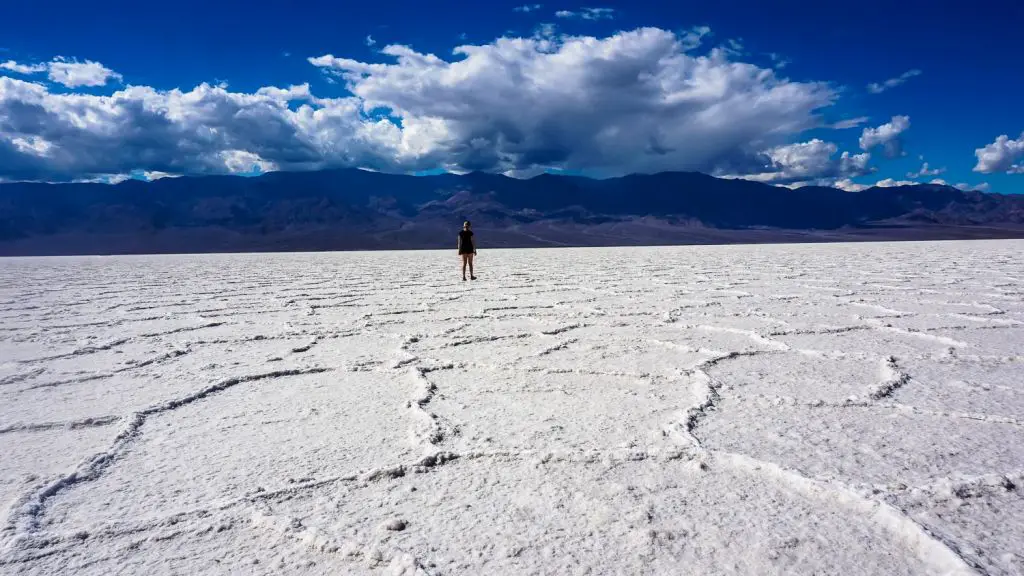
The next day, we woke up early again to catch the sunrise. This time, we decided to go to the Badwater Basin and watch the sunrise over the Salt Flats.
Sunrise at Badwater Basin – 6:30 am to 8:00 am
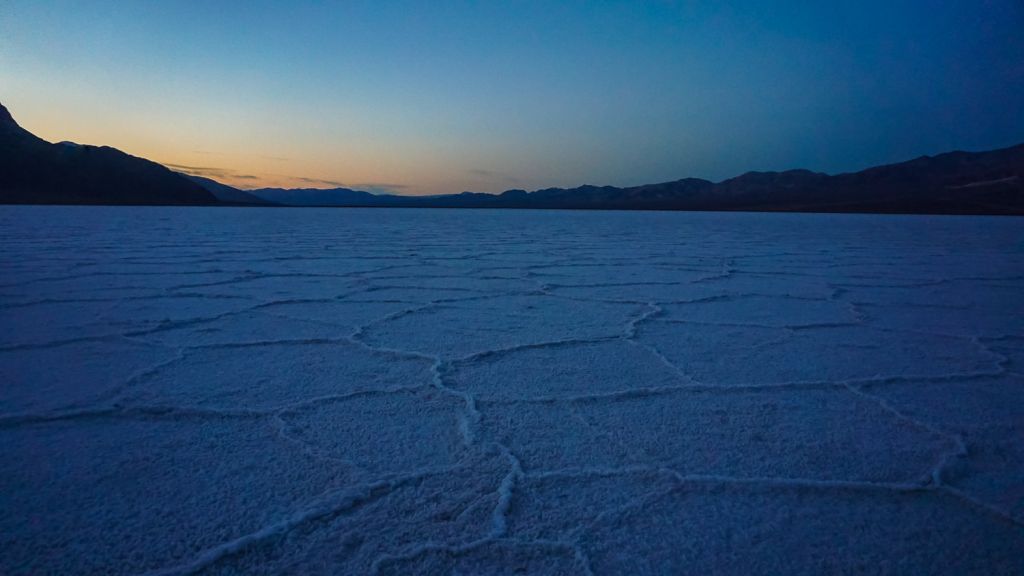
We arrived here around 6:30 and walked 30 minutes from the parking lot until we were far out into the salt flats. There were a few other people here taking pictures but it never felt crowded at any point. The morning hours are a fantastic time to come to the Salt Flats and a great time to make photographs.

Ubehebe Crater – 9:30 am to 10:00 am

Ubehebe Crater is a giant crater located near the northern part of Death Valley National Part. It is the starting point of the dirt road that leads to some of Death Valley’s best spots such as the racetrack, lost burro mine and teakettle junction; however, the crater itself is worth a trip to in itself.
We hadn’t even heard about it until our waiter from the Oasis from the previous night told us about it. I guess I am a fan of giant holes in the ground so we had to come here.
Ubehebe Crater is a maars volcano that was created by a phreatic eruption two to seven thousand years ago. Hot magma converted groundwater into steam, which created an intense pressure and an intense explosion. The result was a half-mile wide crater surrounded by a large cinder field.
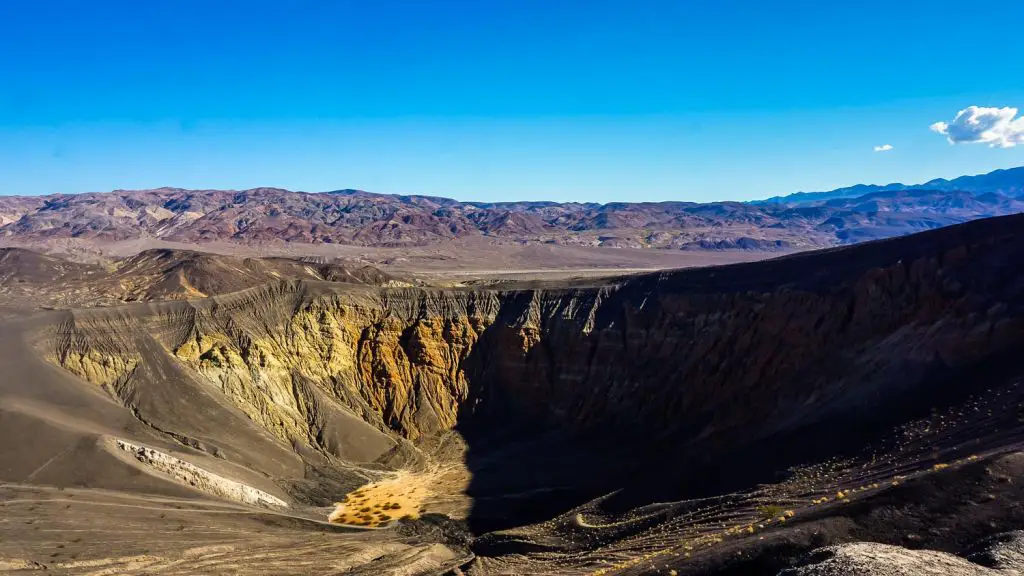
The crater is half mile wide and about 700 feet deep. You can actually climb down to the bottom of it but the thought of climbing back up was not appealing. As we did so many hikes already on this trip, we walked to the first peak of the crater and called it a day as the views won’t really look much different from anywhere else (it is just a giant crater).
Dante’s View – 11:30 am to 12:30 pm
Similar to Keys View in Joshua Tree, Dante’s View is at the peak of a mountain overlooking the entire valley. The views here are quite insane and you don’t need to hike at all to get there (just drive). If I did this itinerary again, I would come here for sunset next time as the sun sets directly in front of the viewpoint.
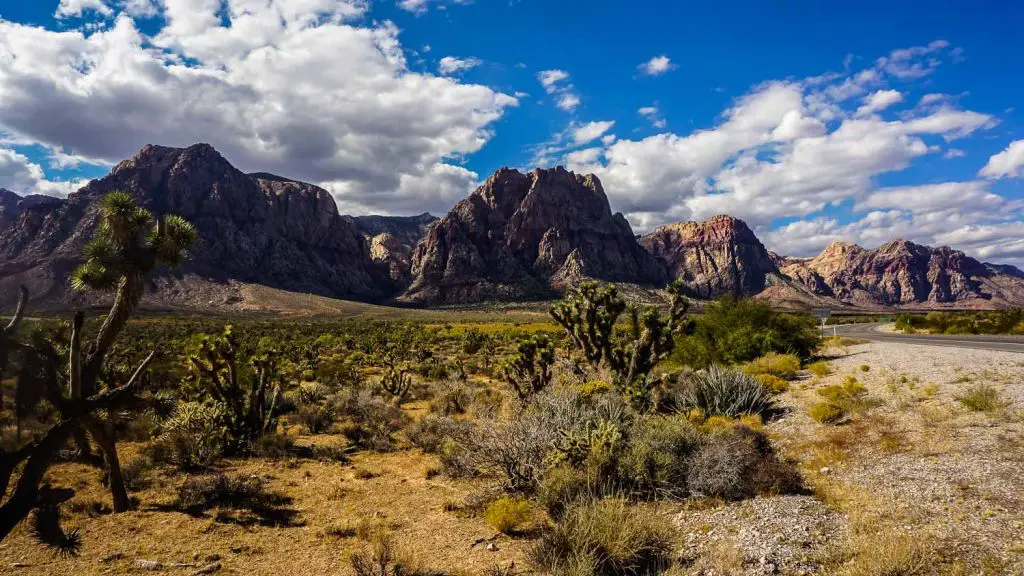
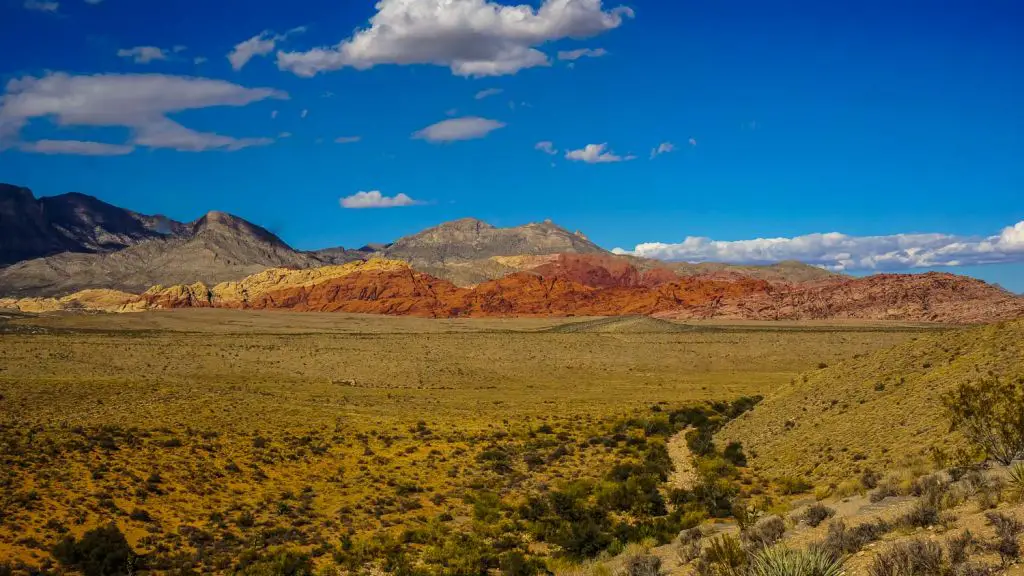
Day 16 Afternoon: Red Rock Canyon
After visiting Dante’s View, it was time to exit the park and drive towards Las Vegas. Make sure you have enough gas to make it at least until the town of Pahrump. If you’re visiting from Death Valley from Las Vegas, this is the last town you will see so make sure to stock up on supplies and gas here.
From Pahrump, it is just 1 hour to the Red Rock Canyons.
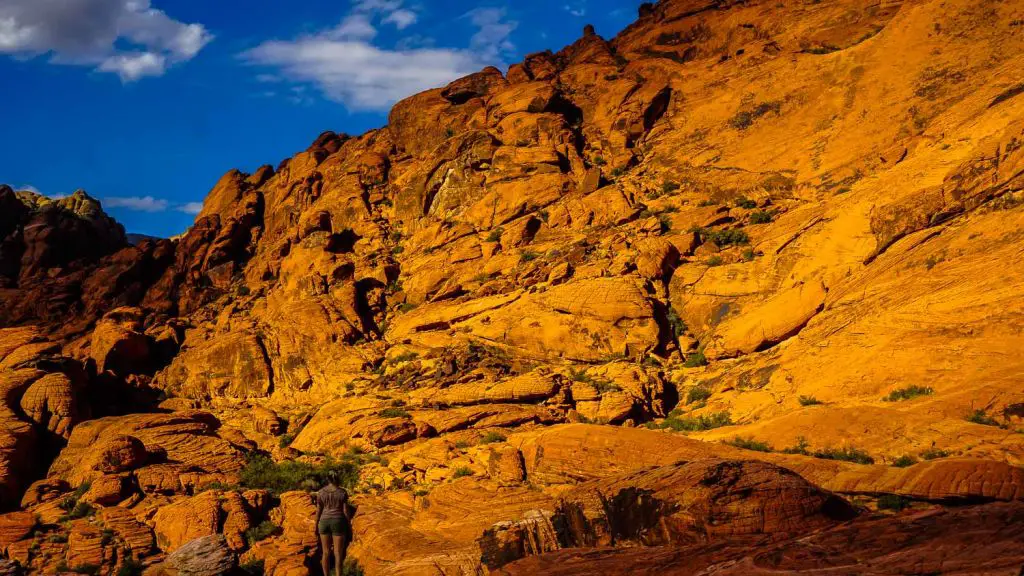
Red Rock Canyon Scenic Loop – 2:30 to 5:00 pm
Red Rock Canyons really reminded me of the Isalo National Park in Madagascar. Sure there are no lemurs here, but the canyons, rock formations, and colors are exactly like the canyons hike in the Isalo National Park.
Because Antelope Canyon is located in Navajo territory, it is 100% mandatory to book a tour through the local operators in the area. The cost is around $30 per person. All tours essentially take the same route walking through the slot canyons. There are two areas, the upper Antelope canyon and the lower Antelope Canyon. I elected with the upper canyon but I’m told both will blow your mind (and I believe it).
The light beams in Antelope Canyon are, to me, what makes this place is so unforgettable. They only occur at certain times of the day and only last for a short while but when they shine through the openings up top it’s truly a sight to see.
Wow, this article is just something else. You have thought about every little detail and given such an in depth information, it’s amazing.
It’s actually been a dream of mine to go on a longer road trip across the US, i guess yours would be a great way to start. 🙂
Awesome! Your blog information is really beautiful and helpful. Your blog information is very helping me. I want to go grand cannon so you article helping me. Your photos are really awesome and amazing and really makes me want to visit this place.
Thanks for the tips! I will need them in my road trip around America
!
Thanks! Have a great road trip!
wow so much to see and do and i must say this would be a great road trip judging from the photos. Simply breath taking.